Now and then, there is someone who finds their desktop computer or laptop either stuck in an endless restarting loop or just stuck on a screen before they are unable to sign into their user accounts. In such cases, the user is probably unable to perform any actions at all since the PC has frozen, or is continuously rebooting.
Even after waiting for prolonged hours, users have reported that their computer is still rebooting and nothing is happening. So what should you do in such a situation since Windows often recommends that you do not unplug or turn off the computer in case of a Windows update?
In this post, you will find several solutions to the freezing and reboot-loop issues that work.
Table of contents
Determine the Screen Causing the Reboot
Before we begin discussing the potential solutions for your system freezing on the restart screen or computer automatically rebooting, you must first determine at which point the computer is stuck/rebooting.
This means that you need to identify the last screen you see when the computer reboots or the screen at which the computer hangs and becomes unresponsive. This is because the solution(s) to the problems are dependent upon how far along is the boot process before the issue arises.
According to our research, the problem can be seen at one of the following 5 screens:
-
Computer manufacturer logo screen

Manufacturer logo screen At this point, the system BIOS isn’t even loaded, therefore the Windows isn’t loaded either. However, the system is beginning to load the BIOS.
-
A black screen after the manufacturer logo screen
At this point, the BIOS is loaded and the computer is reading the bootable drive to boot the Windows operating system.
-
The Windows logo screen

Windows loading screen The system has now detected the operating system and is loading the necessary files and services.
-
Login screen

Login screen The operating system is loaded and is waiting for user input to log into their user account.
-
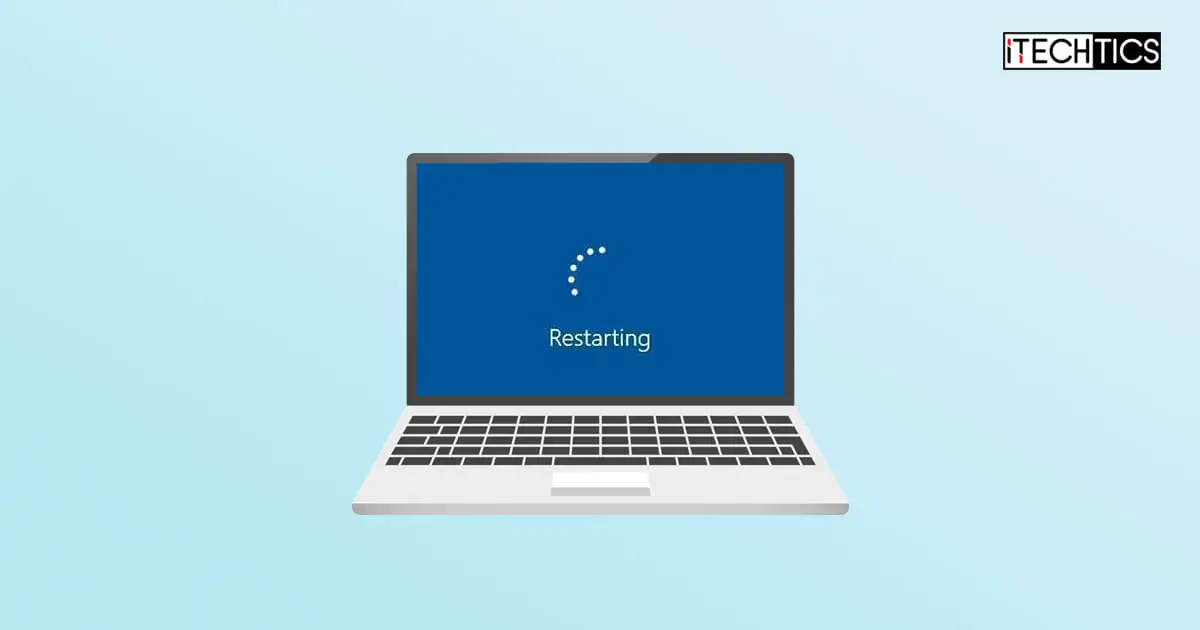
The restart screen

Restarting screen This screen appears when the system is being rebooted, which means that it would first shut down, and then boot back up again.

Depending upon at which point the computer repeatedly restarts again or hangs/freezes, you can continue to the relative section below in this post to find the solution(s).
Fix Computer Stuck/Restarting at Manufacturer Logo Screen
If your computer gets stuck or keeps rebooting in an endless state as soon as you see the manufacturer’s logo, then this is the section where you’ll find a possible solution for the problem.
At this point, the computer has not even loaded up the BIOS yet. This means that the issue is not related to the Windows operating system, but something else is causing it. It may be because the system is unable to detect any bootable disk. If so, you may see a message such as the following:
A bootable device was not found
It is also safe to assume that either the system BIOS has been corrupted or there is a hardware issue with your computer blocking the BIOS from loading. Either of these issues can cause the system to hang and you cannot proceed further.
Here are a few solutions you can try and resolve the problem.
Perform a Hard Shutdown
The first thing you ought to do is perform a hard shutdown. A hard shutdown refers to a forceful shutdown of the computer using its power button.
When your computer is on and stuck or is rebooting on the manufacturer’s logo screen, press and hold down the power button for at least 30 seconds. This will turn off the computer forcefully in the first 5 seconds, and then for the remaining 25 seconds, any residual power stored inside the capacitors on the hardware will be drained.
This is a quick method to bring all the hardware components inside the computer to an absolute-zero power state.
Note: If you are using a laptop, then it is recommended that you also hold down the power button for 30 seconds while both the AC power and the battery are disconnected.
Now press the power button again to turn on your computer and check if you can get past the manufacturer’s logo screen.
If the problem stills persist on the same screen, then you may be dealing with faulty system hardware.
Troubleshoot Hardware
Note: The solutions in this section need to be performed under adult supervision. Please disconnect all power sources before opening your computer’s hardware, including the AC power as well as the battery (in the case of a laptop).
It may be possible that a faulty hardware component on your computer is preventing the system from booting up. It can be your hard drive/SSD, a memory module, or the motherboard itself.
In some cases, the connection of the hard drive is loosened, making it undetectable to the system.
If the previous solution did not work for you, you must now open up your computer/laptop and do some manual troubleshooting. This is because there are reports that a faulty SSD can lead to your PC continuously rebooting or stuck at the manufacturer’s logo screen.
Before doing anything else, disconnect and then reconnect the hard drive firmly to your PC to make sure that there isn’t a connection issue. Now check to see if you can boot it up successfully. If not, remove the hard drive again and replace it with another temporary bootable disk (if available).
Now check again if you can boot up the PC successfully. If the problem persists, there are a few more things you can do.
We would also suggest that you take out your RAM module(s) and clean its connectors, then place them back to see if it works. Dust particles between the RAM connectors often cause issues with the computers.
If you have multiple RAM modules, try running them one at a time to determine a faulty module, since one bad apple amongst the good ones can cause the whole system to crash.
With that plausibility out of the way, we must now confirm that the hard drive is being detected by the system and that the boot order is correct and that the computer isn’t trying to boot from another source, such as from the network.
Check Hard Drive Detection and Boot Order from BIOS
Check to see if the hard drive is even detected by the system. If it is not, then the system may get stuck at the manufacturer’s logo screen.
Similarly, if the computer is trying to boot over the network with no internet connection, it can also cause the PC to get stuck.
Follow these steps to ensure that the hard drive is detected and is at the top of the boot order list:
-
Restart the computer forcefully and then enter its BIOS using the correct hotkey.

Enter BIOS -
Now look for the Boot Sequence section from the menu. Here, check to see if you find “Internal HDD” or something similar in the list, and make sure that it is selected. If it isn’t, check the box next to it to select it.
Next, make sure that it is at the top of the boot order list. This way, the system will boot from the hard drive first, even if other peripherals are connected (unless you boot from another device explicitly).

Confirm hard drive detection and boot order Note: This list will only appear if you have legacy boot enabled. If you are using the UEFI boot sequence, then only “Boot Manager” would appear in the list, in which case you will be unable to sort the boot sequence manually.
-
As you can see in the image above, the hard drive is not at the top of the list. If you wind up in a similar situation, select the hard drive from the list and then use the up arrow to move it to the top. Then click Apply to save the changes.

Move the hard drive to the top -
Now restart your computer by exiting out of BIOS.


Now check to see if you can get past the manufacturer’s logo screen and boot into Windows.
Flash System BIOS
In case the problem persists, then the only possible solution left is to flash your system BIOS. Flashing the BIOS means performing a clean BIOS install. This removes all your current configurations.
Often, a bad firmware/BIOS update leads to such issues, especially if you lose power during a BIOS update. In that case, you must flash it manually.
Use another computer to download the BIOS setup for your computer model, copy it to a USB drive, and then boot from the USB on the affected computer. Proceed to install the BIOS while making sure your computer has sufficient charging/power.
Fix Computer Stuck/Restarting at Black Screen
If you find that your computer is automatically rebooting or gets stuck immediately after passing the manufacturer’s logo screen, then the solutions to fix this problem might be somewhat different from the ones we have already discussed.
Of course, this could either be a BIOS problem or an operating system problem, because, at this point, the system fetches the boot loader to load the Windows OS.
Here are a few things you can try to fix the problem.
Perform a CMOS Reset
A CMOS reset is the same as doing a hard shutdown, and the purpose is also the same – bringing all hardware components to an absolute-zero state.
Shut down the computer by pressing the power button for at least 5 seconds, then disconnect any external power from the computer as well as any batteries. Now press the power button again for at least 60 seconds to drain any energy stored in the capacitors.
After the 60 seconds have passed, release the power button and reconnect the battery/ AC power and switch on the computer. Now check to see if it can boot into Windows successfully.
Check Graphics Card
This issue is often associated with a faulty dedicated graphics card, which is preventing the computer from booting up and displaying anything, hence resulting in a black/blank screen.
To rule it out, turn off your PC forcefully and disconnect all power. Take out your system’s graphic card and clean its connectors and fan(s), then replace it back in the computer. Now check to see if the problem is solved.
If not, you can also remove the dedicated GPU and use the shared GPU instead. If this works for you, then there is a definite issue with the graphics card that you have removed and might need replacing.
Here are a few solutions that may work for you. However, they need to be performed after booting into safe mode.
Boot into Safe Mode
Safe mode is a diagnostic mode in Windows that starts Windows in a basic state, loading a limited set of files and drivers. It is intended for troubleshooting Windows problems. In most cases, safe mode is used to reverse Windows misconfigurations, driver installations, and malware removal.
Follow these steps to boot into safe mode using a bootable media:
-
First, you will need to create a bootable USB flash drive using an ISO image. You can download all versions of Windows 10 and 11 from the given links:
-
Once downloaded, create a bootable USB flash drive using Rufus.
Alternatively, you can also use Ventoy and create a multi-boot USB drive.
-
Now attach/mount the bootable media and then boot from it through the “One Time Boot Menu.”

Boot from USB -
You will then see the installation screen. Click Next.

Proceed to install Windows -
On the next screen, click Repair your computer. This will take you to the Windows Recovery Environment (WindowsRE or WinRE).

Repair Windows -
Now click Troubleshoot.

Troubleshoot Windows -
Then click Command Prompt.

Open Command Prompt -
Command Prompt will now run. Execute the following command(s) to boot into safe mode with networking:
bcdedit /set {default} safeboot network
Boot into safe mode with networking -
Now close the Command Prompt and then click Continue.

Continue to boot Windows


The computer will now boot into safe mode. Here, you must now perform the tasks discussed below to attempt and resolve the freezing/rebooting loop issue.
Update Drivers
Your computer could also have a faulty driver causing the computer to reboot every time. If so, you need to update/reinstall that faulty driver, but how can it be done if you are unable to log into Windows in the first place?
For this, you’re going to need to boot into safe mode with networking. This will allow you to boot a restricted version of Windows and update the faulty driver(s).
Follow these steps to update/reinstall your system drivers:
-
Boot into safe mode and open the Device Manager by typing in devmgmt.msc in the Run Command box.

Open the Device Manager -
Now right-click every device and click Update driver from the context menu.

Update drivers -
From the pop-up window, click Search automatically for drivers.

Search for drivers -
The wizard will now start searching for an update for the driver on the internet. Once found, it will automatically install the update.
If not, you will be prompted with “The best drivers for your device are already installed.” Either way, close the wizard.

If a driver is not updated, automatically or manually, then you must reinstall it just to be sure that there is no faulty driver on the computer. Follow these steps to reinstall a driver:
-
Inside the Device Manager, right-click on the device you want to reinstall the driver for and click Uninstall device from the context menu.

Uninstall a device -
In the confirmation dialog box, check the box next to “Attempt to remove the driver for this device” and then click Uninstall.

Remove the driver for the device -
You will now see that the device will disappear from the list of devices inside the Device Manager. Click on the Scan for hardware changes button at the top.

Scan for hardware changes -
Now restart your computer out of safe mode and check to see if the issue is resolved.


How to Boot Out of Safe Mode/Normal Boot
Follow these steps to boot the Windows normally again:
-
Inside the safe mode, run the following cmdlet in the Run Command box to open the System Configuration window.
msconfig
Open System Configuration -
Inside the General tab, select “Normal startup,” and then click Ok.

Select Normal startup -
Now restart the computer as you usually would and it should now boot normally.

The steps above are to boot normally and out of the safe mode so you can check whether updating the drivers did the trick.
Fix Computer Stuck/Restarting at Windows Logo
If you find that your computer is stuck while displaying the Windows logo, or is rebooting at the same spot while the logo is displaying, then it is probably caused by something different than we have already discussed above.
At this point, the system boot has already passed the BIOS phase. Thus, it is safe to say that nothing is wrong with the BIOS. Instead, either the Windows operating system is causing your computer to behave like this, or it’s the associated hardware running the OS.
Below you’ll find several things you should do if you find yourself in a similar situation. Note that most of these solutions will need to be performed while booted into safe mode.
Update Drivers
Now that you know how to boot into safe mode, attempt to update all Windows drivers through the Device Manager. It is, for this reason, we opted to boot into safe mode with networking, so we could gain internet access and Windows can attempt to update any drivers.
You can try to update the drivers automatically. If you find that all of them are already updated, then we suggest you reinstall the critical ones.
When you are done, do not reboot the computer. Instead, proceed to update the Windows operating system.
Update Windows
Sometimes, a faulty Windows update can cause issues with the OS, preventing it to boot and thus acting irregularly. Try installing any pending updates which will replace the existing update files and perhaps fix the problem from safe mode.
To install pending updates, follow these steps after booting into safe mode:
-
Navigate to the following:
-
In Windows 10:
Settings app >> Update & Security >> Windows Update
-
In Windows 11:
Settings app >> Windows Update
-
-
Now click Check for updates.

Check for pending updates -
If there are any pending updates, download and install them.
-
Once installed, restart the computer into normal mode and check to see if it resolved the issue.

Disable Fast Startup
Fast Startup is a Windows feature that controls the behavior of shutdown and startup processes. Fast Startup enables Windows to reload necessary components of the operating system while keeping others in the memory resulting in faster boot times.
However, this can often cause the Windows OS to go haywire and act weird, resulting in freezing and sudden reboots.
Unfortunately, without being able to boot into Windows normally, you cannot disable just the Fast Startup feature, but you have to disable hibernation mode entirely, which includes the Fast Startup feature.
To do this, boot into safe mode and run the following cmdlet in an elevated Command Prompt:
This will disable hibernation as well as Fast Startup.
PowerCFG -h OffReinstall All Windows Updates
The SoftwareDistribution folder can be found in “C:\Windows.” This folder contains temporary files within a sub-folder (download) that are required to install a Windows update.
Quite often, a Windows update fails to install and experiences an error code because of these corrupted files. In this case, these temporary files need to be removed, and the update process needs to be started from the top.
The whole process of deleting the SoftwareDistribution folder and reinstalling all Windows updates might be lengthy but might fix the freezing/rebooting issue without having to reinstall the Windows operating system.
Perform the following after booting into safe mode:
-
Navigate to the following using File Explorer:
C:\Windows\SoftwareDistribution\Download
-
Here, select everything using the CTRL + A keys and then hit Delete.

Delete everything inside SoftwareDistribution’s Download directory -
When asked for confirmation, click Yes.

Confirm action -
Now navigate to the following and check for any pending updates.
Settings app >> Windows Update
-
Install all updates. When installed, restart the computer out of safe mode (using the guide above) and check to see if the issue is now resolved.


If you find that the problem persists, then the issue might not be the software, but the hardware.
Troubleshoot Hardware
Note: The solutions in this section need to be performed under adult supervision. Please disconnect all power sources before opening your computer’s hardware, including the AC power as well as the battery (in the case of a laptop).
At this point, the problem could either be the hard drive or the system’s RAM modules.
We recommend that you begin by removing the hard drive/SSD and replacing it with another temporary bootable disk. If the OS is booted normally, this means that the issue is either with the hard drive or the operating system inside it that could not be fixed by updating the Windows or its drivers.
Before we proceed to resolve that too, we suggest that you also take out your RAM modules and clean them, and then put them back in again one by one to rule out if any module is faulty.
If it turns out that neither the RAM nor the hard drive is faulty, then you can attempt to repair the Windows OS. However, if you find that one or more is faulty, then you must replace them.
Repair Windows
Windows comes with preinstalled tools to help fix the OS. Apart from the built-in troubleshooter you can find in the Settings app, Windows also comes with a Deployment Image Servicing and Management (DISM) tool, System File Checker (SFC), and a Check Disk (CHKDSK) utility, where each performs a different scan and attempts to automatically fix any glitches in the OS.
These steps will need to be performed in either safe mode with networking, or you can perform them directly from the Command Prompt in the Windows Recovery Environment (WinRE) which we opened using the boot media when booting into safe mode.
Either way, run the following cmdlets in the given order to attempt and repair the current Windows OS installation. If booting into safe mode with networking, we suggest using an elevated Command Prompt instance.
DISM.exe /Online /Cleanup-image /Checkhealth
DISM.exe /Online /Cleanup-image /Scanhealth
DISM.exe /Online /Cleanup-image /Restorehealth
sfc /scannow
When the scans are finished, we also suggest that you run the Scan Disk utility using the following cmdlet:
Chkdsk C: /f /r /xYou will be asked to schedule the CHKDSK utility the next time the computer reboots. Enter Y for yes, then restart the computer normally and out of the safe mode using the given guide above.
After all the scans are performed, check to see if the computer still freezes or reboots when on the Windows logo screen. If it does, then the only way around the problem now is to reinstall the Windows operating system from scratch.
Clean Install Windows
If none of the solutions above worked for you, then perhaps the only thing left to do is reinstall the Windows operating system from scratch. This includes formatting the boot partition (usually C drive), which will erase all data.
Follow these steps to perform a clean Windows installation:
-
First, create a bootable drive using either Ventoy or Rufus and an ISO image of the operating system you want to install.
-
Connect the bootable USB drive to the computer, then turn on/reboot the computer and open its One Time Boot Menu (Usually through the F12, F10, or Esc button).
-
From there, select External USB drive to boot from the bootable USB.
-
You will now see a menu such as the one below. Click Next.

Proceed with installation -
Now click Install Now.

Install Windows -
On the next screen, click “I don’t have a product key.” Even if you do have one, you can activate the product later after installation.

Proceed without entering key -
Now, select the edition that you want to install on this device. When selected, click Next.

Select edition to install -
On the next window, check the box to accept the license agreement and click Next.

Accept terms -
You will now be asked whether you want to upgrade the existing OS or perform a custom installation. Since this needs to be a clean and fresh installation, we will be selecting Custom.

Custom installation -
Next, you need to format the boot volume. Once done, select the same volume and click Next.
Note: Do not format the other drives, as any data inside them will be lost.

Begin installation -
Windows will now begin installing on your device. This step may take a few minutes and your device may reboot a few times.
Further ahead in the process, you will be asked to configure your PC through several Out Of Box Experience (OOBE) screens. Proceed with the on-screen instructions, configure your PC, and you will have successfully installed Windows with no previous corrupted files.


Learn how to install Windows 11 without an internet connection or without a Microsoft account.
Fix Computer Stuck/Restarting at Lock Screen
Users have often reported that their Windows PC gets stuck at the lock screen and cannot input their passwords. Sometimes all that is showing is the background image and nothing else; not even the date and the clock.
This issue can occur due to multiple different reasons. Maybe a system file has been corrupted, or a recent Windows update was defective which causes this issue. Either way, this problem can be solved by performing a few simple tasks. Here are a few things you can try to resolve the problem.
Check Keyboard/Mouse is Working
Users often mistake a faulty or out-of-battery keyboard or mouse for a frozen PC. It may be possible that your keyboard or mouse isn’t working, has gone haywire, or the batteries have died, and thus you aren’t getting any movement on the screen.
Therefore, make sure that your devices are enabled by pressing the Caps lock or the Num lock button on the keyboard, and make sure that the lights are going on or off. In the case of a mouse, make sure that it is powered on (usually a button) and that the batteries haven’t completely died.
This can be confirmed by using these peripherals on another computer.
Alternatively, you can also use wired peripherals on the faulty computer and check if they work, just to rule out the possibility of faulty hardware.
If these aren’t the issue and your computer is really stuck on the login screen, then it is time to fix the issue using other means.
Press CTRL + Alt + Delete
It may sound bizarre, but try pressing the CTRL+ Alt + Del keys altogether on the login screen.
There is a setting inside the Windows operating system which requires a user to press the CTRL+ Alt + Del keys to access the password screen after the lock screen. Although this option may be disabled, a bug can still sometimes automatically enable it.
Press the keys and see if the computer responds. If it does, you are good to go. You can disable the option if needed.
However, if the problem remains, then you must boot in safe mode and then perform the following steps:
-
After booting into safe mode, open the User Accounts window by typing in netplwiz in the Run Command box.

Open User Accounts settings -
Switch to the Advanced tab and uncheck the box next to “Require users to press Ctrl + Alt + Delete” under the Secure sign-in section.
If already unchecked, check it and then uncheck it again just to be sure.
Click Apply and Ok when done.

Disable CTRL + Alt + Del functionality
Now restart your PC normally (out of safe mode) and check if the issue is resolved and the lock screen has become responsive again. If not, then there are still a few more things you can do.
Repair Windows
Since there might be some broken or corrupted system files causing the PC to hang, you must attempt to repair them from the command line. Of course, this will need to be done from either the Windows Recovery Environment or by booting into safe mode.
Either way, repair your Windows OS and then check to see if it resolved the problem.
At this point, we also recommend that you disable Fast Startup.
Uninstall Latest Windows Update
If you observed that a new Windows update had been recently installed and the issue occurred after it, then there may be something wrong with the update itself. In this case, you need to uninstall the Windows update.
Note: You need to be sure whether the last update was a feature update (updating the Windows version) or a simple quality update (cumulative or Patch Tuesday update) that caused the issues.
-
Boot your computer into the WindowsRE by using a bootable media drive. Boot from a bootable USB drive and click Next on the first screen.
Proceed to install Windows -
On the next screen, click Repair Windows.

Repair Windows -
You will now be inside WindowsRE. Click Troubleshoot.

Troubleshoot Windows -
Now click Uninstall Updates.

Uninstall Windows update -
Now select whether you want to uninstall a quality update or a feature update.

Select type of update to uninstall -
Now select the operating system.

Select OS -
Now confirm it by clicking on the button.

Confirm action -
The removal process of the last Windows update will now begin. When removed, restart the computer and check if you are now able to move past the lock screen.


Alternatively, you can also restore your computer to an earlier state.
Restore Computer
Restore refers to taking back your Windows to a state it was earlier captured in. It means all system configuration, network settings, and files and folders will be reverted to a point in time as if nothing ever happened after that.
Of course, there needs to be a restore point in the history of the PC to revert it to. This can be enabled using Backup & Restore. If you have already created a restore point in the past that you can revert to, follow these steps:
-
Boot into Windows Recovery Environment as discussed in the section above, and then click Troubleshoot.
Troubleshoot Windows -
Now click System Restore.

System Restore -
Now select the operating system to restore.

Select OS -
You will now see the System Restore wizard. Click Next.

Proceed with System Restore -
Now select the restore point by clicking on it, and then click Next.

Select restore point -
Now click Finish.

Finish restore -
You will now be asked for confirmation. Click Yes.

Confirm restore Windows will now restore to a previous restore point. This step can take some time to complete. Do not reboot or turn off your computer during this point and wait for the restoration to complete.
-
When finished, click Restart.

Restart computer


When it reboots, check to see if the computer still freezes on the lock screen. If it does, then you must proceed to reset the computer.
Reset Windows from WindowsRE
Resetting the computer brings all configurations back to their factory default settings and values. If the solutions discussed above did not work for you, then you must now reset your PC. Here is how:
-
Boot into WindowsRE using a bootable media and click Troubleshoot.
Troubleshoot Windows -
Now click Reset this PC.

Reset this PC -
You will now be asked whether you want to keep your files or delete everything. We suggest that you click Keep my files.

Keep files -
You will now be asked to reinstall Windows. Click Local reinstall.

Local reinstall -
Finally, click Reset to begin the process.

Confirm reset -
Windows will now begin to reset itself. This step can take a while.
Once it finishes, restart your computer and check if it is still freezing on the lock screen.


In case you are still experiencing the same problem, then the only solution might be to perform a clean Windows installation as discussed above in this post.
Fix Computer Stuck at Restart Screen
Users have often reported that their computer gets stuck at the restart screen for prolonged hours. This could either mean that even the rotating circles have stopped and are stuck in one position, or that the computer is displaying the same restarting screen for some time now.
This issue can be caused because of a Windows or BIOS update gone wrong, or because of a corrupted or damaged system file. Mostly, this issue is associated with an improper last shutdown/restart as well.
That said, the possible solutions to mitigate this problem have already been discussed above. You can click on the respective link below and you will be taken to the detailed solution. Perform the steps to fix the Windows OS freezing on the restart screen:
Note: We suggest that you perform these actions in the given chronological order, which is from a less-aggressive approach to a more aggressive one. Moreover, many of these actions need to be performed after booting into safe mode. When you need to boot out of safe mode, refer to this guide.
- Troubleshoot hardware: Clean RAM connectors and modules one by one to detect faulty ones.
- Update drivers
- Install Windows updates
- Reinstall all Windows updates: Clear the SoftwareDistribution folder and reinstall all Windows updates from scratch.
- Repair Windows
- Uninstall quality or feature update: Only when you suspect that the issue arose after installing a Windows update.
- Perform a system restore: Only if you think that the issue did not exist when the restore point was created.
- Reset OS to factory settings
- Perform a clean install: If nothing else has worked, then you may need to perform a clean install of the Windows operating system as a last resort.
Final Thoughts
It is always beneficial to have backups of your computer’s image and files. Therefore, we suggest that you use File History and Backup and Restore before you experience any problems. We also suggest that you have a Recovery Drive for when your Windows starts acting up.
Do let us know in the comments below which solution worked for you. Moreover, if you are experiencing any similar issues for which a solution is not provided here, let us know that too so our team may assist you.


