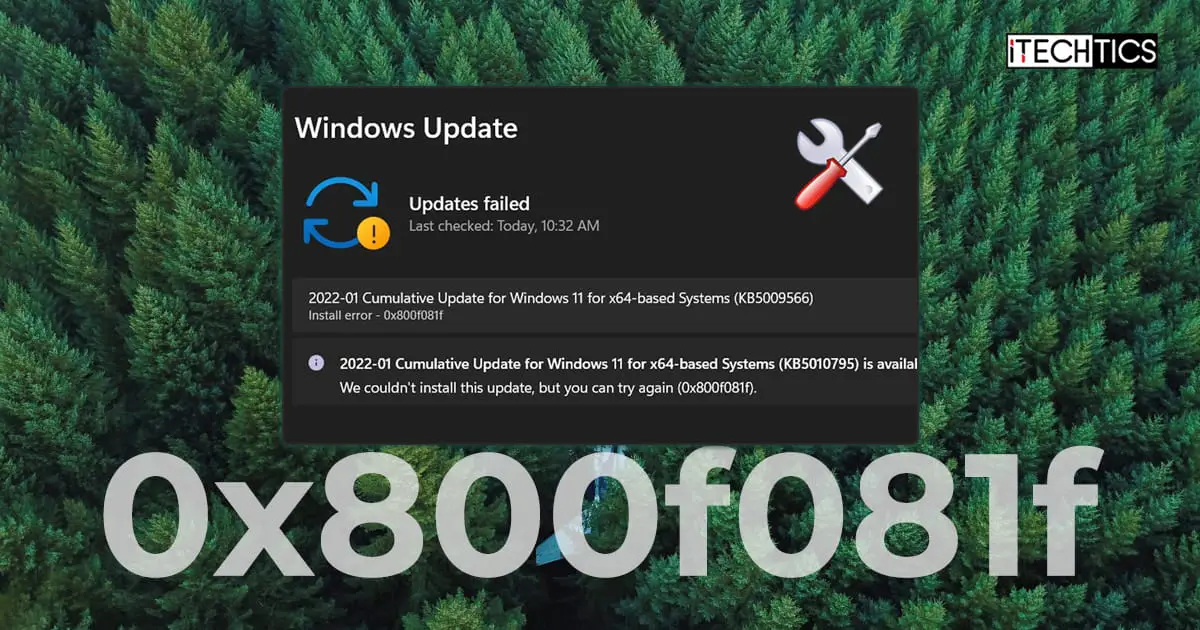
Updating your operating systems is important, but occasionally, you may encounter an error you have never seen before. One of the many error codes while updating Windows 10 or Windows 11 is 0x800f081f.
This error code can be accompanied by different error messages. Here are a few that you may see:
There were some problems installing updates, but we’ll try again later.
CBS_E_SOURCE_MISSING
The latter error message indicates that there are some files missing on your PC. This is usually encountered when you update your PC from an older version to a newer one, for example, from Windows 8 to Windows 10, or Windows 10 to Windows 11. After the upgrade has been performed, this error message appears while installing certain Windows components, as reported here.
The former error message is usually encountered when trying to install Windows updates through the Windows Update Settings page. The same error message can also be seen with the error codes 0x800F0906, 0x800F0907, and 0x800F0922.
If you are experiencing either of these error messages accompanied by the error code 0x800f081f, then this guide will give a step-by-step on how to fix the issue that addresses both sorts of errors.
What causes the 0x800f081f error in Windows
The 0x800f081f error can be caused by any number of reasons. this likely has to do with missing or corrupted system files, but can also be caused by certain mismatched configurations and compatibility issues. Here are some of the common reasons for the 0x800f081f error to occur:
- Issues with .NET Framework compatibility
- Corrupted or missing Windows Registry files
- Corrupted Windows Update files
- Corrupted user profile
- Misconfigured Group Policy settings
- Unstable network connectivity
The error code 0x800f081f has been encountered for a long time and has been observed in both Windows 10 and Windows 11. If you are in a similar situation, then this guide is exactly where you should be.
Fix Windows error code 0x800f081f
The solutions provided below are given in chronological order so that the more intensive and complicated mitigation processes are given towards the end. I suggest performing these fixes in the given order to fix the error code 0x800f081f and install that Windows update.
Note: The screenshots and the steps are targetted toward Windows 11, but also apply to Windows 10.
Run the Windows Update troubleshooter
The Windows operating system comes with built-in troubleshooters, including the Windows Update troubleshooter. The Windows Update troubleshooter can scan and potentially fix any detected issues relating to Windows updates and the optional features.
Perform the following steps to run the Windows Update troubleshooter:
-
Press the Windows Key + i to open the Settings app.
-
Navigate to the following:
System >> Troubleshoot >> Other troubleshooters
-
Here, click Run in front of “Windows Update.”

Run Windows Update troubleshooter -
The troubleshooter will now run and scan for any anomalies. If any are found, it will attempt to fix them, as in the image below. You can then Close the troubleshooter.

Attempted to fix any issues

Enable .NET Framework 3.5 and 4.8
Some Windows components require that .NET framework 3.5 or 4.8 be enabled on your system for them to install and work properly. If the required version isn’t installed, it can throw the error 0x800f081f.
Use the following steps to enable the .NET Framework versions:
-
Press the Windows Key + R to open the Run Command box.
-
Type in “optionalfeatures” and press Enter to open the Optional Features dialog box.

Open the Optional Features dialog box -
Select both “.NET Framework 3.5” and “.NET Framework 4.8 Advanced Services” and click OK.
Note: If already enabled, leave it be.

Enable .NET Framework versions from Optional Features -
[Conditional] Restart the computer if asked.
Once .NET is installed, check to see if the error has been mitigated. If it still exists, then there are still a few things you do to fix it.
Clear SoftwareDistribution and Catroot2 folder
If the “0x800f081” error code is occurring during a Windows update installation, then you can apply this fix.
The SoftwareDistribution folder can be found in C:\Windows, while the Catroot2 folder can be found at C:\Windows\System32\. The SoftwareDistribution folder contains temporary files within a subfolder (download) that are required to install a Windows update, while the Catroot2 folder contains Windows update-related files and folders, including signature files from Microsoft.
Quite often, a Windows update fails to install and experiences an error code because of the corrupted files inside these 2 folders. In this case, these temporary files need to be removed and the update process needs to be started from the top.
Here is how to clear the SoftwareDistribution and the CarRoot2 folder:
-
Navigate to the following location using File Explorer:
C:\Windows\SoftwareDistribution\Download
-
Press the CTRL + A key combination to select everything.
-
Hold down the Shift key and press Delete to delete all selected items permanently.
-
If asked for administrative rights, select “Do this for all current items” and click Continue.

Provide admin rights -
[Conditional] If certain items are currently in use and cannot be deleted, skip them.
-
Now navigate to the following path:
C:\Windows\System32\Catroot2
-
Select everything here again and delete them.

After performing the steps above, we also recommend restarting the Windows Update services. Therefore, before attempting to install the pending updates/components, we suggest that you apply the steps in the next section too.
Restart Windows Update services
Sometimes problematic Windows services can be the culprit behind the “0x800f081f” error. In this case, any service relating to Windows Update can cause the error. Try giving these services a restart and check if it resolves the issue.
Note: The following steps restart the service from the Windows command line since the process is simpler. However, you can also restart the services from the Service Console (services.msc).
-
Press the Windows key + R to open the Run Command box.
-
Type in “cmd” and press CTRL + Shift + Enter to launch an elevated Command Prompt.
-
Now run the following commands to stop the services associated with Windows Update:
net stop bits
net stop wuauserv
net stop appidsvc
net stop cryptsvc
Stop services associated with Windows Update -
Then, run these commands to start them back up:
net start bits
net start wuauserv
net start appidsvc
net start cryptsvc
Start the services associated with the Windows Update


Once the Windows Update services have been restated and the SoftwareDistribution folder has also been cleared, check to see if you still encounter the “0x800f081f” error when installing the Windows update or the Windows component.
If the error persists, continue to perform the more aggressive fixes shared below.
Adjust Group Policy setting
If you are experiencing the “0x800f081f” error while trying to install an optional Windows update, then it may be possible that your system administrator has changed the Group Policy. In this case, you can readjust it to allow the installation of the optional Windows Features.
Use the following steps to allow the installation of optional Windows features and fix the “0x800f081f” error:
Note: The Group Policy Editor is required for this fix, which isn’t available on Windows Home edition by default. If you have the Home edition, then here is a guide to install gpedit.msc.
-
Press the Windows key + R to open the Run Command box.
-
Type in “gpedit.msc” and press Enter to launch the Group Policy Editor.
-
Navigate to the following path from the left pane:
Local Computer Policy > Computer Configuration > Administrative Templates > System
-
In the right pane, double-click the policy “Specify settings for optional component installation and component repair.”

Open the optional component installation policy -
Select Enabled and then click Apply and OK.

Allow optional Windows update installation from Group Policy -
Next, run the following command to implement the changes made to the Group Policy in an elevated Command Prompt instance:
GPUpdate /Force
Enforce the update Group Policy

After performing these steps, check if you are now able to install the optional updates.
Fix corrupted files with DISM and SFC
Windows comes with preinstalled tools to help fix the OS. Apart from the built-in troubleshooter you can find in the Settings app, Windows also comes with a Deployment Image Servicing and Management (DISM) tool, System File Checker (SFC), and a Check Disk (CHKDSK) utility, where each performs a different scan and attempts to automatically fix any glitches in the OS.
Run the following cmdlets in the given order in an elevated Command Prompt to attempt and repair the current Windows OS installation:
DISM.exe /Online /Cleanup-image /Checkhealth
DISM.exe /Online /Cleanup-image /Scanhealth
DISM.exe /Online /Cleanup-image /Restorehealth
sfc /scannow
If the SFC does find any corrupted files that it was able to fix, then check whether the error persists. If not, continue to perform the next solution.
Register system files
Unregistered system files can cause the respective services to not be able to run. You can register Dynamic Link Libraries (DLLs) using the “regsvr32” command line tool.
Follow these steps to register the system files associated with Windows Update:
-
Press the Windows key + R to open the Run Command box.
-
Type in “cmd” and press CTRL + Shift + Enter to launch an elevated Command Prompt.
-
Execute the following commands:
regsvr32.exe /s atl.dll
regsvr32.exe /s urlmon.dll
regsvr32.exe /s mshtml.dll
Register system files
After registering these files, I also recommend resetting the network configuration.
Reset network configuration
The “0x800f081f” error can also occur because of network issues. Even if you have a stable internet connection, the said error can occur because of certain network configurations on your computer, which you can reset to defaults with simple commands in the Command Prompt.
Here are the steps to reset the network preferences:
-
Press the Windows key + R to open the Run Command box.
-
Type in “cmd” and press CTRL + Shift + Enter to launch an elevated Command Prompt.
-
Run the following commands in the given order:
netsh winsock reset
netsh winsock reset proxy
Reset Winsock configurations -
Restart the computer.
After the restart, check to see if the issue has been mitigated. If it persists, then you can switch to a bit more aggressive solutions shared below.
Delete WUServer and WIStatusServer from Windows Registry
If your system is behind a Windows Server Update Services (WSUS), certain Registry values can prevent Windows updates from installing on your PC, resulting in the “0x800f081f” error. It can occur if certain values are corrupted.
This can often be fixed by deleting the Windows Registry values “WUServer” and “WIStatusServer.” Here are the steps to safely delete them:
Note: Misconfiguration of critical values in the system’s registry could be fatal for your operating system. Therefore, we insist that you create a system restore point or a complete system image backup before proceeding forward with the process.
You can also use our top selection of disk imaging and backup software so you never lose your data or operating system again.
-
Press the Windows key + R to open the Run Command box.
-
Type in “regedit” and press Enter to open the Registry Editor.
-
Now navigate to the following path from the left pane:
Computer\HKEY_LOCAL_MACHINE\SOFTWARE\Policies\Microsoft\Windows\WindowsUpdate
Note: If the “WindowsUpdate” key does not exist, then you can close the Registry Editor and skip this solution right now.
-
In the right pane, select the 2 values and delete them:
- WUServer
- WIStatusServer
-
Close the Registry Editor and restart the computer for the changes to take effect.
When it restarts, check to see if you still encounter the “0x800f081f” error while installing Windows updates.
Perform an in-place upgrade
An in-place upgrade is when you upgrade your operating system using an ISO file, but all your personal data, files, and folders are retained. This replaces the corrupted system files and makes your PC act normal again.
To perform an in-place upgrade, perform these steps:
-
Start by downloading a Windows ISO image. Click on the respective link below to download one:
-
Mount the ISO to your system.

Mount the ISO file -
Navigate to the mounted drive and run the “Setup.exe” file by double-clicking it.
This will launch the Windows installation setup.
-
On the welcome screen, click “Change how setup downloads updates.”

Change how updates are downloaded -
Select “Not right now” and click Next.

Skip downloading updates -
Accept the licensing terms.

Accept licensing terms -
Finally, click Install and wait for the process to complete.

Begin the in-place upgrade


When the in-place upgrade completes, you should now now longer encounter the “0x800f081f” error.
In the odd change that it is still there, then there is still one trick left up our sleeves.
Perform a cloud reset
If none of the solutions have worked thus far, try resetting the Windows OS to its default values and configurations.
Although this is not an ideal situation, but is now the only hope left in fixing the error once and for all. Resetting the OS will restore all critical system files, services, and processes to their default operations, and maintain your personal data
You can reset the PC where it uses the same files and folders to reinstall the OS or perform a cloud reset. In both these options, you can keep your personal files and folders in the non-boot partitions.
I recommended that you perform a cloud reset so that all problematic files are replaced with fresh, correct ones. Here are the steps to perform a cloud reset:
-
Press the Windows Key + i to open the Settings app.
-
Click System.
-
Go to Recovery.

Open Recovery settings -
Click “Reset PC.”

Reset PC The reset PC wizard will now open.
-
Select “Keep my files.”

Keep files and data -
Select “Cloud download.”

Cloud download -
Click Next.

Proceed with resetting Windows -
Click Reset.

Reset Windows from the Cloud while keeping files


The wizard will now begin downloading fresh files from Microsoft servers and then reset your computer to its default configurations, also replacing a majority of the system files that may have been corrupted. This step can take a while depending upon your internet connection, and your PC may restart.
When a fresh OS has been installed, the error should be mitigated and you should now be able to install the Windows updates.
This concludes all the methods to fix the “0x800f081f” error code on a Windows PC.
Ending thoughts
The “0x800f081f” error code can be encountered under different circumstances. These can range from installing optional features, and certain Windows components, or simply upgrading the OS to a newer version through Windows Update.
This is a common issue reported by many Windows users and has been around since the launch of Windows 10. Even with the latest Windows 11 version 22H2, people are reportedly seeing the same error message. This leads me to believe that this error is not going to be permanently fixed by Microsoft anytime soon, and can come up with any Windows update.
This guide details the steps required to fix the “0x800f081f” error regardless of the circumstances you encountered it.


