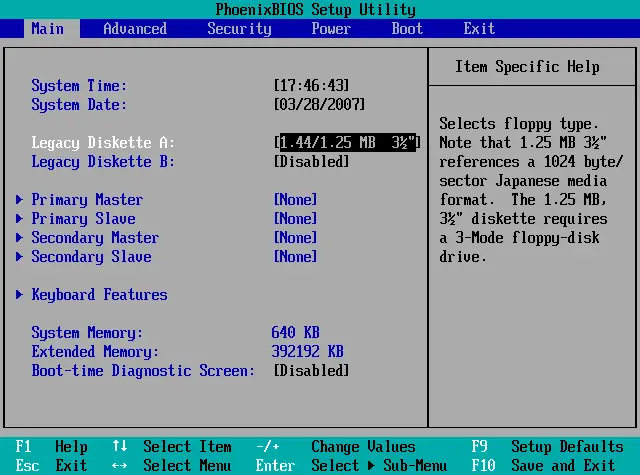
The Basic Input/ Output System (BIOS) is an integral part of the computer system. Without it, the computer will not be able to know how to start. It needs to be properly updated, managed, and configured according to each individual computer, and the person using the computer.
However, accessing the BIOS settings on each PC is confusing, as every manufacturer has its own special key to access it as the computer is booting. On top of that, the user has very little time to press that key before the computer boots up the OS.
This article highlights how you can access your BIOS according to your specific computer.
Also check out: how to access BIOS information in Windows 10 without restarting.
What is BIOS

BIOS is a hard-coded chip embedded within the motherboard of your computer. It is responsible for properly booting your computer and has a set of instructions that controls the inputs and the outputs of the computer. These settings can be changed by accessing BIOS, as in the image above, which has been discussed further in the article.
BIOS also performs a Power-On Self Test (POST) which is basically a self-test to ensure that all attached peripherals and devices are fully functional. This is why you are receiving an error if your CMOS battery is running low or one of the attached hardware is faulty. If all goes well, BIOS then boots the Operating System from the hard drive.
Enter BIOS at startup using a hotkey
A hotkey is a key, or a set of keys, that perform a certain function when pressed together, or during a certain time period. To access BIOS, a hotkey such as F2, F12, or Del has to be pressed as the computer is about to load into Windows.
You can use the associated hotkey mentioned below according to your manufacturer to access BIOS. Note that these can be used in both UEFI and Legacy BIOS.
- Dell BIOS: F2 or F12
- HP BIOS: Esc or F10
- Lenovo BIOS: F2 or (Fn+F2) or (Enter + F1)
- Acer BIOS: F2 or Del
- Toshiba BIOS: F2
- Gigabyte BIOS: Del
- Asus BIOS: F2 or Del
- MSI BIOS: F2 or Del
- IBM BIOS: F1
- Sony VAIO BIOS: F1 or F2 or F3
- Compaq BIOS: F1 or F10
- Samsung BIOS: F2
- Origin BIOS: F2
- Microsoft Surface BIOS: Press and hold the volume up button
Use the associated hotkeys to access and modify BIOS settings while the computer is booting up (before POST).
BIOS functionality
We mentioned earlier in the article that there might not be a functional computer without a BIOS. Why is that?
Let us discuss the various functions and roles of BIOS that make it an integral part of the computer system.
Power-On Self Test (POST)
BIOS launches the POST process first to ensure that all attached hardware, such as the hard drive, RAM modules, CD ROM, etc., are all functional before proceeding further to boot up the OS.
If there is an issue with any hardware component of the computer, the POST will display the associated error message and give out a certain number of beeps through the buzzer for the user to use and troubleshoot the problem.
Complementary Metal-Oxide Semiconductor (CMOS)
BIOS is responsible for saving crucial data when you shutdown or reboot the computer. All such data, such as passwords, date, and time are moved to the CMOS for preservation. The CMOS battery then provides it with sufficient power to maintain that information.
BIOS drivers
Many small-level drivers are stored within BIOS that aid your computer to boot up properly. These drivers also prompt basic operational controls on users.
Bootstrap loader
This is a critical piece of software that is usually stored in the ROM. It is responsible for loading the Operating System to RAM as soon as you boot up your computer. The OS is then launched from RAM.
Closing words
BIOS also displays other useful information, such as the date and the time, the CPU temperature, make and model of the motherboard, etc. This is also where one may implement additional security walls, such as a bootup password, to restrict access for the PC to boot up at all.
Most users find it difficult to enter BIOS settings and end up restarting their computers several times before being able to find the right hotkey. You can use this guide to start with the correct one.


