Key Points
- To open the per-user Startup folder, type in “shell:startup” in the Run Command box. For the all-user Startup folder, type in “shell:common startup” in the Run Command box.
- You can disable or enable Startup apps from Task Manager > Startup, or from Settings > Apps > Startup.
- To add more apps and programs to the Startup list, create/paste a shortcut in either of the Startup folders.
When logging into your user account on Windows 11, you may have noticed certain apps launching automatically, like Skype, Microsoft Teams, Steam client, etc. This is because these apps and programs have become a part of the Startup apps. This Windows feature can save you time by not having to launch each app individually. However, they also have their downside.
Most applications are added to the Startup App list automatically, without user involvement. Some are already there as soon as you install the operating system. You can manage the existing apps and disable them from launching automatically, or add your apps to the Startup Folder, after which they, too, will launch automatically as soon as you sign in.
Startup Folders are of two types, both of which can be found at different locations within the Windows OS. You may need to access them occasionally to add more apps to the list, remove some, or simply monitor them. This guide will discuss how the two Startup Folders are different, and how to access and edit them if needed.
What is the Startup Folder?
The Startup Folder made its debut with Windows 95. The purpose of this folder was to include the apps and programs that start and run automatically, as soon as the user signs in. Up until Windows 7, you could access the Startup folder from the Start menu > Startup. However, this changed when Windows 10 was launched.
In Windows 10 and the operating systems to follow, accessing the Startup Folder wasn’t as convenient, and the users were unable to find it at first. Users needed to access it to manage the apps and the program’s automatic launch. Some needed to include the programs that wouldn’t launch automatically themselves, while others needed to disable them.
Before I show you how to access and manage the Startup Folders, let us learn some things about their types.
Local Startup folder vs. Global (all-user) Startup folder
As mentioned earlier, there are two Startup Folders in the Windows OS which the users can access. One is the local, or per-user Startup folder, while the other is the global, or all-user Startup folder. Both of these serve different purposes and are at different locations.
The table below highlights the difference between the two Startup folders in Windows:
| Location | Details | |
| Local (per-user) Startup folder | C:\Users\[username]\AppData\Roaming\Microsoft\Windows\Start Menu\Programs\Startup | The apps inside this folder run automatically for the particular user account only. |
| Global (all-user) Startup folder | C:\ProgramData\Microsoft\Windows\Start Menu\Programs\Startup | Apps inside this folder run automatically regardless of which user account logs in. |
Note: The [username] in the Location column varies depending on your user account name.
If you use File Explorer to access these folders, you may not be able to find it using the default Windows settings. This is because, by default, the “AppData” and the “ProgramData” folders are hidden. However, there are other methods to access it.
How to find the Startup Folder
There are multiple ways to find and access the Startup folders in Windows 11. You can access them from the Run Command box and the File Explorer.
Find the Startup folder using Run Command box
Using the Run Command box, you can access the Startup folders with a single command. Here is how:
-
Press the Windows Key + R to open the Run Command box.
-
Run either of the following commands to access the respective Startup folder:
- For local (per-user) Startup folder: shell:startup
- For global (all-user) Startup folder: shell:common startup

Open the Startup folder from the Run Command box
Running either of these commands will open the respective Startup folder in File Explorer.
Find the Startup folder with File Explorer
You can also access either of the Startup folders using File Explorer. However, to do this, you must first unhide the hidden folders, and then navigate your way through the many subfolders. This makes the process a bit lengthier. However, if you need to access these folders frequently, then you may want to adopt the following method:
-
Open File Explorer.
-
Click View from the ribbon menu.

Expand View menu -
Expand Show, and then click “Hidden items” to view them.
The “AppData” or the “ProgramData” folder will now be visible inside File Explorer.

Show hidden items -
Now navigate through either of the following paths (depending on which Startup folder you want to access):
- C:\Users\[username]\AppData\Roaming\Microsoft\Windows\Start Menu\Programs\Startup
- C:\ProgramData\Microsoft\Windows\Start Menu\Programs\Startup


These are the two methods to access both of the Startup folders in Windows 11. However, if you may notice, none of these folders list the programs that you find inside the Task Manager’s Startup tab. So where are they located?
Disable, enable programs that run at startup
The applications and the programs you see in the task Manager inside the Startup tab are those that are added automatically to the Startup list. These are not accessible by the users using conventional methods. However, you can disable them from running at startup, or enable the ones that you want to run as soon as you log in.
There are two methods to manage the apps that run at startup in Windows 11.
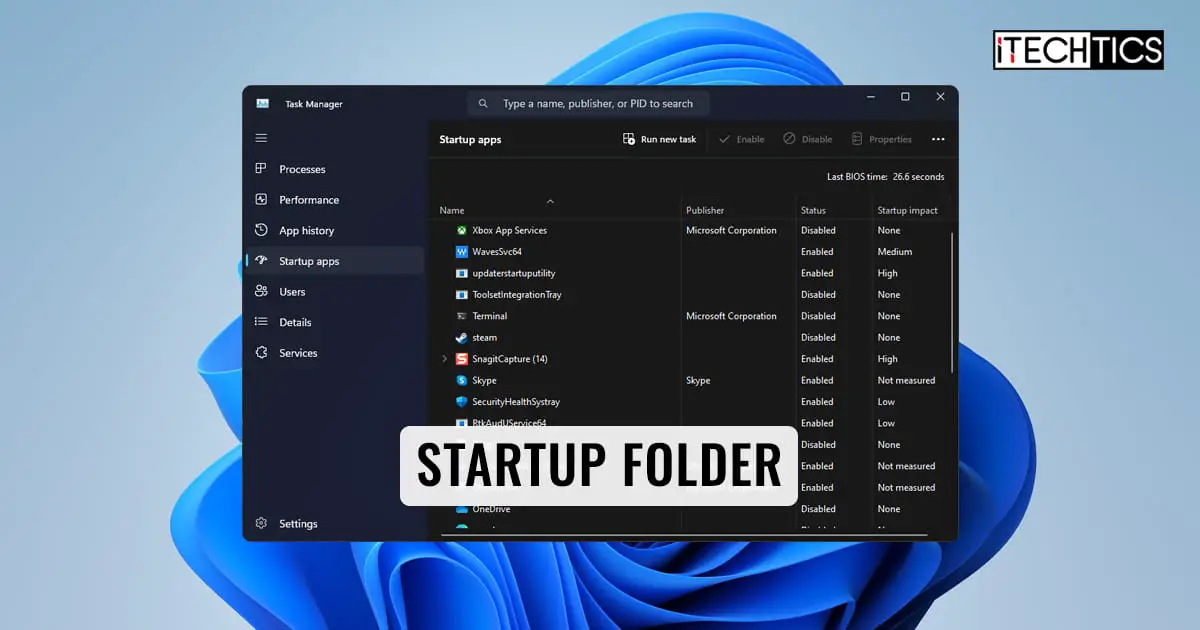
Disable or enable Startup apps from Task Manager
If you prefer using the Task Manager itself, here is how you can disable or enable the apps from running at startup:
-
Press the CTRL + Shift + Esc shortcut keys to open the Task Manager.
-
Switch to the “Startup apps” tab.

Open the Startup apps tab in the Task Manager -
Right-click on the app that you want to manage and click Disable/Enable from the context menu.

Disable or enable app from running at startup from the Task Manager


Disable or enable Startup apps from Settings
Alternatively, you can also manage the Startup apps from the Windows Settings app. Here is how:
-
Press the Windows Key + i to open the Settings app.
-
Click Apps.
-
Go to Startup.

Open Startup apps settings page -
Toggle the slider in front of the app to either the On or Off position to enable or disable it.

Disable or enable app from running at startup from the Settings app


How to add apps and programs to Startup folder
As I mentioned earlier, the apps and programs that are automatically added to the Startup app list show up in the Settings app and the Task Manager. To manually add apps to the list, you must place them inside one of the Startup folders we had talked about earlier.
Placing a shortcut inside one of the Startup folders will allow the app to run automatically as soon as you sign into the user account. Use these steps to add an app or a program to the Startup folder on Windows:
-
First, access the Startup folder using the methods discussed above. Remember to open the Startup folder to which you want to apply the app (local or global Startup folder).
-
Right-click on an empty space, expand New, and then click Shortcut.

Create a new shortcut in the Startup folder -
In the shortcut wizard, enter the complete path to the app/program that you want to run automatically, and click Next.

Enter the path to the program -
Set a custom name for the shortcut and click Finish.

Set a name for the shortcut

Alternatively, you can also drag and drop a shortcut into the Startup folders.
After performing the steps above, you can now find the program in the Task Manager’s Startup tab as well as in the Startup settings page, from where you can manage whether to run the app automatically as you sign in or not.

This concludes all the methods to find, access, and manage Startup applications on your Windows 11 computer.
Ending words
Startup applications are often something Windows users leave neglected. They are usually managed automatically by the operating system, and thus, we do not bother managing them. However, startup applications play a vital role in the user experience.
First of all, the apps that you use often and need as soon as you log in should be configured to run automatically as you log in. This saves you time. However, the apps that you do not use should be disabled. Not only do they cause hindrance, they consume system resources and take precedence over the more important tasks at hand.
Therefore, I ask you to be smart about the apps and programs that you manually add to the Startup folders and only include the ones that you absolutely need.


