Key Points
- At the moment, you can remove or replace the image background on the Dev and Release Preview Insider channels, with the photos app version 2023.11110.8002.0 or above.
- To replace or remove the image background, open it with Microsoft Photos, click Edit, switch to the background tab, and select either Remove or Replace. Make the necessary adjustments and save the edited image.
Using third-party software with potential hazards is no longer required to edit your pictures. Now, you can change the background of any image with native Windows tools in Windows 11.
Microsoft is working on the Photos app and making it better by including new features. In a recent announcement, Microsoft mentions several new features to the Photos app, including a filmstrip of thumbnails, a timeline scrollbar, and the ability to remove or replace the background of an image without having to manually select the item(s) in focus.
Previously, you could blur out the background in any image. But with the recent improvements, you can now also remove the background, which kind of makes the image like a PNG image, or replace the background with a solid color. In this guide, I am going to show you how to change the background of any image to a solid color, or simply remove it, with the Photos app.
At the time of writing this post, these features are only available to the Insiders. I believe that this feature will soon make its way to the stable channel as well. In addition to that, the Photos app’s build should be 2023.11110.8002.0 or higher.
Before getting started
Before you can remove or replace the background of any image using the Windows native Photos app, you need to make sure that your software supports it.
For one, you should currently be on either the Dev or the Release Preview Insider channels. This means that your Windows 11 build should be 22631.2787 or higher. You can check your operating system details by running the command “winver” in the Run Command box.

Moreover, the Photos app should also be on build 2023.11110.8002.0 or higher. You can check the build number on the app with these easy steps:
-
Open the Photos app by searching for it in the Start menu Search box.

Open the Photos app -
Click on the gear icon in the title bar.
-
Scroll down and view the Photos app build number in the About section.

Check the Photos app build number


If you find that the app is not of the required build number, then use the following steps to update it and install the latest version available:
-
Open the Microsoft Store app.
-
Click Library in the left sidebar.

Open the Microsoft Store library -
Click “Get updates.”
The app will now search for updates for all of the installed applications.
-
When the scan is complete, click Update in front of Microsoft Photos to update it.

After performing these steps, wait for the app to get updated, and then return to the Photos app’s Settings page and check whether it is now on the required build number.
Now that the requirements are met, let me show you how to remove and replace the background of any image.
Remove image background with Photos app
Apply the following steps to remove the background from any picture using the Photos app:
-
Right-click on the image that you want to edit, expand “Open with,” and then select the Photos app.

Open image in the Photos app If the Photos app is already your default image opener, then simply double-click the image to open it. Or, double-clicking it could also open the “Open with” dialog box, from which you can also select the Photos app.
-
Click on “Edit image” button.

Edit image in Photos -
Click the Background button in the command bar.

Click the Background button The app will now scan the image and mark the selected background automatically.
-
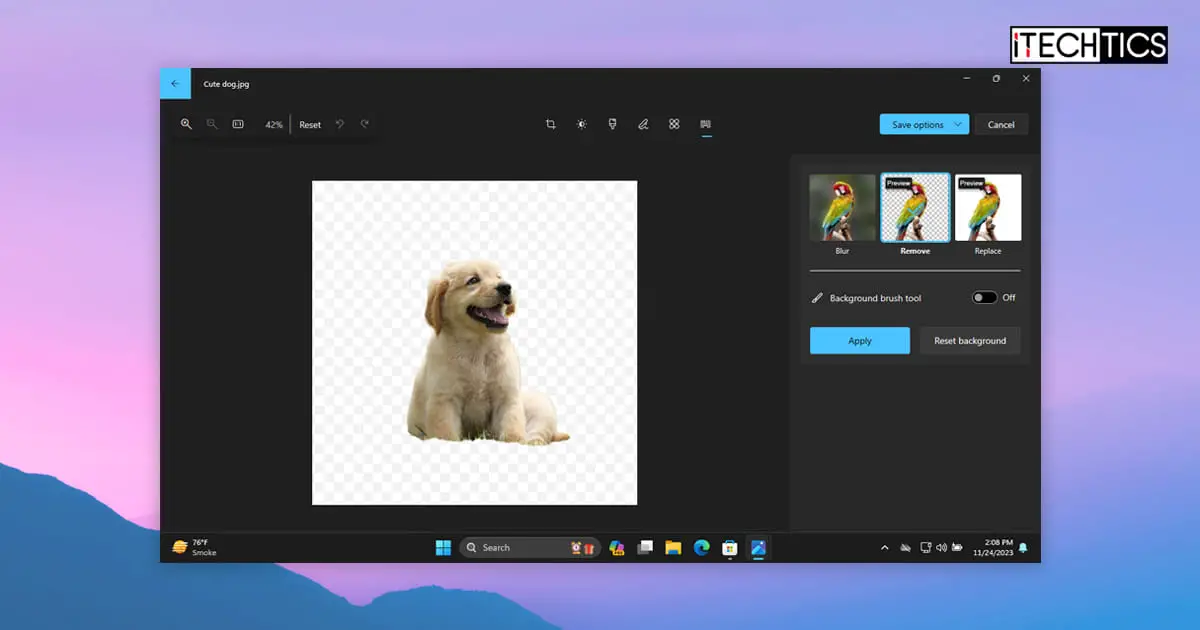
Click the Remove button in the sidebar menu.

Remove the background using the Photos app -
[Optional] Toggle the Background brush tool and select any areas that you want to add or remove from the background.
-
Click Apply.

Apply the changes The background image will now be removed.
-
Click the “Save options” button.
-
Select one of the saving options and save the image.
Note: It is recommended that you save the image in the PNG format so that the background remains removed when you reuse the image in another environment.

save the image without the background


After performing the steps above, you will have an image without a background.
Replace image background with Photos app
You can also replace the image’s background with a solid color using the Photos app. Note that it does not allow you to replace the background with another image. However, that would be an awesome feature to have, and I hope that Microsoft will add it soon.
Here are the steps to replace the image background using the Photos app:
-
Right-click on the image that you want to edit, expand “Open with,” and then select the Photos app.
Open image in the Photos app If the Photos app is already your default image opener, then simply double-click the image to open it. Or, double-clicking it could also open the “Open with” dialog box, from which you can also select the Photos app.
-
Click on “Edit image” button.
Edit image in Photos -
Click the Background button in the command bar.
Click the Background button The app will now scan the image and mark the selected background automatically.
-
Click the Replace button in the sidebar menu.

Replace background using the Photos app -
Select the color from the Color Picker to replace the background.

Select a color -
[Optional] Toggle the Background brush tool and select any areas that you want to add or remove from the background.
-
Click Apply.

Apply the changes -
Click the “Save options” button.
-
Select one of the saving options and save the image.

Save the image with a solid background color


Ending words
Microsoft is working hard on improving the Windows experience for its users. It is not only focused on integrating AI tools, like the Copilot but also on improving the tools that will benefit all types of audiences.
The Photos app now lets you remove and replace image backgrounds, on top of blurring them, without having to manually outline the items in the forefront.


