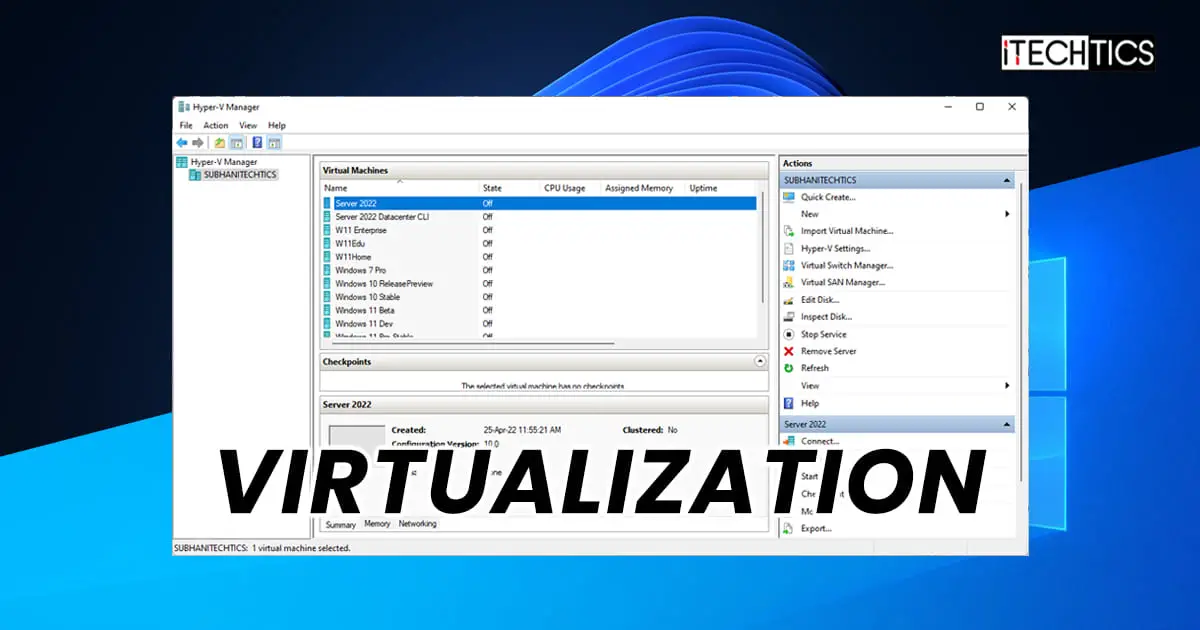
Every IT expert today would probably know about virtualization. The virtualization technology allows you to run multiple guest operating systems on top of your current operating system, which is referred to as the host OS.
Virtualization allows the user to run multiple virtual machines on a single computer without additional hardware.
Almost all modern Intel and AMD processors support this technology. However, the feature is usually disabled. Therefore, you must enable this feature from the system’s firmware (BIOS). Then, to use the feature, you must install a hypervisor (Hyper-V, VMWare Workstation, or Oracle VirtualBox) that hosts the guest operating systems.
In this post, we are going to show you how to enable virtualization on a PC and then how to install Hyper-V, which is a Windows-native hypervisor.
Table of contents
First of all, you must check whether your system supports virtualization technology.
How to Check if Computer Supports Virtualization
One way to check if your system supports virtualization is by checking if the option is available in the system BIOS. However, this is not the ideal way. You can also check for the following information through the Windows Command Line Interface (CLI), which are the 4 basic requirements for Hyper-V:
- VM Monitor Mode Extensions
- Virtualization enabled in firmware
- Second level address translation
- Data execution prevention
To check if your system satisfies these requirements, run the following cmdlet in an elevated Command Prompt.
SystemInfo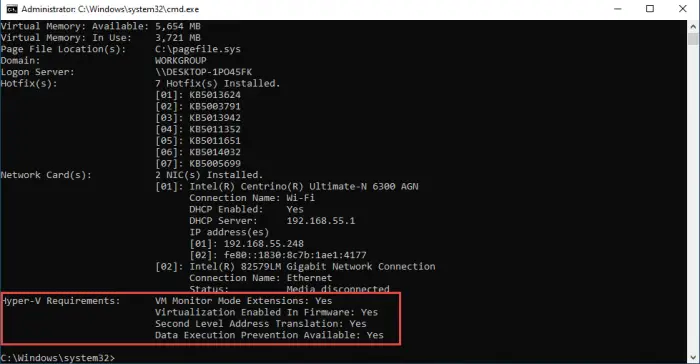
The information under the “Hyper-V Requirements” section will tell you whether your system has the features and if virtualization has been enabled in the system BIOS. If it says No in front of “Virtualization enabled in firmware,” then it needs to be enabled first.
How to Enable Virtualization in System BIOS/ Firmware
Perform the given steps below to enable virtualization from system BIOS in Windows 11/10:
-
In the BIOS settings, look for the “virtualization” or “VTx” tab. From here, enable system virtualization.
The Setting may be called either one of the following, depending on your computer/CPU manufacturer:
- VT-x
- AMD-V
- SVM
- Intel VT-d
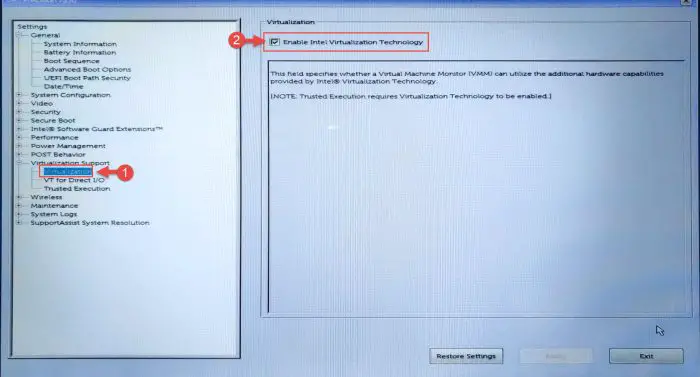
Enable virtualization from BIOS -
Now restart your computer and boot into the OS.
The task is not over yet. Now that virtualization is enabled from BIOS, you must now enable Hyper-V in the Windows operating system.
How to Enable Hyper-V in Windows 11/10
As we already mentioned, Hyper-V is disabled by default in the Windows operating system, and thus needs to be enabled. It can be enabled from the Windows optional features, from the Command Prompt, or through Windows PowerShell.
Note: Only the Enterprise, Pro, or Education editions support Hyper-V natively. In case you are using the Home edition, here is a guide on how to install Hyper-V on Windows Home.
Enable Hyper-V from Optional Features
-
Open the Optional Features applet by typing in optionalfeatures in the Run Command box.
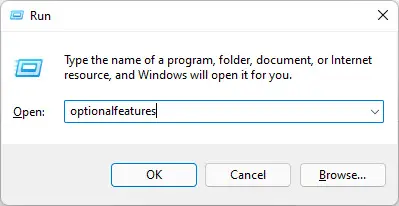
Open the Optional Features applet -
In the popup window, check the box next to “Hyper-V” and then click Ok.
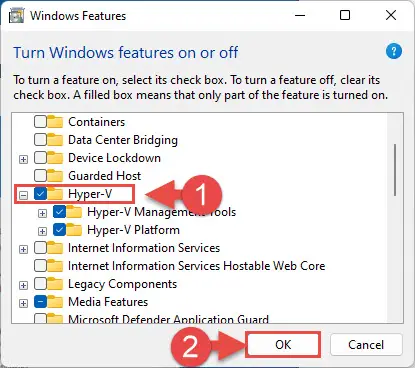
Enable Hyper-V
The Hyper-V hypervisor will now be installed on your computer. You can access it by searching for “Hyper-V Manager” in the Search Box on your taskbar.
Learn how to install Optional Features offline.
Enable Hyper-V from Windows PowerShell
If you would rather prefer the Windows CLI, here is how you can enable Hyper-V from PowerShell:
-
Now run the following command to install Hyper-V:
Enable-WindowsOptionalFeature -Online -FeatureName Microsoft-Hyper-V -All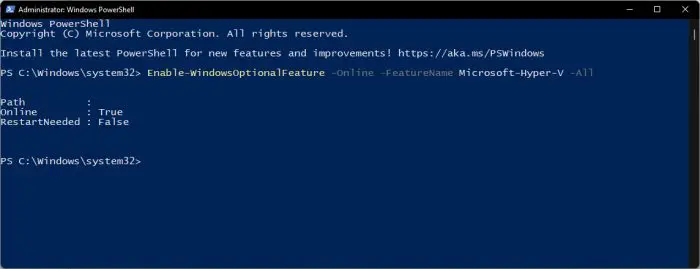
Enable Hyper V from Windows PowerShell -
Now restart the computer for the changes to take effect.
Enable Hyper-V from Command Prompt
-
Now paste the following cmdlet to install Hyper-V:
DISM /Online /Enable-Feature /All /FeatureName:Microsoft-Hyper-V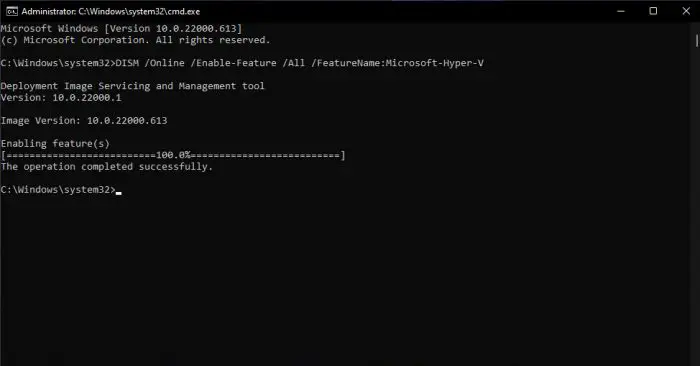
Enable Hyper V using Command Prompt -
Now restart the computer for the changes to take effect.
You can now begin hosting other operating systems by creating Virtual Machines (VMs) using Hyper-V.
How to Check if Virtualization is Enabled in Windows 11/10
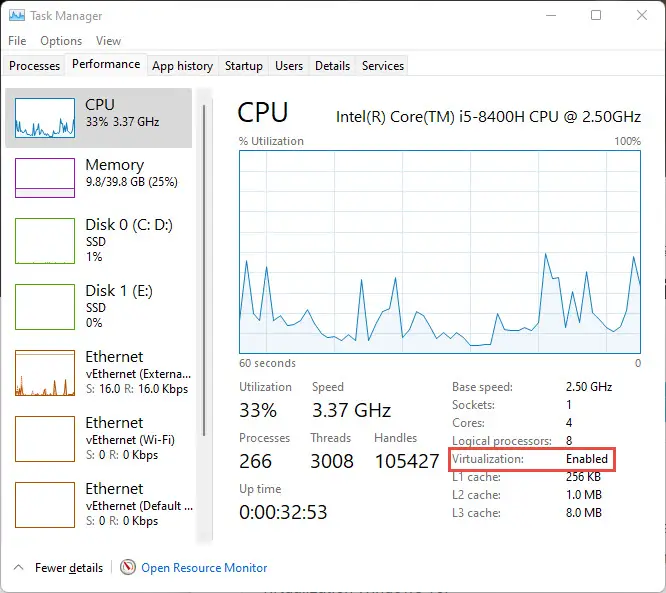
The Task Manager in the Windows operating system has come a long way since Windows 10 was first launched. It now also shows whether the virtualization technology is enabled on your computer.
To check the virtualization status, open the Task Manager using the CTRL + Shift + Esc shortcut keys. Switch to the Performance tab, and then click CPU in the left menu. You shall now see the Virtualization status in the description below the graph(s).
Closing Words
Running guest operating systems allows you to test other operating systems, or even run experiments on them, without ever risking your own machine. They can also be used to run software to keep them secluded from your host PC, if they contain malicious content.
For those reasons, you can enable and install Hyper-V on your Windows PC today using the given guide above.

