Remote Server Administration Tools (RSAT) allow system administrators to manage Windows servers from their own computers without having to log in to each one individually. This makes network management very easy, especially when you have a large network of servers.
Microsoft releases RSAT tools separately for each Windows version. In Windows 10 version 1803 or earlier, users had to download RSAT tools and install them manually to enable it.
In Windows 10 version 1809 and later, Microsoft simplified the installation of RSAT tools. RSAT tools were integrated into the “optional features” section inside the Settings app. This is sufficient for the user to enable the RSAT components and Windows will automatically download, install, and enable them.
Now that Windows 11 has been released, let’s check how we can download, install and enable RSAT tools in Windows 11.
How to Install RSAT on Windows 11
Follow these steps to install RSAT tools on Windows 11:
-
Navigate to:
Settings app >> Apps >> Optional features
-
Click “View features.”
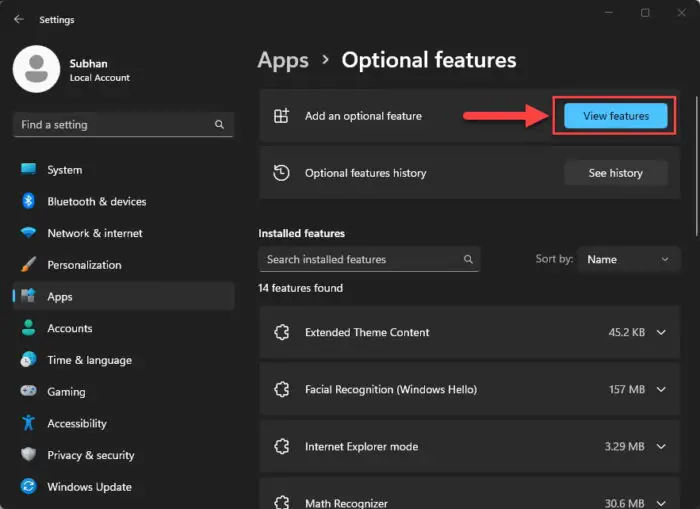
View optional features The “Add an optional feature” window will now open.
-
Search for “RSAT.”
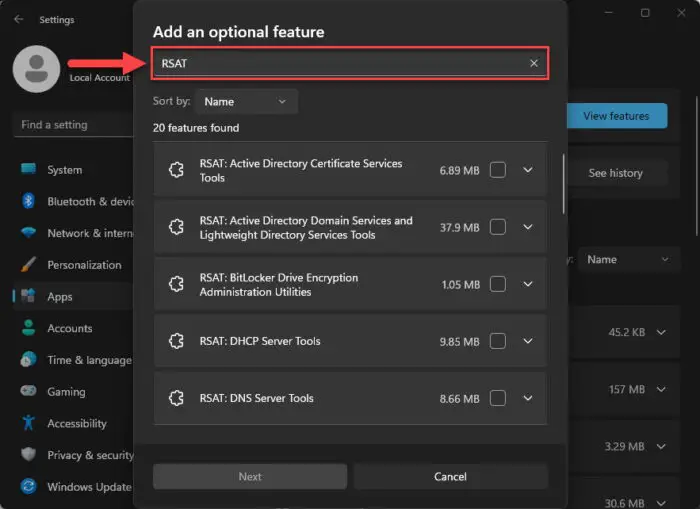
Search for “RSAT” -
Select the RSAT tools that you want to install and click Next.
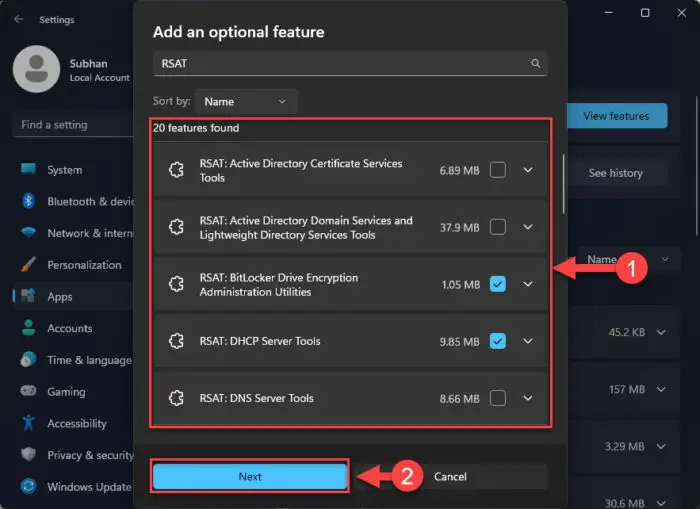
Select and install RSAT tools -
Confirm the components and click Install.
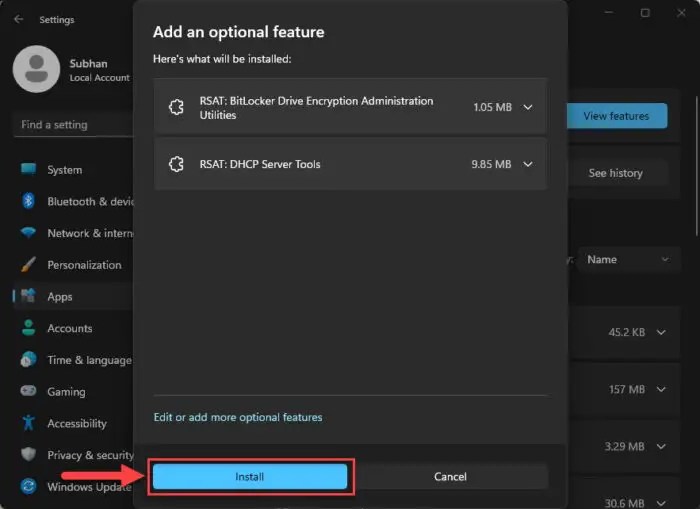
Install RSAT tools in Windows 11
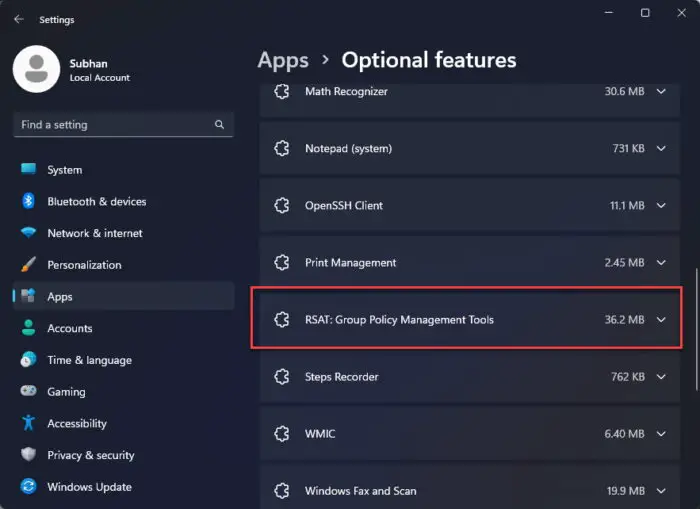
The RSAT tools will now begin downloading and installing on your PC. Once they are fully installed and ready to be used, they will be visible under the “Installed Features” section:
How to Install RSAT using PowerShell in Windows 11
For sysadmins who want advanced stuff, RSAT tools can also be installed using PowerShell. The beauty of using PowerShell is that you will be able to install RSAT tools even on remote computers.
To install all RSAT tools using PowerShell with Administrator privileges, run the following cmdlet in an elevated PowerShell instance:
Get-WindowsCapability -Name RSAT* -Online | Add-WindowsCapability -OnlineTo install a specific module, you’ll need to give the name of the module instead of the “*”.
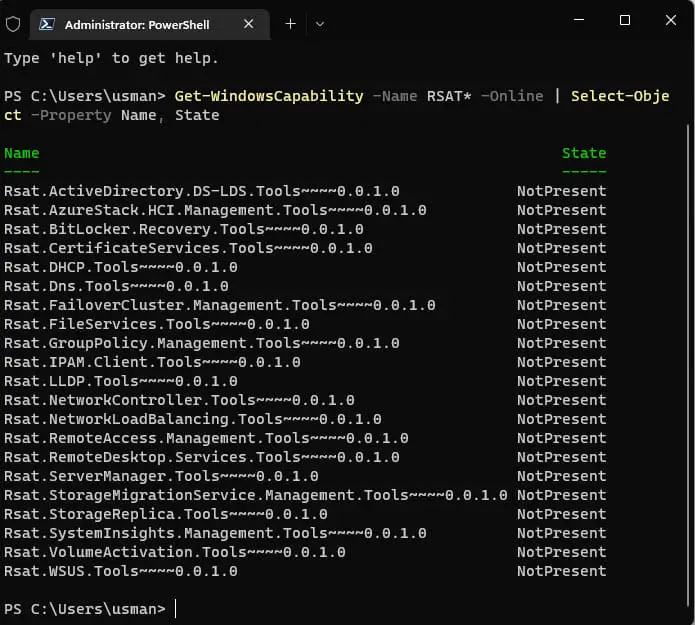
First, list down all the available RSAT tools. Open PowerShell as an administrator and run the following command:
Get-WindowsCapability -Name RSAT* -Online | Select-Object -Property Name, State.For example, here is the output when I run this command on my computer:
- Rsat.ActiveDirectory.DS-LDS.Tools Rsat.AzureStack.HCI.Management.Tools~~~~0.0.1.0
- Rsat.BitLocker.Recovery.Tools Rsat.CertificateServices.Tools Rsat.DHCP.Tools~~~~0.0.1.0
- Rsat.Dns.ToolsotPresent Rsat.FailoverCluster.Management.Tools Rsat.FileServices.Tools~~~~0.0.1.0
- Rsat.GroupPolicy.Management.Tools Rsat.IPAM.Client.Tools Rsat.LLDP.Tools~~~~0.0.1.0
- Rsat.NetworkController.Tools Rsat.NetworkLoadBalancing.Tools~~~~0.0.1.0
- Rsat.RemoteAccess.Management.Tools Rsat.RemoteDesktop.Services.Tools~~~~0.0.1.0
- Rsat.ServerManager.Tools Rsat.StorageMigrationService.Management.Tools~~~~0.0.1.0
- Rsat.StorageReplica.Tools Rsat.SystemInsights.Management.Tools~~~~0.0.1.0
- Rsat.VolumeActivation.Tools Rsat.WSUS.Tools~~~~0.0.1.0
Copy the name of the tool you want to install and run the command, such as follows:
Get-WindowsCapability -Name Rsat.BitLocker.Recovery.Tools~~~~0.0.1.0 -Online | Add-WindowsCapability -OnlineIn the above mentioned command, I’m installing the RSAT bitlocker module.
To install all the modules simultaneously, run the following command instead:
Get-WindowsCapability -Name Rsat* -Online | Add-WindowsCapability -Online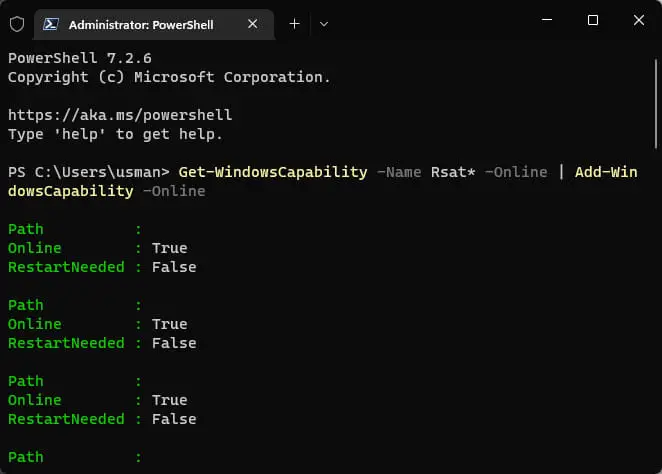
How to Run the Installed Remote Server Administration Tools on Windows 11
While Microsoft is making installing RSAT tools easier, it is certainly not easy to find where they have been installed and how to run them. You can search in Windows Search or in the Start Menu if you know the name of the tool. Or you should go to the following location:
Start Menu >> All apps >> Windows tools
This will open a folder where you will find all the RSAT tools installed on this computer. Double-click on any tool to run it.
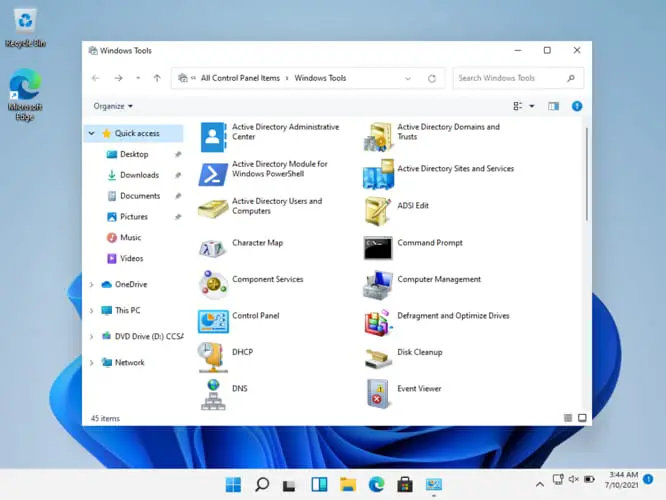
After running the tool, manage the respective component of different servers directly from your Windows PC.
Closing Thoughts
The Remote Server Administrator Tool (RSAT) is the one tool that is often overlooked. Admins are often used to the fact that they can remotely log into any computer and server on the domain, that they forget the fact that there is an even easier method of managing the many different servers in their network.
If you have not used the RSAT tools on your Windows PC before, we recommend that you do so, even if you have only one server to manage. You will find this tool very convenient and time-saving to use.



8 comments
bala
am using windows 11 home….is there is any other option to install active directory in windows 11 home
Steve
There is also an incorrect space in one of the commands
It should be Add-WindowsCapability as per below
Get-WindowsCapability -Name RSAT* -Online | Add-WindowsCapability -Online
Not “Add-Windows Capability”
Usman Khurshid
Hi Steve, thanks a lot for the correction. I have corrected the commands in the article.
Djiby THIAM
The correction should be for example below :
Get-WindowsCapability -Name Rsat.ActiveDirectory.DS-LDS.Tools~~~~0.0.1.0 -Online | Add-WindowsCapability -Online
Effectively working for me
chris
none of these worked, installing through setting fails out everytime, powershell doesn’t recognize the commands
Jeff
Did you ever resolve this issue Chris?
anggy noviady
Add-WindowsCapability -Online -Name tool-name
use this
Usman Khurshid
What version of Windows 11 are you using? Make sure you are running Windows 11 Pro otherwise, the Home edition won’t install RSAT tools.