Both Windows 10 and 11 automatically install Windows Cumulative updates without giving the user a chance to choose whether he/she wants to install it or not unless you have manually turned off Windows Update.
If you feel that you are being cornered by Microsoft, worry not! You can uninstall Windows cumulative updates using any of the methods shared below.
This post discusses how you can remove a Windows cumulative update, especially if you are having trouble with it. Since many updates have known issues, there may be a good enough reason for you to remove it from your PC.
Uninstalling a Windows update is an easy process. The methods we have discussed here involve both the Graphical User Interface (GUI) of Windows as well as the Command Line Interface (CLI). Also, if your most recent Windows update is not letting you log in, you can uninstall it without booting it in.
Table of contents
Uninstall Windows Cumulative Update using Control Panel
Here is how you can uninstall an update through the Control Panel:
Note: Ensure that you are logged into the computer as an administrator. If not, learn how to launch the Control Panel with administrative privileges.
-
Open the Programs and Features applet by typing in “appwiz.cpl” in the Run Command box.

Open Programs and Features applet -
Click “View installed updates” from the left.
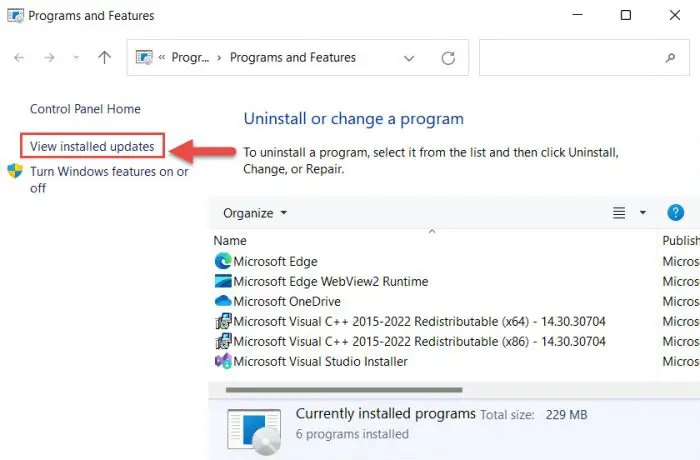
View installed updates -
Double-click the update that you want to remove from the list.
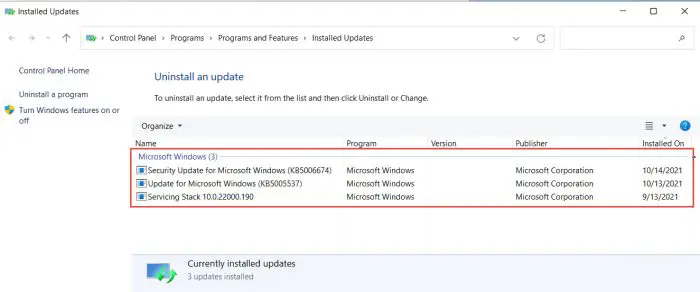
Select the Windows update to remove -
When asked to uninstall the update, click Yes.
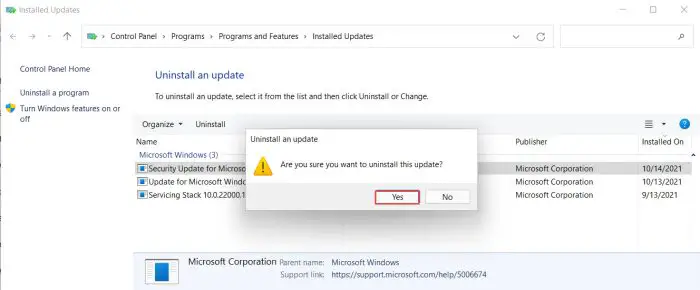
Confirm action Windows will then begin the uninstallation process. This may take a few minutes, depending upon the size of the update to be removed.
-
If needed, restart the computer.
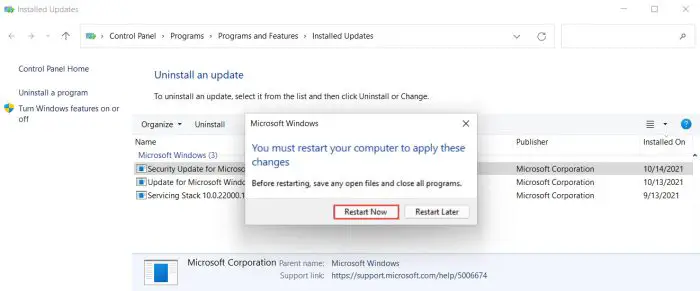
Restart computer Once it is uninstalled, you will need to start the computer if needed.
You may also click “Restart Later” if you wish to reboot at a later time. The changes will only take effect when the device is restarted.
The update you double-clicked on earlier will then be removed. You can recheck it by navigating to the Installed updates page, or by typing in winver in the Run Command box and confirming whether the Windows build has rolled back or not.
Uninstall Windows Cumulative Update from Settings App
You can also remove Windows updates from the Settings app. Here is how:
-
Navigate to the following:
Settings app >> Windows Update >> Update history >> Uninstall updates
-
Here, click “Uninstall” beside the update that you want to remove.
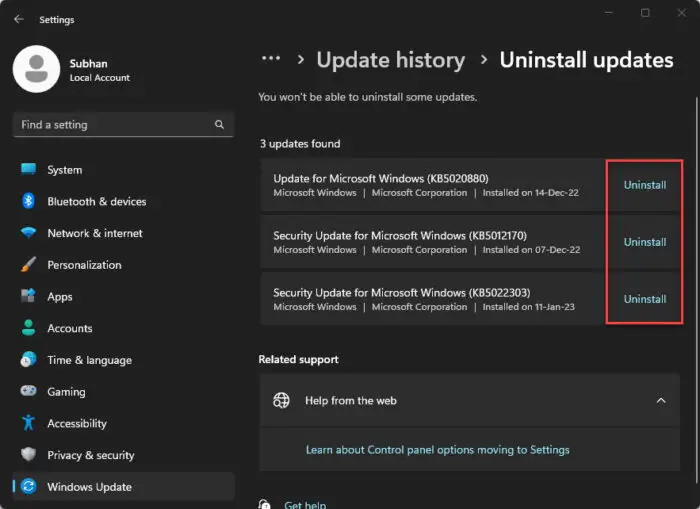
Uninstall a Windows update from the Settings app -
Click “Uninstall” again to confirm.
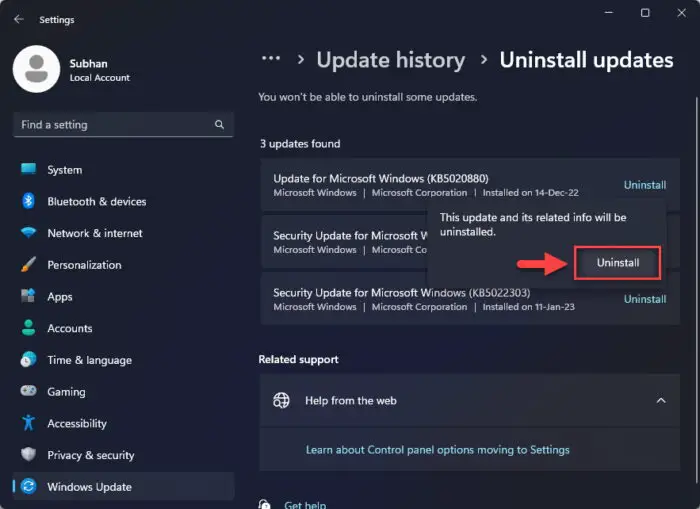
Click Uninstall The update will now remove itself whilst showing a progress bar on the Uninstall Updates Settings page.
-
Restart the computer to finalize the Windows update removal.
Uninstall Windows Cumulative Update using Command Prompt
Another way to uninstall a Windows cumulative update is through the CLI. This is a great method mostly used by sysadmins for a quick and controlled (through switches) removal of an update.
This method also does not have that many steps and hence can be performed rather quickly. Here is how to do it:
-
Run the following cmdlet in an elevated Command Prompt:
wmic qfe list brief /format:table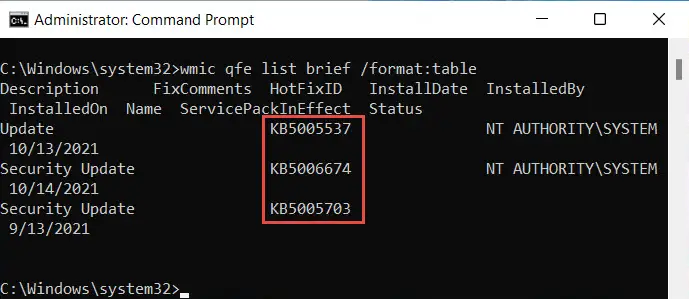
View installed Windows updates in Command Prompt -
Use the following cmdlet to uninstall an update while replacing [UpdateNumber] with the KB number of the Windows update:
wusa /uninstall /kb:[UpdateNumber]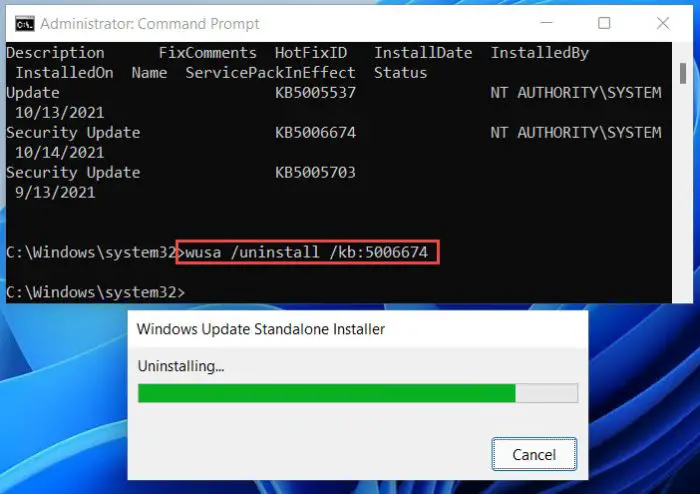
Uninstall Windows update from Command Prompt If prompted for a confirmation, click Yes.
-
When the update has been removed, restart the computer.
When rebooted, you can confirm that the Windows update has been removed successfully through the Installed updates page in the Control Panel.
Uninstall Windows 11 Updates Without Booting into Windows (WinRE)
Another method to remove an installed Windows update is through the Windows Recovery Environment (WinRE). This way you do not have to boot into the operating system itself. This method is ideal to be used if you can’t boot up your OS.
Follow these steps to remove an installed Windows update without booting into Windows:
-
Create a bootable USB drive using the same OS as the installed OS.
-
Boot from the USB using the One Time Boot Menu.
-
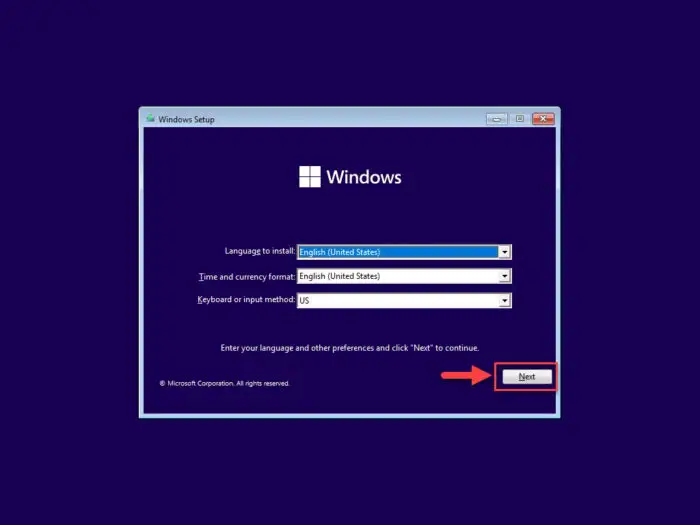
On the first screen, click Next.
Proceed -
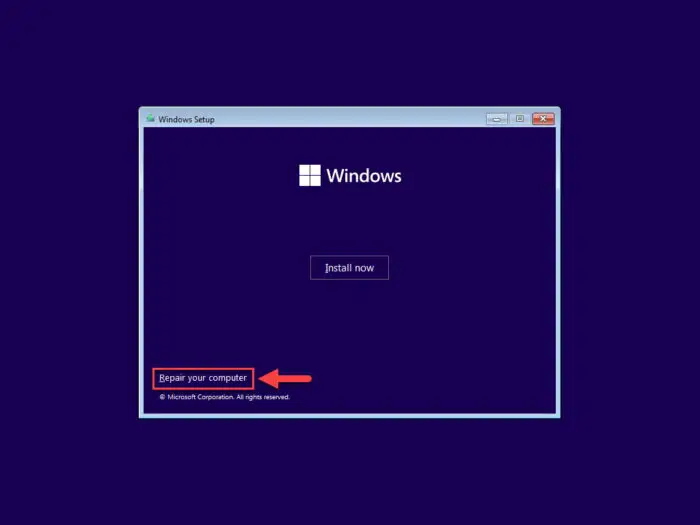
Click “Repair your computer.”
Repair computer -
Select “Troubleshoot.”
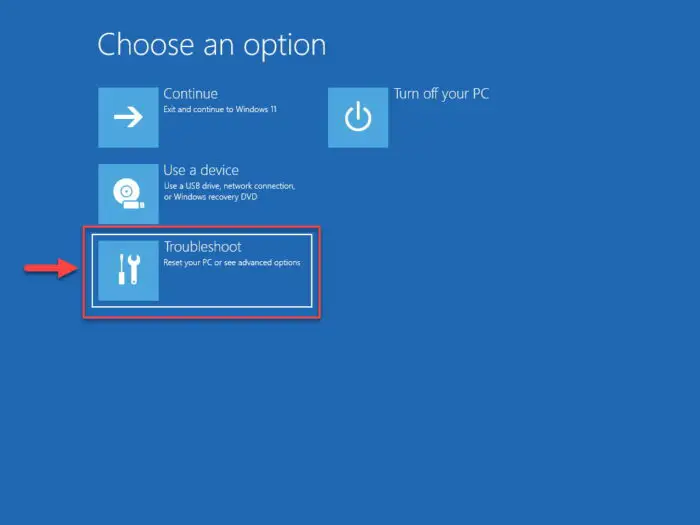
Select Troubleshoot from WinRE -
Select “Advanced Options.”
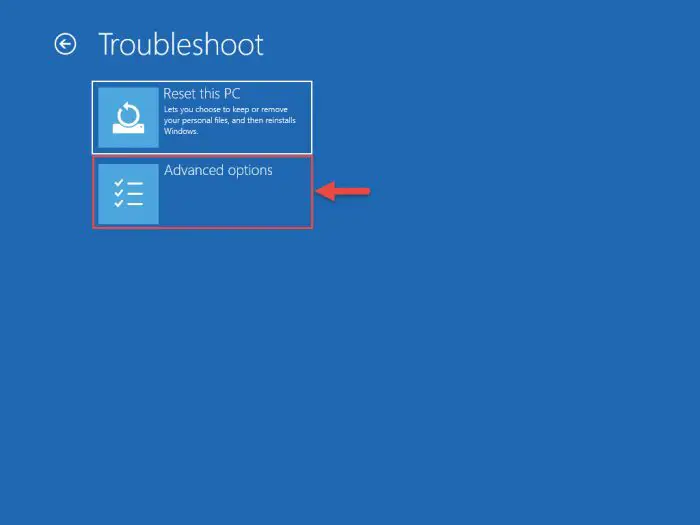
Select advanced options -
Click “Uninstall Updates.”
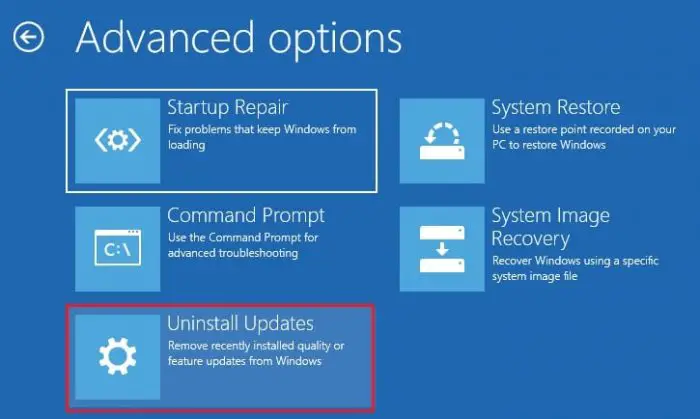
Select Uninstall Updates -
Click “Uninstall latest quality update.”
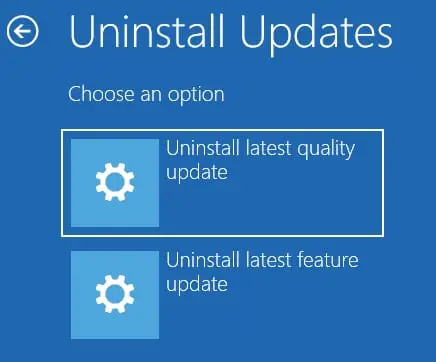
Select the type of update to uninstall Click “Uninstall latest feature update” if you wish to revert to an older version of Windows.
-
Now choose the target OS.
This is in case there is more than one instance of the operating system running on the host device.
-
Click “Uninstall Update” to remove the last installed Windows update.
Final Verdict
All Windows updates are not always beneficial for your system’s stability. Even though they are vetted through the Windows Insider Program, some of them may occasionally make your PC behave abnormally.
It is recommended that you uninstall such mischievous Windows updates until Microsoft fixes them.
Additionally, we would also like to recommend that you boot into Safe Mode in case you cannot boot your operating system under normal conditions, and then try the methods above to uninstall a Windows update.
FAQs
Can cumulative updates be uninstalled?
Yes. Type in appwiz.cpl in Run and then click View installed updates. Double-click on the update that you wish to remove. A reboot will be required once the update is uninstalled.
How to roll back/downgrade from Windows 11?
You can roll back from Windows 11 to Windows 10 only if you upgraded your OS and did not perform a clean install. To rollback to Windows 10, navigate to Settings app >> System >> Recovery >> Go Back.
What happens if you uninstall a Windows 11 update?
All features and fixes that came with the update will be removed and the OS build will revert. However, the update will try to install itself again once you check for Windows Update. Therefore, it is recommended that you pause the updates for anywhere between 1-5 weeks.

