Visual Studio is a collection of tools and services to help you create desktop and web applications quickly in a well-managed and well-facilitated IDE. Visual Studio 2013 comes with the XAML editor Intellisense for data binding to the XAML editor. The developers will now be able to develop cloud based applications making use of Office 365 Cloud Business App Template. Besides, CodeLens feature provides contextual insights inline to the source code.
Visual Studio Online allows you to connect your project with the developers, testers and stakeholders. With the online version, you can create environment for your team that may include Team Foundation Server or GIT repositories. You can even connect to the Eclipse and XCode development tools using Visual Studio Online. It lets you create and store your code, backlog and test details of any project in the cloud. It comes with five free Basic Users and includes shared monthly resources for build and load testing. As your team expands, you may need to upgrade your user plan.
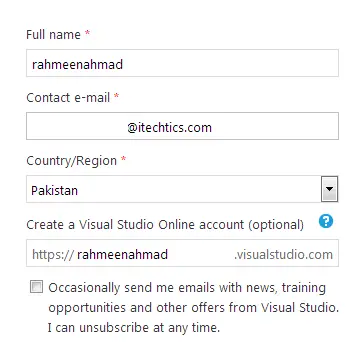
If you are a Microsoft account holder, create your Visual Studio Online account now. Sign in with your Microsoft account credentials, make a choice among available Visual Studio versions. You will be asked for some contact information and an option to create an account of Visual Studio domain. This is optional, but why miss such an opportunity ?
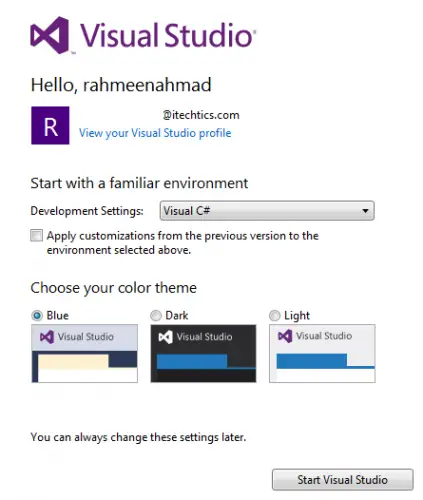
It is time to get your hands on the Visual Studio 2013. The first time use will let you configure the development environment and will be connected to your online account.
- Click Start Visual Studio to continue.
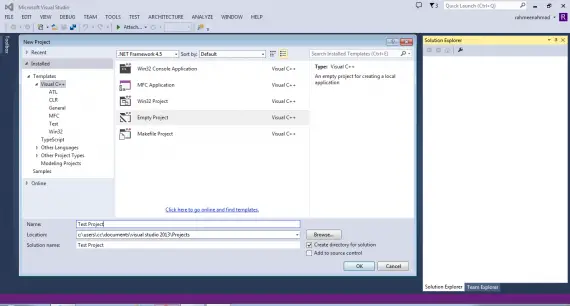
There is no big change in the look and feel of the IDE . So, you can easily create a new project by :
- Go to File ->New Project/Solution
- Choose the programming language
- Now choose your project type. It can be web application, console application or a simple desktop application.
- Select the ‘Empty Project’, for desktop application
- Give a suitable name
- Click Browse -> Set the project location
- By default, the project location is Documents->Visual Studio 2013 -> Projects, where the project files and solution is saved.
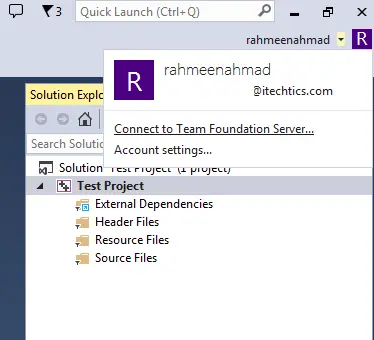
You can also connect to the project in the Team Foundation Server.
- Click Team Explorer->Team Foundation Service
- Or Go to account name drop-down
- Select Connect to Team Foundation Server
- Select the desired project from the list
- Click Connect and Proceed
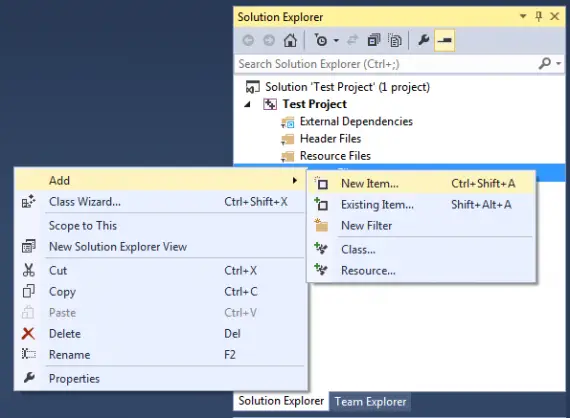
Solution Explorer, appears at the right pane, contains all the files of opened project. If solution explorer does not appear, go to View-> Solution Explorer. Solution Explorer lets you navigate through the project files and groups them in to header, resource or source files. You can either create a new file or add a file from another project.
- Right Click on the Source Files-> Add -> New Item.
- Select the type of file. (Select .cpp file for a C++/C# code)
- Save the file with appropriate name
Recently, a colleague asked me ‘How to hand over a project to client without giving him the code’. You may also come across this situation and so I thought it important to share the answer with you all. You can create a Click Once Application of your project through the Visual Studio IDE. The publishing wizard will convert your project into an application. This application can be published as either desktop application or a web application.
- Select the Project Solution in solution explorer
- Go to Build -> Publish <Project Name>

- Click Browse -> Select the publishing location
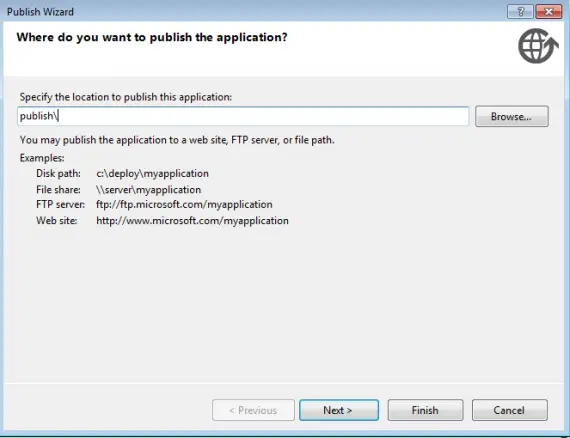
If you wish to deploy your application on any website, and want people to download it from any website:
- Specify the URL using the format http://www.microsoft.com/foldername, and then click Next.
- In the ‘Will the application be available offline?’ page, click the appropriate option:
- If you want to allow offline execution of the application, click Yes.
- It will also create a shortcut on Start screen.
You may also publish application to file share in the format c:deploymyapp or \servermyapp
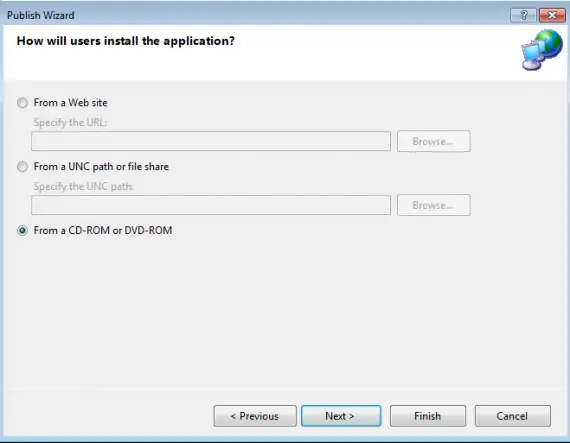
If you want to publish a portable, standalone application which can be downloaded from removable media:
- Select From a CD-ROM or DVD-ROM.
- Click Next.
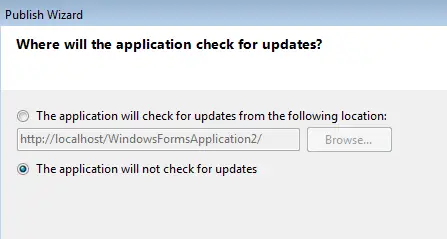
The next page will ask you about the settings for update.
Click finish and it will take a few minutes to publish your application. The targeted folder (where your application is published) will contain three items:
- Application files
- Setup
- And the application
You can give this complete folder to any client or the user intended.

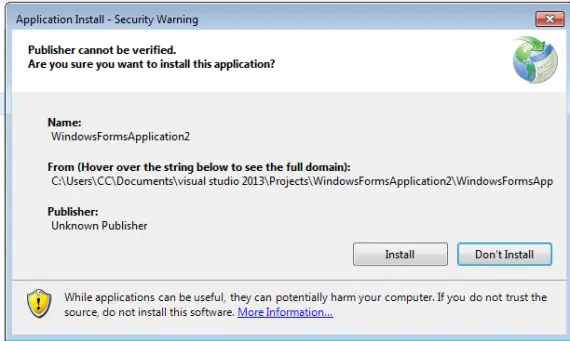
Run the set up and install the application, for the first time use.
Visual Studio 2013 direct download links can be found here.
Hopefully this tutorial will get you started with your first project in Visual Studio 2013. We’ll be glad to have your questions and queries answered in the comments below.

