Key Points
- Open the Snipping Tool, select the Record (video camera) icon, click New, select the screen portion to record, and click Start to record the screen.
- For screen recording using the Xbox Game Bar, press the Windows Key + G to launch it, and click the Record button in the Capture widget to begin screen recording.
While capturing a screenshot on Windows 11 or 10 is easy, recording the screen isn’t a very pleasant experience for many. You may find yourself having to record your screen actions for tutorials, videos, and whatnot. Rather than having to install third-party software, you can use Windows-native applications for screen recording.
On Windows 11, you can use the Snipping Tool as well as the Xbox Game Bar to record the screen. Both of these tools offer whether you want to record the audio coming from the microphone as well. Moreover, the Xbox Game Bar allows you to record an app’s audio, which can come in handy when recording the screen during gameplay.
That said, on Windows 10, you only get the option to record the screen using the Game Bar. Otherwise, you must use external applications.
This guide discusses how you can record your screen using both of these methods and manage the different settings associated with them.
Screen recording with Snipping Tool
The Snipping Tools comes preinstalled with both Windows 10 and Windows 11. Although it is the same app on both operating systems, the versions available are different, and therefore, the older version on Windows 10 lacks the feature of screen recording.
On the other hand, the latest versions of Windows 11 have an updated Snipping Tool app, that is not only modern in looks but also incorporates the screen recording feature. Therefore, this ability only lies within Windows 11 to record the screen with the Snipping Tool.
Additionally, the Snipping Tool lets you select a portion of the screen, or the whole screen to record. If you select a portion of the screen, then any window or app open within that portion will be recorded. You can also choose to record microphone input system audio or exclude them on demand.
Use the following steps to record your screen using the Snipping Tool on Windows 11:
-
Start by searching for Snipping Tool in the search box in the Start menu, and open it.
-
Click the 3 dots in the top-right corner of the app and then click Settings.
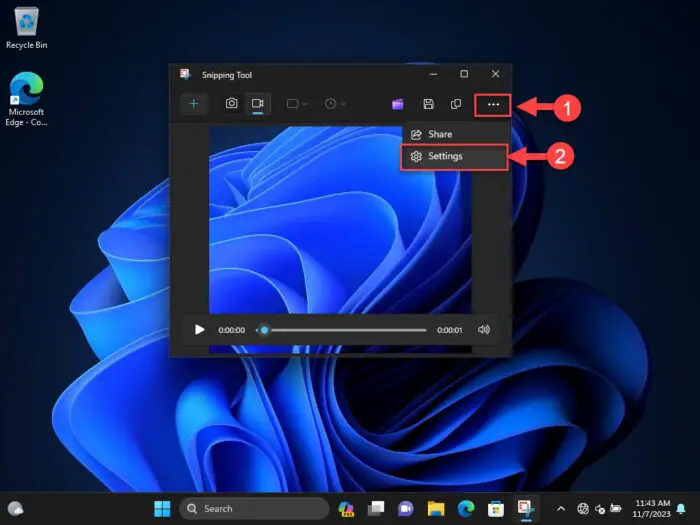
Open Snipping Tool settings -
Scroll down to the “Screen Recording” section and select whether you want to include microphone input or system audio by toggling the sliders in front of the respective option.
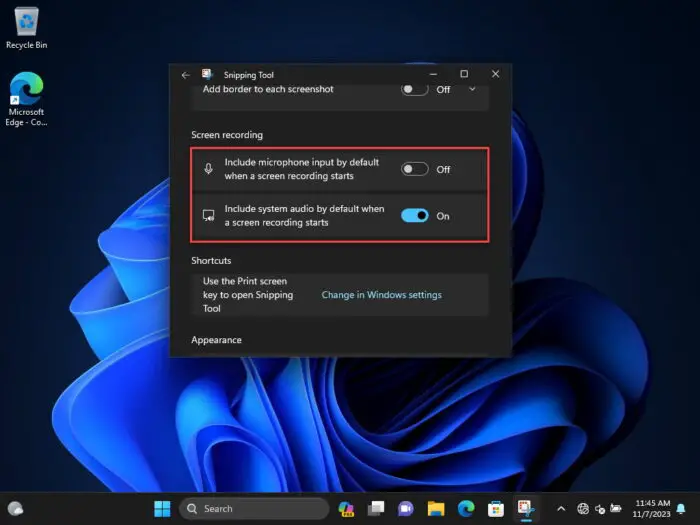
Choose to include microphone audio and system audio in screen recording using the Snipping Tool -
No go back and toggle the Record button so that the icon with the video camera is selected.
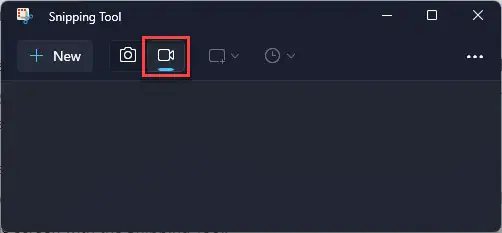
Select the video camera icon in the Snipping Tool -
When ready to record, click New.
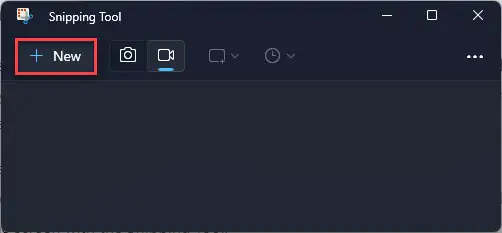
Start a new recording -
Now select a portion on the screen to record by clicking and dragging the mouse cursor.
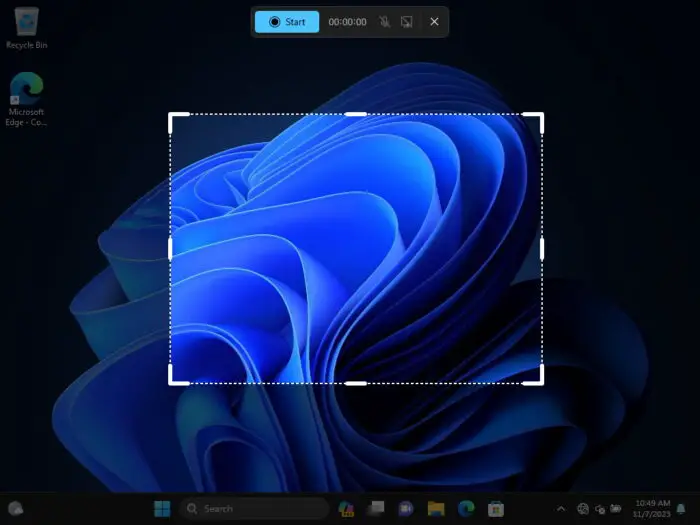
Select the area to record -
Click Start in the control bar.
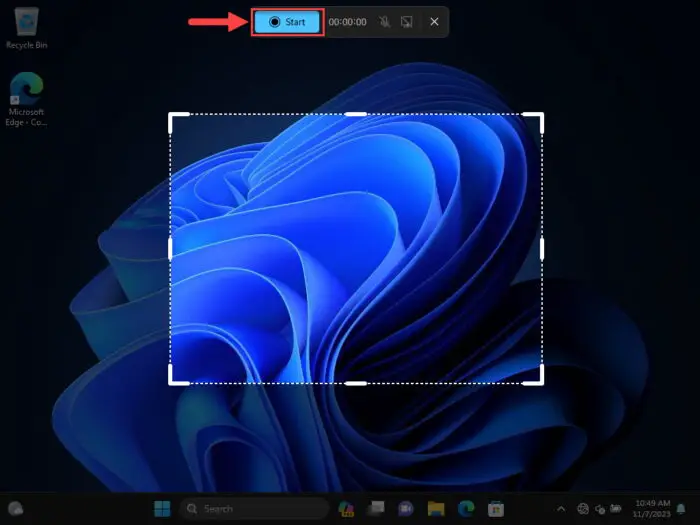
Start screen recording with the Snipping Tool Snipping Tool will then show a 3-second timer after which it will start recording the predefined area.
-
When you are done with the recording, click either Pause or Stop from the control bar.
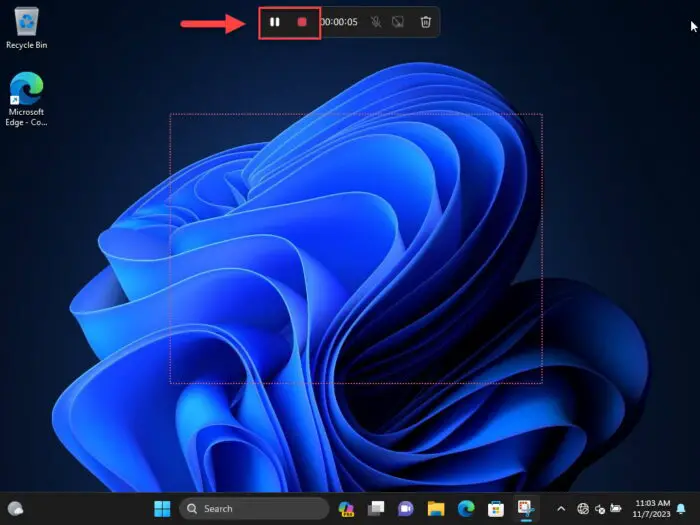
Pause or stop recording
When you click the Stop button, the Snipping Tool will display the recording which you can now play. After having verified it, you may click the Save icon and continue to save the recording in the default MP4 format.
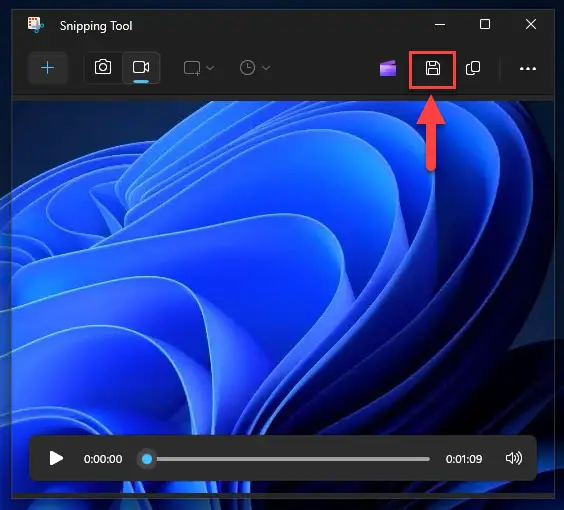
The default location for saving the screen recordings is the Videos folder [c:\users\[username]\videos]. However, you can change it and pick a location of your choosing.
If you do not like following the steps given above, you can use this video tutorial instead to use the Snipping Tool to record a portion of your screen on Windows 11:
Screen recording with Xbox Game Bar
The Xbox Game Bar is a set of overlays designed to control and monitor your gaming experiences. It also has other integrated widgets, such as controls, Spotify, and screenshots and screen recordings. You can record the screen with the Xbox Game Bar, and choose whether to include microphone and app audio.
Use the following steps to configure the Xbox Game Bar and then record the screen with it. Note that you cannot select a portion of the screen to be recorded – the entire display is recorded.
-
Press the Windows Key + i to open the Settings app.
-
Go to the following:
Gaming > Captures
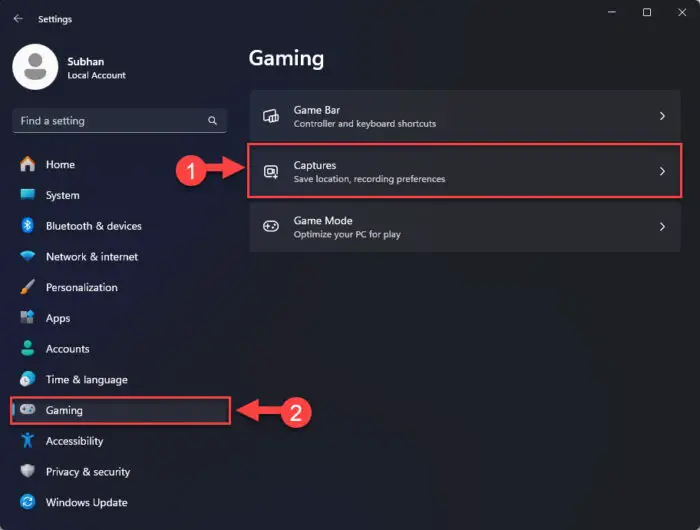
Open the Captures settings page -
On this page, choose your preferences for the screen recordings with the Xbox Game Bar. You can choose the following options:
- Default location to save screenshots and recordings
- Use Windows Key + Alt + G to capture moments in-game
- Max recording length
- Capture recording in-game
- Audio quality, mic, and system volume level
- Recording FPS
- Video quality
- Capture mouse cursor
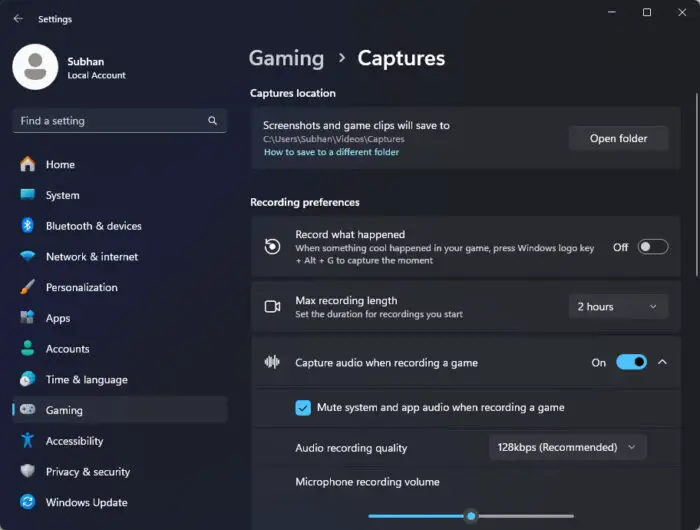
Manage Xbox Game Bar screen recording settings -
Now, go back to the screen that you want to record and press the Windows Key + G shortcut keys to launch the Xbox Game Bar.
-
In the Capture widget, click on the Record button with a circle in its middle to begin your screen recording.
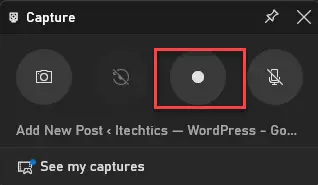
Start screen recording with Xbox Game Bar In a few seconds, you will notice the “Capture Status” overlay indicating the recording has begun, and a few controls.
-
When done with the recording, click the Stop button in the Capture Status overlay.

Stop screen recording -
Now click on the recording notification to open what you just recorded. This will launch the Gallery widget.
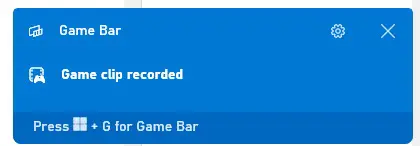
Open the captured recording -
In the Gallery widget, you can play the screen recording, and choose whether to delete it or not. Note that the recording is already saved and does not need further action.
These are the two native methods to record your screen on your Windows computer. Other than these, you can also use third-party applications for further support and features.
Screen recording with applications
The Microsoft Store and the internet are filled with applications and extensions that let you record your screens, whether you are using another app, a game, or a browser. However, not all of them can be trusted since their manufacturers are unverified.
Therefore, we have put together a short list of trusted screen recording apps, that are both free and paid, that you can try out. These apps also offer great controls, such as the quality and duration of the recording, audio inputs, etc.
Here is a list of apps you can try out that are completely safe:
- Screen Recorder for Windows 11
- Screen Recorder (extension for Edge)
- Filmora Screen Recorder
- Full Screen Recorder (extension for Chrome)
Closing words
Screen recording can come in handy for many different purposes. Whether gathering proof, providing a detailed guide, or simply capturing moments with your friends and loved ones while on video chat – screen recording is a feature in Windows that everyone can enjoy.
If you are looking for methods to record your screen with convenience, then this guide gives two methods to do just that without having to purchase or install any third-party apps.


