There are several ways to format a USB drive on a Windows computer. Some offer a Graphical User Interface (GUI) while other methods can be applied using the command-line tools which the operating system offers.
In this article, we will discuss how to properly format a USB drive using Windows PowerShell and the Command Prompt.
These methods can come in handy if you are a command-line fanatic and want to save time by formatting a USB drive in a few easy commands, rather than having to navigate through several windows to get the job done.
Table of contents
How to Format Drive using PowerShell
Create Single Partition
Windows PowerShell is a powerful command-line tool in Windows that allows you to perform administrative tasks on your computer. Follow the steps given below to format a USB drive using this tool and create a single partition.
Note: This method works regardless of the drive letter being assigned to the USB drive.
- Plug the USB device onto your computer.
- Now open PowerShell with administrative rights and paste the following. This will give you the number associated with the USB flash drive, which will be used in the steps below.
Get-Disk
- Now use the following cmdlet to erase all data from the drive, while replacing Number with the number associated with the USB drive noted in step 1 above.
Clear-Disk -Number <em>Number</em> -RemoveData
- When asked for a confirmation, type in A and hit Enter.

- Now use the following cmdlet to create a single, new partition consisting of the maximum usable space on the drive. Replace Number with the number associated with the drive noted in step 1, and Label with the new label which you want to give the new volume.
New-partition -DiskNumber <em>Number</em> -UseMaximumSize | Format-Volume -FileSystem NTFS -NewFileSystemLabel <em>Label</em>
- The drive has now been formatted. Now assign a drive letter with the cmdlet given below, replacing the number with the disk number listed in step 1 above, and DriveLetter, which you want to assign to this USB.
Note: Ensure the drive letter is not being used by another volume on the computer.Get-Partition -DiskNumber <em>Number</em> | Set-Partition -NewDriveLetter <em>DriveLetter</em>
After entering the last command, the USB drive will be accessible and will automatically open in Windows Explorer.
Create Multiple Partitions
You can also create multiple partitions of a USB drive using PowerShell, rather than just a single big partition. Here is how to create multiple partitions of a USB drive using PowerShell:
- Open PowerShell with administrative rights and paste the following. This will give you the number associated with the USB flash drive, which will be used in the steps below.
Get-Disk - Now use the following cmdlet to erase all data from the drive while replacing Number with the number associated with the USB drive noted in step 1 above.
Clear-Disk -Number <em>Number</em> -RemoveData - When asked for a confirmation, type in A and hit Enter.
- Now use the command below to create a new parition of a specific size, format it, and assign a drive letter, all in one cmdlet. Replace Number with the number associated with the USB drive noted in step 1 above, Size with the size of the partition that you want to create, DriveLetter with the letter that you want to assign, and Label with the label that you want to assign to this partition.
Note: Ensure that the drive letter is not being used by another volume on the computer.New-Partition -DiskNumber <em>Number</em> -Size <em>Size</em>gb -DriveLetter <em>DriveLetter</em> | Format-Volume -FileSystem NTFS -NewFileSystemLabel <em>Label</em>
- Repeat step 4 to create additional partitions in the USB drive.
Note: The combined space of the partitions cannot exceed the total space available on the drive. - At the end, create a volume of all remaining space on the drive using the given cmdlet:
New-Partition -DiskNumber <em>Number</em> -Size $MaxSize -DriveLetter <em>DriveLetter</em> | Format-Volume -FileSystem NTFS -NewFileSystemLabel <em>Label</em>
You will now have to create at least 2 partitions on the drive using the steps given above.
We would like to highlight that you may be prompted with a message stating the following as you are performing steps 4, 5, or 6 above:
Please insert a disk into USB drive (X:)

This message can be ignored as shortly after, Windows completes the formatting process of the partition and creates the partition successfully.
How to Format Drive using Command Prompt
Diskpart is a command line utility used to manage Windows computer drives, including disks, partitions, volumes and virtual drive disks. It can be used to format a drive safely and securely. We will use diskpart utility to format the drives from Command Prompt.
You can also format a USB drive using Command Prompt. However, this tool requires 2 different methods for a situation, depending on whether there is already a drive letter assigned to a USB partition.
Format Drive with Drive Letter
Perform the following steps using the Command Prompt to format the drive if a drive letter is already assigned to it.
Note: This method will only format the existing partition(s) on the USB drive and will not resize them.
- Plug in the USB device to your computer.
- Open the Command Prompt with administrative privileges and paste the following to obtain the drive letter(s) of the USB partition(s).
WMIC LogicalDisk Get DeviceID, VolumeName, Description
- Now that you have the associated drive letter, use the following cmdlet to format the partition, while replacing DriveLetter with the drive letter of the partition and Label with the new label that you want to give.
Note: Press Enter twice to confirm the volume is attached to your computer.Format <em>DriveLetter</em>: /v:<em>Label </em>/fs:NTFS /q
- Repeat step 3 in case you wish to format more volumes on the drive.
That’s it! The drive partition will now be formatted successfully.
Format Drive Without Drive Letter
If your USB partitions do not yet have a drive letter, use this method to format them using the Command Prompt.
- Attach the USB to your computer.
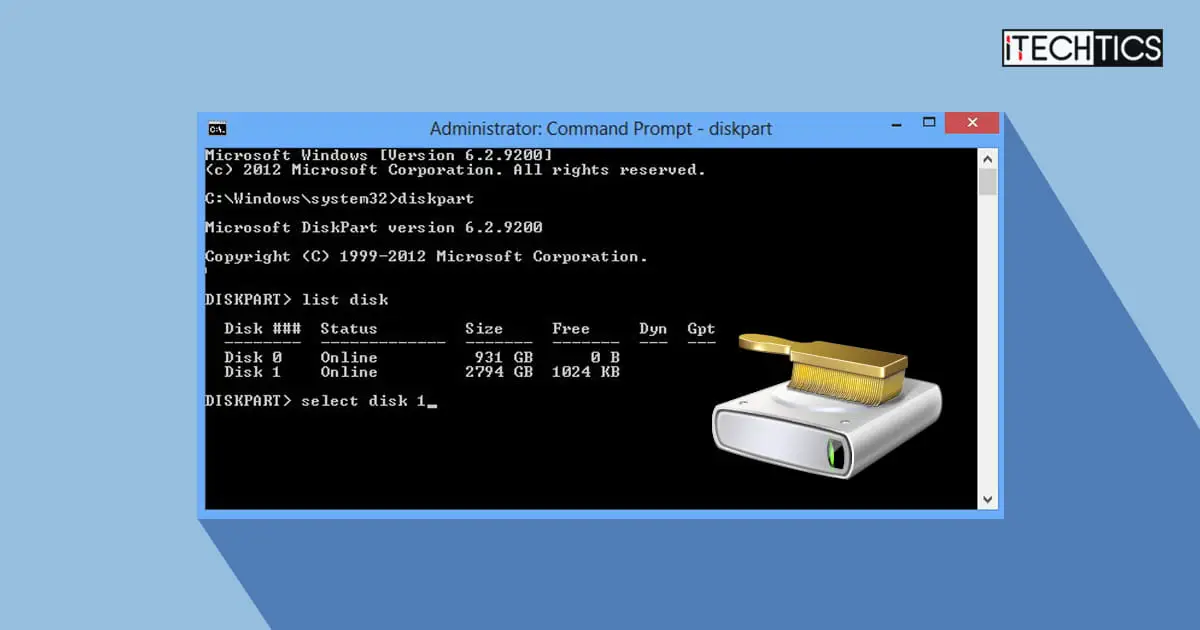
- Open the Command Prompt with administrative privileges and paste the following to enter Disk Partition mode:
Diskpart
- Now paste the following and note down the disk number associated with the USB drive.
List Disk
- Now select this disk using the given cmdlet, while replacing Number with the disk number noted in step 3.
Select Disk <em>Number</em>
- Now delete all the data on the disk using this cmdlet:
Clean
- Now create a single, big partition on the drive using this cmdlet.
Create partition Primary
- Now enter the following command to quickly format the partition. Replace Label with any custom label that you want to assign to the volume.
Format fs=NTFS Label="<em>Label</em>" quick
- Now paste the following cmdlet to automatically assign a drive letter to this partition.
Assign
The USB drive will now be formatted successfully and will automatically open in Windows Explorer.
Closing Words
Although many of you would prefer to format a drive using the GUI-based Explorer, using the command-line has its advantages. If you are a sysadmin who spends most of their time on the command line, especially PowerShell, then you would know that it enables you to perform all sorts of administrative tasks from a single interface.
Similarly, you can now also format drives, according to your needs and specifications, directly from Command Prompt or Windows PowerShell, without having to switch between windows.


