Microsoft first introduced the “God Mode” in Windows 7. Although this is not an official name for the mode, it was named “God Mode” by users, as it can perform almost anything within the operating system. The name then caught on and became popular. You can enable God Mode using a simple trick discussed below.
The “God Mode” folder is a hidden folder in the Windows operating system that provides quick and convenient access to Windows administrative tools, such as various Microsoft Management Consoles (MMCs), system configurations, hardware configurations, etc.

After Windows 7, all future Windows versions have this hidden gem, which is especially useful for system administrators and people wanting to manage their computers with their own customizations and preferences.
However, this feature needs to be enabled manually. In this post, we are going to discuss what exactly God Mode is, and how you can activate it.
What is Windows God Mode
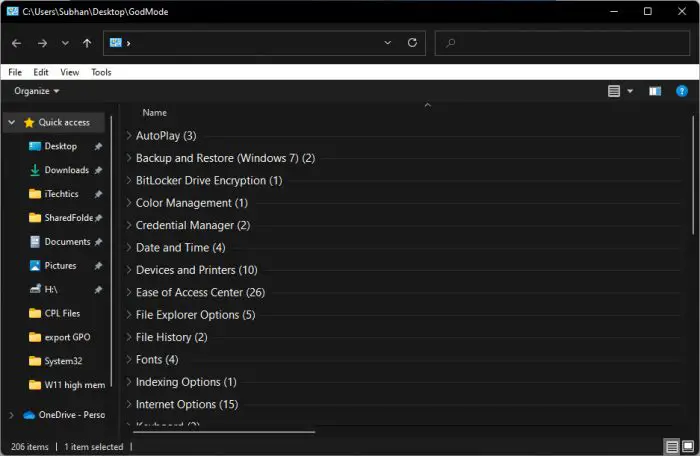
Unlike in games, God Mode in Windows does not perform miracles. Rather, it is a centralized folder that gives quick access to certain manageable Windows components. These components are already accessible through the Windows Control Panel. However, users need to look for and navigate through the different applets within the Control Panel before they reach what they were looking for.
The tool can also be searched through the Start Menu, but that only works if you already know what to look for.
With the God Mode folder, all your important tools can be found under one roof. Moreover, you can also create shortcuts to these tools and place them anywhere on your PC.
Here is a list of all the categories you can find within the God Mode folder:
- Administrative Tools (Windows Tools)
- AutoPlay
- Backup and Restore
- Color Management
- Credential Manager
- Date and Time
- Devices and Printers
- Ease of Access Center
- File Explorer Options
- File History
- Fonts
- Indexing Options
- Infrared
- Internet Options
- Keyboard
- Mouse
- Network and Sharing Center
- Pen and Touch
- Phone and Modem
- Power Options
- Programs and Features
- Region
- RemoteApp and Desktop Connections
- Security and Maintenance
- Sound
- Speech Recognition
- Storage Spaces
- Sync Center
- System
- Tablet PC Settings
- Taskbar and Navigation
- Troubleshooting
- User Accounts
- Windows Defender Firewall
- Windows Mobility Center
- Work Folders
Each of these categories then has a number of different settings you can manage.
Let us now show you how to activate this mode in Windows.
How to Enable God Mode in Windows
Perform the following steps to activate God Mode:
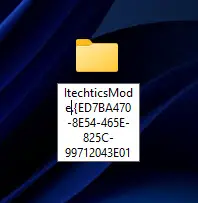
- Right-click on an empty space on the Desktop, expand New from the context menu, and then click Folder.

- Paste the following as the name of the new folder and hit Enter. You can replace Name with anything you want to name this folder, but people usually prefer “GodMode.”
<em>Name</em>.{ED7BA470-8E54-465E-825C-99712043E01C}
You will now notice that the folder’s icon has changed to a Control Panel icon, as it should.

Note: If the icon has not changed, restarting your computer will change it.
We experienced this issue with Windows 11. However, in Windows 10, the icon changed immediately.
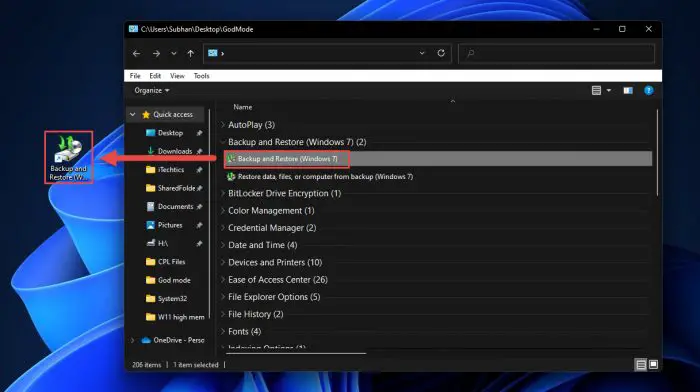
You can now open this folder and begin with your configurations. You can also drag and drop the different components from the God Mode folder onto your desktop (or anywhere else) for easier access to the settings by creating shortcuts.

Closing Words
With Microsoft shifting Windows controls from the Control Panel to the new Settings app, it is becoming more and more difficult to look for the configuration settings you need. That is why we recommend that you try out this God Mode and see how simpler your life gets.


