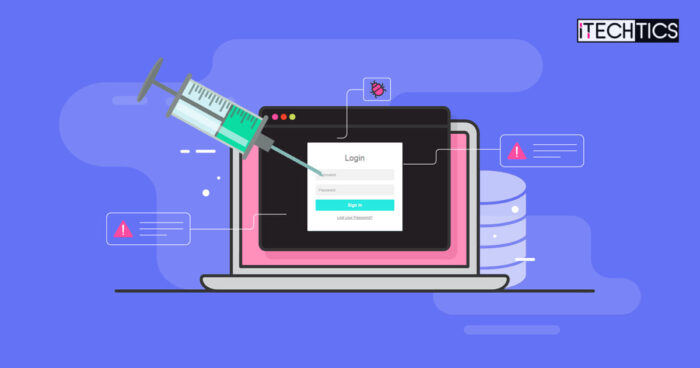
In light of the alarming increase in online attacks and hacks, it is becoming increasingly critical to protect your online accounts and social media platforms. Large tech companies such as Alphabet (the parent company of Google) and Meta (the parent company of Facebook, Instagram, and WhatsApp) have taken precautionary steps to enroll potentially-targeted accounts in their Protection Programs.
Meta’s Protection Program involves enrolling Facebook accounts of politicians, journalists, activists, and other high-targeted people and making them more secure, starting with mandatory two-factor authentication. The program has only been announced and has not matured yet.
What is 2FA or Two Factor Authentication?
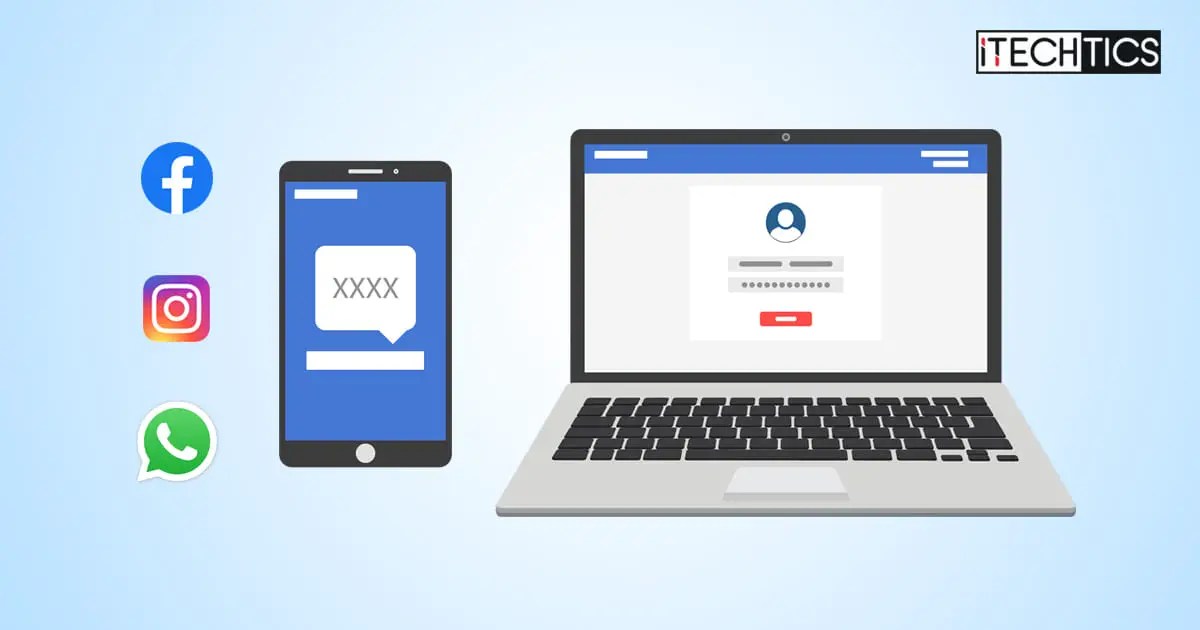
The two-factor authentication process (2FA), also known as two-step verification or dual-factor authentication, requires users to verify their identity using at least two different methods.
With that information disclosed; why wait? Two-factor authentication adds a layer of security that protects your online accounts with a combination of what you know (your password) and what you own (a mobile phone), making it more difficult for hackers to gain access to your accounts.
Table of contents
In this article, we have discussed how anyone can set up and configure two-factor authentication on Facebook, Instagram, and WhatsApp, significantly enhancing your security.
Before we dig into the methods, here is a quick summary of what modes can be used with each of Meta’s products for two-factor authentication
Enable Two-Factor Authentication
You can choose to authenticate using any of the following authentication methods for Facebook:
- A third-party authentication app (Google Authenticator works)
- Via text message (SMS)
- A security key (USB flash drive)
You can choose to authenticate using any of the following authentication methods for Instagram:
- A third-party authentication app (Only for mobile phones)
- Via a message through WhatsApp (Only for mobile phones)
- Via text message (SMS)
- Notification through mobile app where logged in (Only for mobile phones)
Unfortunately, there is currently only one method to validate yourself for two-factor authentication on WhatsApp, which is an additional security layer of a 6-digit Personal Identification Number (PIN).
Although this PIN is required for when a new device logs in using your phone number on WhatsApp, the app also asks for the PIN from time to time so that you do not forget it.
How to Enable Two-Factor Authentication for Facebook
You can access your Facebook account on your mobile phone via the app or through a web browser on your computer.
On Mobile
Follow the steps below to enable 2FA through Facebook’s mobile app:
Note: It is assumed that you have already signed up on the respective platforms and logged into your account via the respective apps.
- Open the Faceboom app on your phone, click on the 3 lines in the top-right corner, expand Settings & Privacy, and then click Settings.

- Now click Password and Security.

- Now click Use two-factor authentication.

- Now select a security method from the given options and then click Continue.

If you select Text message in the last step, continue with the steps below. If not, then follow the on-screen instructions.
- Now select the phone number on which you would like to receive the security code for 2FA and click Continue.

- You will now receive a code via SMS. Enter that code in the Facebook app and click Continue.

- Two-factor authentication will now be enabled. On the final screen, click Done.

You will now need to use your 2FA authentication method each time logging into your account.
In case you feel like switching off 2FA, follow the steps below:
- Navigate to the following:
Settings & Privacy >> Settings >> Password and Security >> Use two-factor authentication - Click Turn off.

- On the confirmation screen, click Turn off again.

- You will now need to provide the password for your Facebook account. Enter it and click Continue.

Two-factor authentication will now be turned off.
On a Web Browser
If you are keen on using Facebook on a computer via a browser, follow the steps below to enable two-factor authentication:
- Log into your Facebook account at www.facebook.com.
- Now click on the down-arrow button in the top-right corner, and then click Settings & privacy from the expanded menu.

- Now click Settings.

- Click Security and Login on the left, then click Use two-factor authentication on the right side.

- On the next screen, select your mode for authentication by clicking on the button below the option.

If you select Text message in the last step, continue with the steps below. If not, follow the on-screen instructions.
- From the popup, select the phone number you want to receive your codes on and click Continue.

- Now enter the password for your Facebook account as an added security measure, then click Submit.

- You will now receive a code on your phone number via SMS. Enter it in your browser and click Continue.

- 2FA will now be enabled. Click Done in the final window.

Two-factor authentication will now be enabled for your Facebook account. If you feel like switching off two-factor authentication via a web browser, follow the steps below:
- Navigate to the following:
Settings & Privacy >> Settings >> Use two-factor authentication - Click Turn off.

- On the confirmation screen, click Turn off again.

2FA will now be switched off.
How to Change Security Information on Facebook
Occasionally, a user may need to change their security information, such as their phone number or email address, so that the code is sent to the correct location. Follow the steps below to change your security information using the mobile Facebook app:
Note: The primary email address cannot be removed unless an alternate email address is provided, as a Facebook account is directly connected to your email address.
- Navigate to the following:
Settings >> Personal and Account information >> Contact Info - Now click Add Phone Number/Email Address and proceed with adding new security information. A verification will be required.
- Once added, return to the Contact Info page and click on the security information that you want to remove (if any).
- On the next page, click Remove.
- When asked for confirmation, check the box next to “I understand I could lose access to my account” and click Remove Number/Email.
Alternatively, you can also change the information from your web browser using the following steps: however, the option to change your email address and phone number is available at two different locations:
For the email address:
- Navigate to:
Settings & privacy >> Settings >> General - Click Edit in front of Ad account contact.
- Now click Change.
- Provide a new email address.
- Verify the new email address.
For phone number:
- Navigate to:
Settings & privacy >> Settings >> Mobile - Click Add another mobile phone number.
- Provide a new phone number and verify it with the code sent via SMS.
- Now return to the Mobile page and click Remove under the number you want to change.
- When asked for confirmation, check the box next to “I understand I could lose access to my account” and click Remove Number.
How to Enable Two-Factor Authentication for Instagram
Instagram has now become the epicenter for influencers, artists, business tycoons, and other digital art fanatics. Similar to Facebook, you can also apply 2FA to your Instagram account to make it more secure. Instagram offers more verification methods than Facebook and WhatsApp, as denoted in the section above.
On Mobile
Follow the steps below to enable 2FA for your Instagram account using the mobile application:
- Open the app and click on your profile icon from the bottom-right corner.
- Click on the 3 lines in the top-right corner and then click Settings.

- Now click Security.

- Then click Two-factor authentication.

- From this screen, select which verification you would prefer by clicking on the relevant option, or by toggling the slider in front of it.

- Now follow the on-screen instructions to complete the verification method for 2FA. If you select WhatsApp as the last step, you will receive a code via WhatsApp. Enter that code and click Next.

Two-factor authentication for Instagram will now be activated.
In case you want to disable this feature in the future, follow these steps:
- Navigate to the following from within the Instagram app for mobile:
Settings >> Security >> Two-factor authentication - Now toggle the slider in front of the verification method to switch it off.

- From the confirmation popup, click Turn off.

Two-factor authentication will now be turned off for Instagram
On a Web Browser
If you are using Instagram on a computer via a browser, follow the steps below to enable two-factor authentication:
- Log into www.instagram.com.
- Click on your profile icon in the top-right corner and then click Settings.

- Now click Privacy and Security from the left, then click Edit Two-Factor Authentication Settings in the right pane.

- Now check the box next to “Use text message.”

- From the popup, click Turn On.

- On the next screen, confirm your phone number and click Next.

- You will now receive a code via SMS on your phone number. Enter that code and click Done.

Two-factor authentication will now be enabled on your Instagram account. In case you want to disable it, follow these steps:
- Navigate to the following:
Settings >> Privacy and Security >> Edit Two-Factor Authentication Settings - Uncheck the box next to “Use text message.”
- From the confirmation popup, click Turn Off.
2FA will now be disabled for your Instagram account.
How to Change Security Information on Instagram
Security information can be changed for Instagram through a web browser as well as from the app on your phone. This includes your phone number and email address. Follow the steps below from the app:
- Navigate to the following:
Settings >> Account >> Personal Information - Here, click on the email address or the phone number (which you want to change).
- Now replace the old information with the new one and then click on the tick mark in the top-right corner of the page.
Alternatively, you can also change your security information from a web browser, here’s how:
- Navigate to the following:
Settings >> Edit profile - Here, replace the information from the respective text field (email or phone number) and then click Submit.
Of course, entering the new security details will require you to verify it through the code sent to your email address or phone.
How to Enable Two-Factor Authentication for WhatsApp
WhatsApp is one of the most popular instant messaging platforms worldwide. What started as a messaging service for iOS is now gaining popularity each day with the addition of its web and Windows application platforms.
However, two-factor authentication can only be configured and managed through the mobile app. That being said, after enabling 2FA on WhatsApp, while logging in to a new location, you will need to enter the PIN on top of the One-Time PIN (OTP) sent via SMS, doubling your security.
Follow the steps below to enable it:
- Open your WhatsApp app on your phone, click on the ellipses (3 dots) in the top-right corner, and then click Settings.

- Now click Account.

- Then click Two-step verification.

- On the next screen, click Enable.

- Create and then confirm the 6-digit PIN code.
- (Optional) Enter an email address that can be used to recover your WhatsApp account if you forget your PIN. This is optional and can be skipped. If you enter an email ID, you will also need to confirm it by entering it a second time. However, no verification was made for this e-mail address.
- On the final screen, click Done.
2FA has now been enabled for your WhatsApp account. As soon as you go to the main page, you will be asked to provide the PIN you created. This is only asked occasionally, so the user does not forget his/her PIN.
If you want to disable two-factor authorization for your WhatsApp, navigate to the following and click Disable.
Settings >> Account >> Two-step verification
You can also change your email address and PIN from the Two-step verification page.
Since WhatsApp is directly linked to your phone number, there is no other security information you could change, except the email address used to recover your account.
Closing Words
Other than two-factor authentication, your security information, such as your phone number and email address, can be used to recover your account in case you forget the password, your account gets hacked, or you lose your phone.
Therefore, we suggest that you create at least 2 two-factor authentication mechanisms so that you can still authorize a valid login in case you lose your phone or lose access to your email address.