Windows 10 automatically sets the right kind of screen settings when it detects a display attached, provided that the correct drivers are installed. However, they are not always according to your needs and requirements. You might not enjoy the text size or the graphics it is pushing out to the display screen, and want to change it.
Thankfully, Windows 10 offers some basic configurable settings which you can modify and get the right kind of display output, one that you would prefer.
Let us look deep into the display settings and try to understand how the display works.
Table of contents
Why you need to understand screen resolution settings
The display screen’s output quality depends on a number of factors, such as the Dots Per Inch (DPI), resolution, and scaling. It is important to understand what each of these terms is, so you would completely comprehend when making the selection between the different choices in the Windows Settings.
What is DPI?
DPI, or Dots per Inch, is pretty easy to understand, as the name gives it away. It is the number of dots, or pixels, in a square-inch on your screen. The greater the number of dots in a square inch, the more compact the pixels would be, hence, there will be more clarity in the images you see on your screen. Since each pixel gives out its own color, you would achieve greater focus and sharpness with higher DPI.
Unfortunately, this setting cannot be controlled through Windows Settings directly. Nonetheless, it is important to understand this term in order to fully comprehend the next one.
What is the resolution?
You will see the screen resolution in the format of a number followed by an “x,” and then a number again. This is because it illustrates the length and width of the screen in pixels.
A resolution depicting “1024 x 768” would mean that the length of the screen is configured to have 1024 pixels, while the height is 768 pixels. These two can be multiplied to get the total number of pixels on a screen.
Resolution is different from DPI as it tells the total number of pixels on a display device, while the DPI tells how compact those pixels are. A resolution setting may make the images blurry on a 32-inch screen, but the same setting when applied to a 20-inch screen might make the images razor-sharp.
Resolution is often confused with the size of the image. The resolution settings do have an effect on the size, but that is not entirely the case. The size of the image changes when increasing the resolution is because the screen adjusts the display to make room for more pixels, resulting in a decrease in the size of the items displayed. An example has been given below.
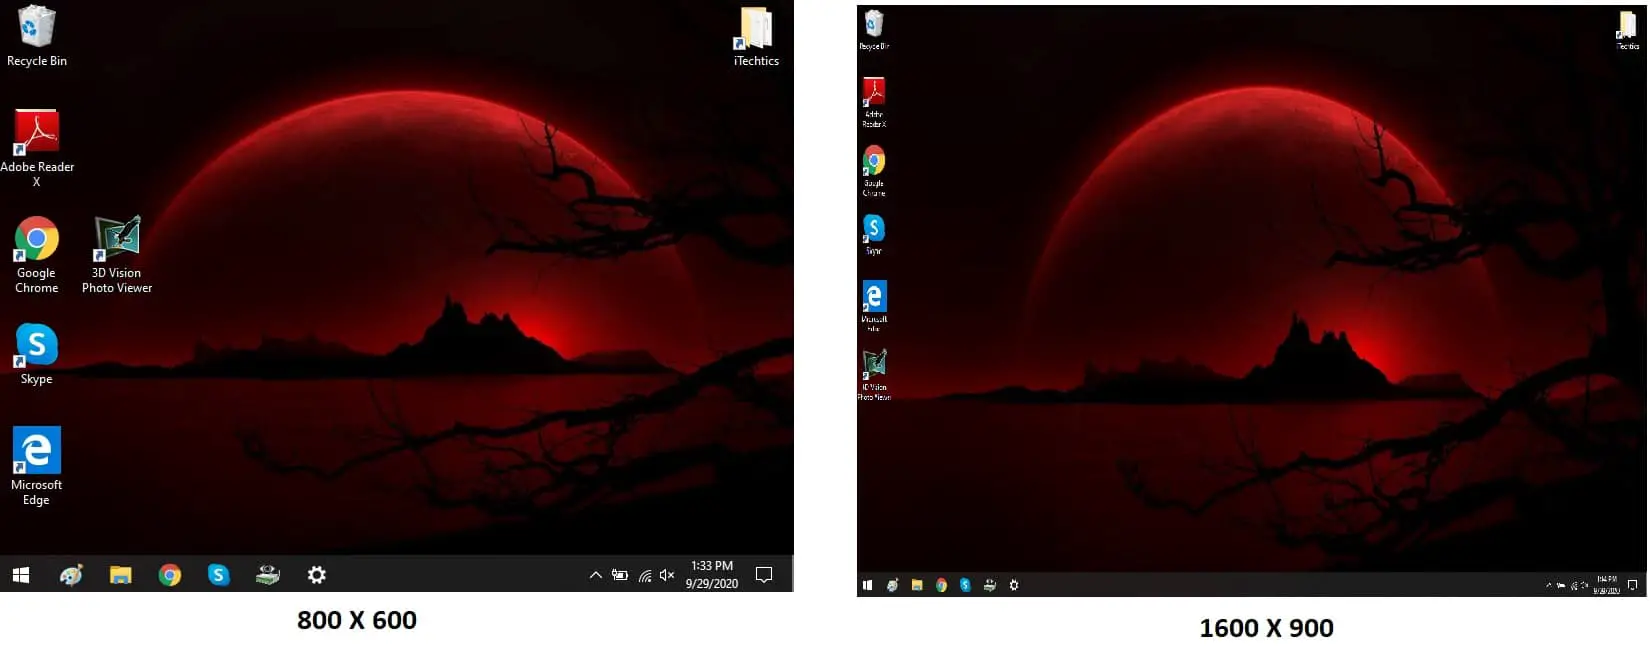
When we increased the resolution from “800 x 600” to “1600 x 900,” you can see that the size of the icons on the desktop shrunk, portraying that the size decreased. Whereas only the pixels on the display screen increased.
What is scaling?
Scaling does not have much to do with the pixels on the display, but rather the size of it. It is a feature by Microsoft to adjust the size of the text, applications, and other elements within Windows for better ease of use. It provides accessibility to the users by not making them strain themselves while looking at the screen.
How to change resolution, scale, and layout in Windows 10
You can adjust the resolution and the scale of your display(s) using your Windows 10 Settings. Moreover, you can also manage the orientation of the screen, if you wish to read the coding script in a vertical position, or for any other reason.
How to change display resolution in Windows 10
You can adjust the display resolution according to your liking. It is not always necessary to keep the resolution at the maximum, but at what your eyes are comfortable with. It is true that maximum resolution means maximum sharpness and quality, but it might not be worth it if you strain your eyes.
- To change the resolution settings on your PC running Windows 10, navigate to the following:
Start Menu -> Settings -> System -> Display - Click on the drop-down menu under Display Resolution and select your preferred option.
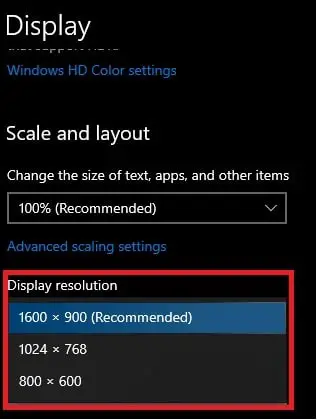
- Your screen resolution will then change. However, you will be given the option to keep the changes you have made or revert them. Select your desired option.

Sometimes the old display devices do not support the set resolution settings, thus they stop displaying entirely. For that reason, Microsoft has set a timer to automatically revert the settings when the user is unable to select the option themselves.
How to change display scaling in Windows 10
As mentioned earlier, you can adjust the scale of the text, icons, and applications on your screen for a better viewing capability. Here is a guide on how you can change the scales:
- Navigate to the following:
Start Menu -> Settings -> System -> Display - Beneath Scale and layout, click on the drop-down menu, and select your optimized setting.

This will take a moment to change to your desired magnification level throughout the entire Windows. However, if you wish to enter a custom magnification percentage, you can also do so by clicking on Advanced scaling settings.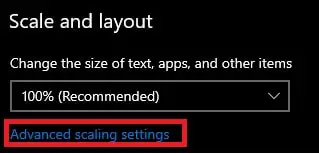
On the next screen, under Custom scaling, enter a percentage for magnification, and then click Apply.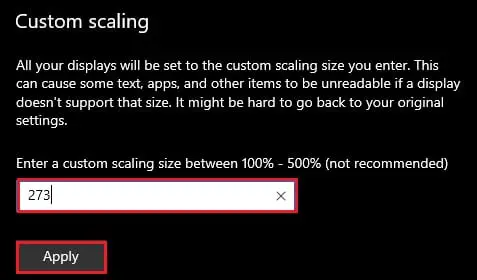
How to change display orientation in Windows 10
You can adjust your display in landscape or portrait orientation, according to your will. Here’s what you can do with Windows 10:
- Navigate to the following:
Start Menu -> Settings -> System -> Display - Open the drop-down menu under Display Orientation and select your preferred screen orientation. Each step down in the menu rotates the screen by 90 degrees to the right.
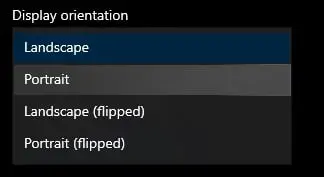
Unlike the custom scaling, you cannot adjust the orientation at any other angle other than the 4 provided.
Also check out: rotate Windows screen using keyboard shortcuts.
Closing words
We believe that every person having a computer should understand the concept behind the different display settings, especially the users that use this eye-straining device on a daily basis. You can use this guide to personalize your display settings that are safer for your vision in the long term.
Customized settings can save you from daily struggles, especially if you have impaired vision.


2 comments
pmshah
I have been using 1090p HD TVs as PC monitors for nearly 10 years now. Never had any problem with scaling so long as I could use VGA output from the PC.
For the last PC I build for my self I used an Hexacore i5 processor WITHOUT graphics and opted for nVidia GeForce GT 1030. Unfortunately it has no VGA output. HDMI output overscaled and clipped the icons as in your images. I could fix that inly with nVidia’s own application. Couldn’t find anything in Windows that allowed accurate scaling with Arrow indicators in four corners.
Usman Khurshid
NVidia’s own app is far better than the basic settings that Windows offers.