Images with a transparent background can be used over other images, and this allows you to get rid of the mess in the background while seamlessly moving a selected portion of an image onto another background. Not only can you download such pictures from the internet with a transparent background (known as PNG images), but you can also create them.
This task is already being accomplished by the graphic designers using third-party tools, such as Adobe Photoshop. Today, we will show you how this objective can also be achieved using the Windows-native applications: Paint and Paint 3D.
Paint 3D was originally being offered as a preinstalled application in Windows 10. However, this decision was reversed and now a clean install of Windows 10/11 no longer includes it. You can still install Paint 3D from Microsoft Store.
In comparison to the images having a transparent background which we are going to create in this post, PNG images have a similar property. PNG images can have transparent backgrounds, which enables any irregularly-shaped image to be usable atop other images where its background does not disrupt the original image.
The image below is an example of a complete image inserted over another image (left) and an image with a transparent background inserted over another image (right).

Let us now continue to show you how to create an image with a transparent background in Microsoft Paint and Paint 3D.
Create Images With Transparent Background in Paint
Perform the given steps to create an image with a transparent background using the preinstalled Microsoft Paint app:
Note: Images with a transparent background created using Paint will only remain transparent as long as they are used within the Paint app. This means that once an image is saved as a PNG file, try to reuse it atop another background, hoping it will still have the transparent image; it will not.
-
Open the Paint app, click File from the top menu, then click Open. Here, select the image in which you want to make the background transparent.
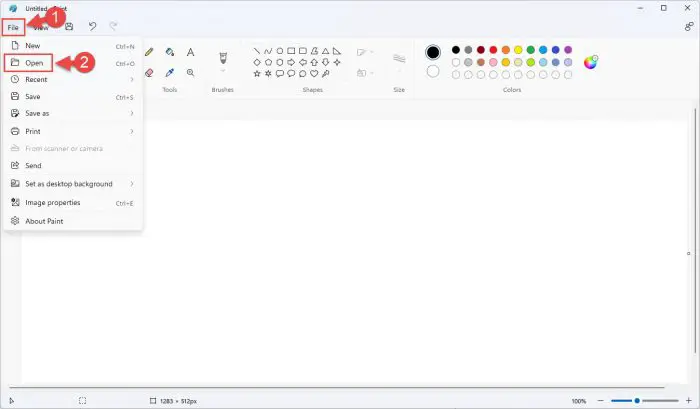
Open image -
Once opened, click on the down arrow below “Select” in the ribbon menu, then click “Transparent Selection” to check it.
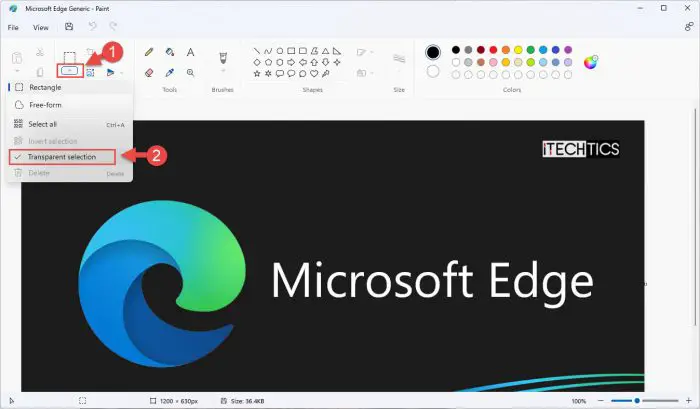
Enable transparent selection -
Now click on the down arrow below “Select” again and then click “Free-form.”
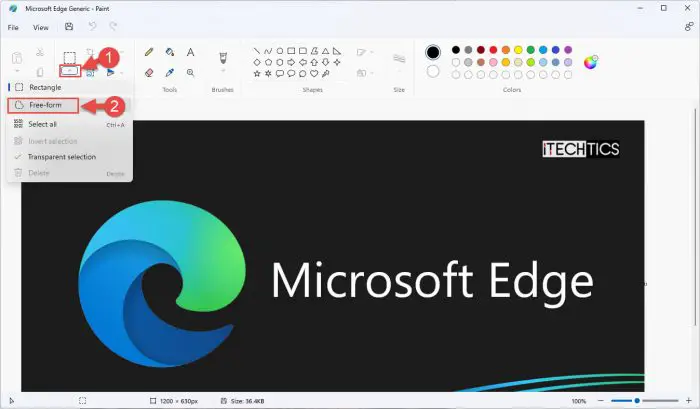
Free-form selection -
Now click and drag your mouse pointer to select the element within the image that you want to use atop another image (the unselected part will be turned transparent).
Note: This selection must be made with a single click. This means you cannot let go of the mouse button until the entire selection is completed.
-
When selected, you will notice that only the selected part is cropped/movable, as in the image below:
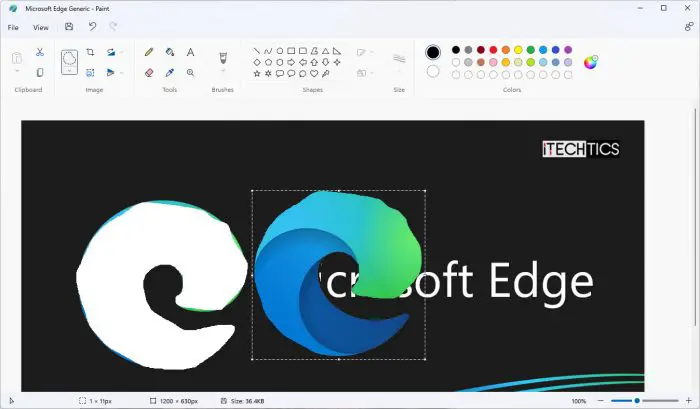
Crop selection Now, press the CTRL + X shortcut keys to Cut the selection.
-
Now, press the CTRL + N shortcut keys to open a new Paint window. If asked to save the current work, click Don’t save.
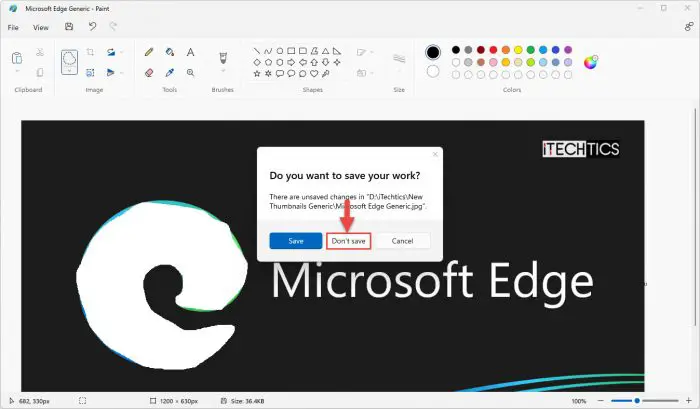
Do not save -
In the new Paint window, open another image like we did in step 1 above, then press CTRL + V to paste the selection on top of the background.
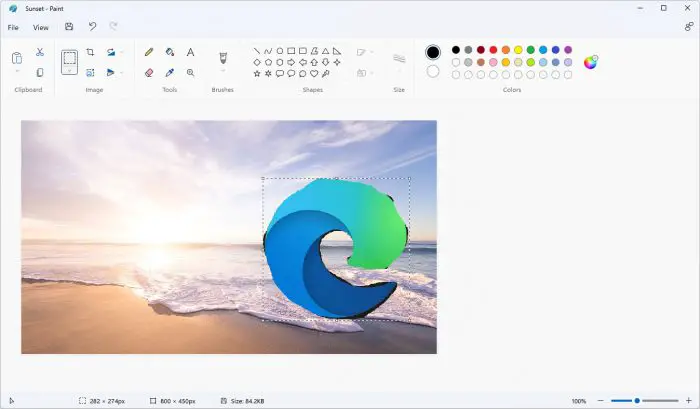
Transparent image pasted atop the background As you can see, the pasted image has a transparent background, which is why you can see the ocean through the center of the Edge icon in the picture above.
Create Image With Transparent Background in Paint 3D
Let us now show you how to achieve the same task in Paint 3D:
Note: Unlike in Paint, Paint 3D does not allow you to select free-form images. This means that you can only make a selection in a rectangular shape and then make its background transparent.
-
Open Paint 3D, click Menu, then click Open, and then Browse Files. Here, select the image you want to set a transparent background for.
-
Now click Canvas from the top menu then toggle the slider under “Transparent canvas” into the On position.
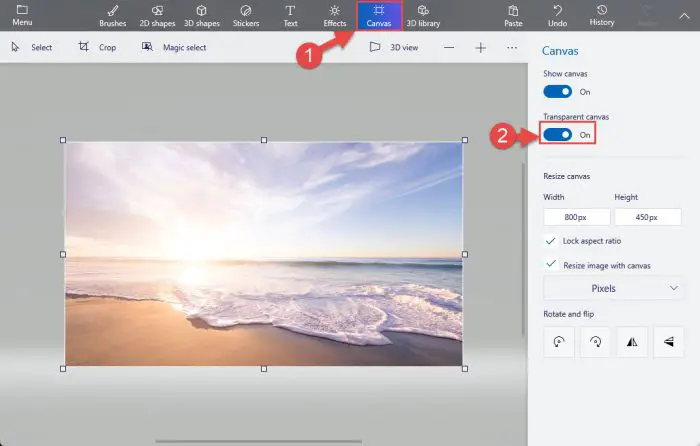
Enable transparent canvas -
Now click Select and then click and drag your mouse pointer to eliminate the background (select the portion you want to make transparent).
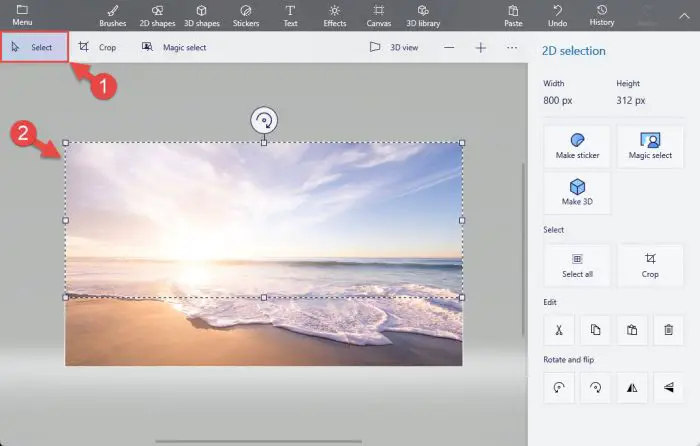
Select portion to make transparent -
Now, press the CTRL + X shortcut keys to Cut the selection.
-
Now click Menu from the top menu, click Save as, and then click Image. Save this image as 2D PNG.
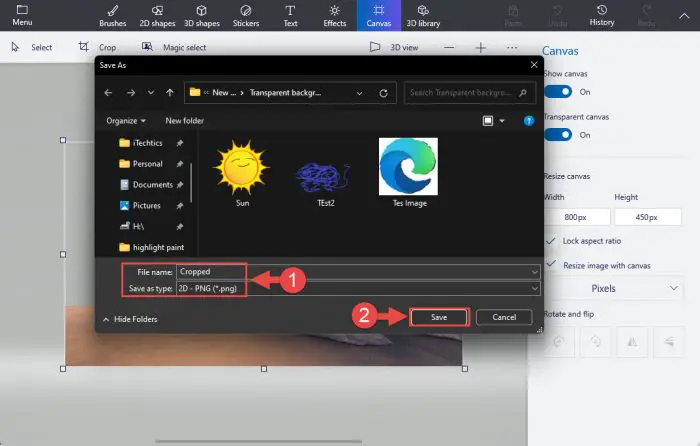
Save as 2D PNG image -
Once saved, open the new image that you want to use as a background, as we did in step 1 above.
-
Now click Menu and then Insert. Select the image with the transparent background that you saved earlier. You will notice that the transparent image will open on top of the background layer as shown in the picture below.
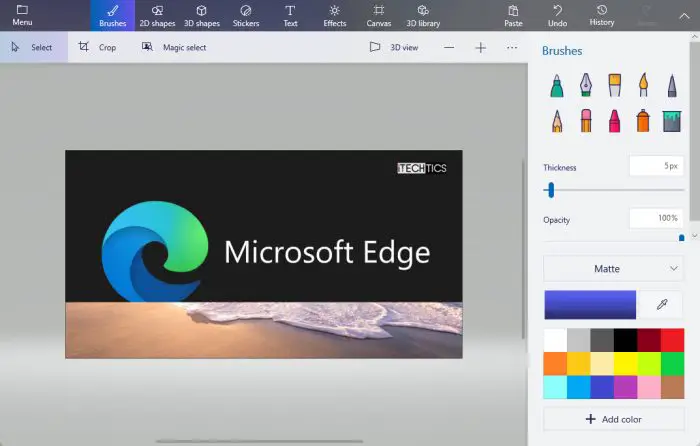
Image with transparent background atop backdrop picture -
You can now resize and move the image as you see fit.
That’s it! This is how you can create images with transparent backgrounds and then use them with other pictures to make the perfect picture.
Closing Words
Creating images with transparent images using these Microsoft apps is only useful if you plan on using them with another image. If you are planning on creating a PNG image and then saving it to be used later, that would not work. This is because, as we mentioned earlier, images with a transparent background saved will no longer retain their property.
That said, we found the Paint app more useful over Paint 3D as it allows you to select free-form shapes and use them as you please, whereas, in Paint 3D, you can only select rectangles.

