E-sports has taken off in the 21st century. With high-end gaming PCs and consoles, live streaming is also one of the “new things” our young gamers are into. One of the more popular applications used for coordinated gaming strategies is Discord.
In this post, we are going to show you how to download and install Discord on a Windows computer, what features it contains, and how to perform the basic tasks.
Table of contents
What is Discord
Discord is a cross-platform application that gamers use to chat via video, call, or plain text messages. It is becoming extremely popular within the gaming community as it is continuously being updated and new features are being added all the time. Currently, the following platforms support Discord and each one has its own app:
- Windows
- Mac
- iOS
- Android
- Linux
However, it can also be used by organization teams to collaborate, work on projects, etc.
Discord is available as a standalone application that can be installed on your computer, or use a web version from any browser of your choice.
Before we begin installing the app, you must register an account.
Create Discord Account
Follow the steps below to create a Discord account:
-
Open the Discord registration page using any web browser.
-
Here, enter the details asked and then click Continue.
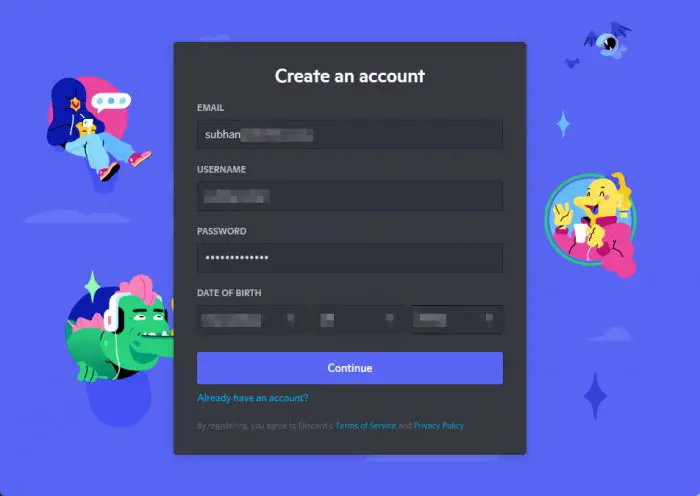
Create Discord account -
You will now be asked to confirm that you are not a robot. Fill in the Captcha to continue.
That is it. You can then continue to log into the web version of Discord or install the app.
Download and Install Discord
Follow the given steps to download and install Discord on a Windows PC:
-
Open the download page for Discord on any web browser.
-
Click Download for Windows.
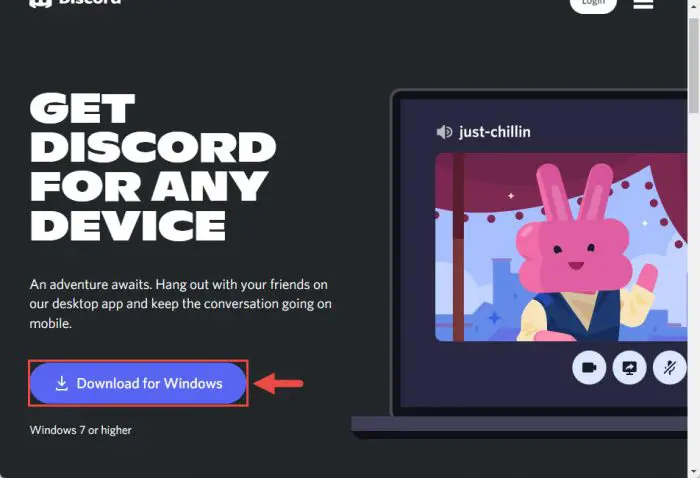
Download Discord for Windows The Discord setup will now begin downloading.
-
Once the download is complete, run it by double-clicking it.
-
The setup for Discord will then run and install. Enter your credentials used to create a Discord account and click Login.
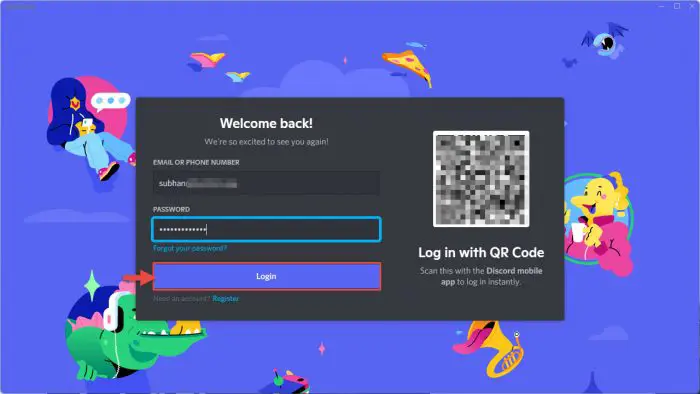
Log in to Discord
That’s it! You are now ready to use Discord.
To download Discord for other platforms, click on the respective links below:
How to Use Discord on Windows
Your Username
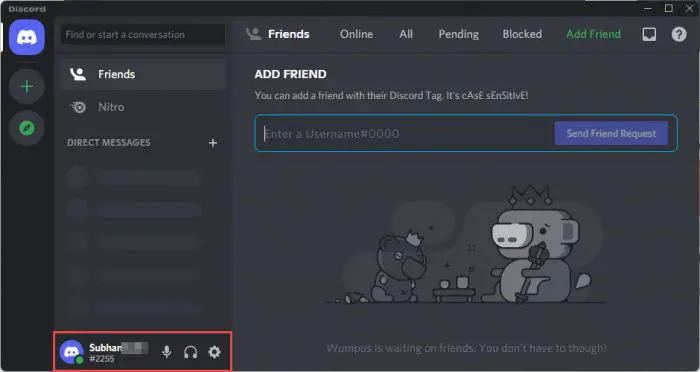
When logged in, you can see your username (the one you used to register) at the bottom of the app. You will also notice that a number has also been assigned below your username.
This number is automatically concatenated with your username to make it unique, since there can be other people registered on Discord with the same username that you chose. The number makes the username unique, so no two users have the same username.
Your complete username is then written as “YourUsername#1234.” This is what your friends on Discord will use to look you up, add you as a friend, add you to a group call or chat, etc.
Add Friends
Similarly, you can add friends to your Discord account using their username. All you need to do is ask your friend for their username, go to the Friends tab, enter their username and click Send Friend Request.
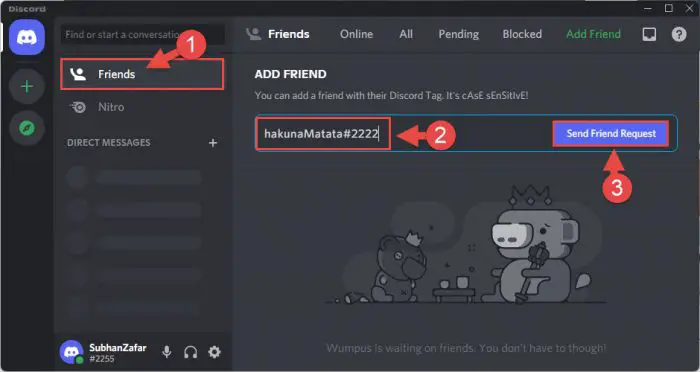
Your friend will then accept your request, and you can begin talking to each other using whichever means you prefer.
Discord Nitro
Discord Nitro is a paid feature Discord offers that offers cool additional enhancements to your account.
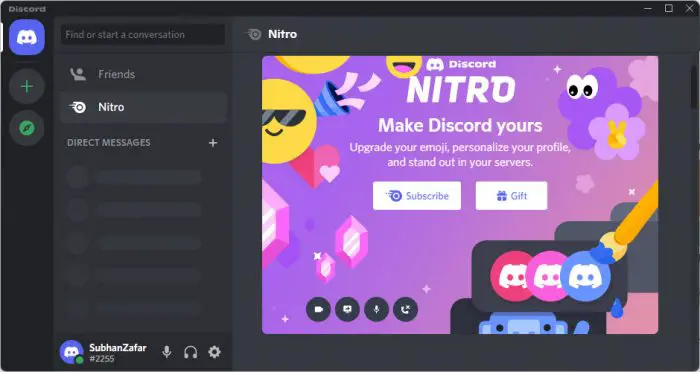
Nitro offers features such as animated emojis for chats, personal avatars that can be used as a display image, high definition video streaming, server boosts, etc.
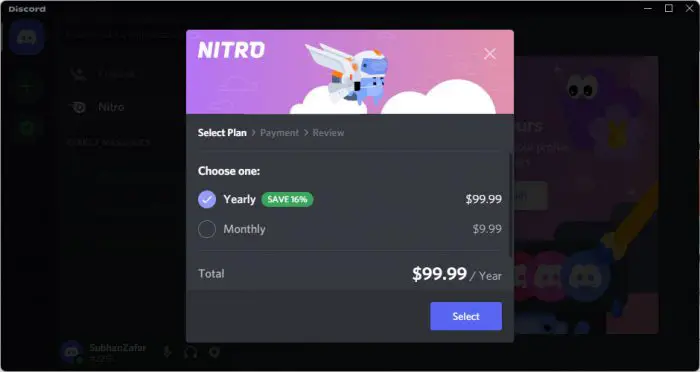
At the time of writing this post, Discord Nitro is being offered at USD 99.99 per annum, or USD 9.99 per month.
Join Servers
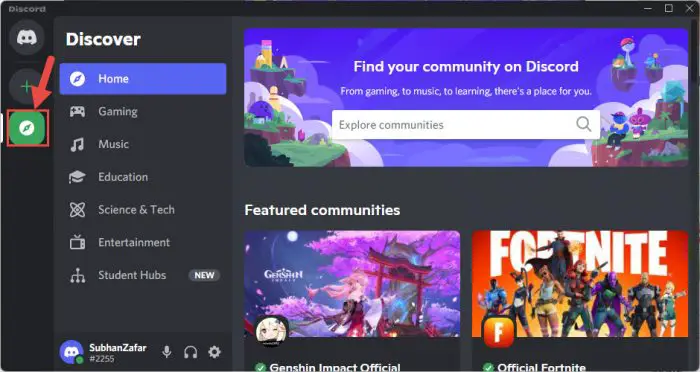
Discord already hosts dedicated servers for various games, such as Counter-Strike, Call of Duty, Valorant, Apex Legends, and many others. Not only that, there are others channels you can join, such as the ones for music, education, general entertainment, etc.
To join a public server, click on the Public Servers category on the left of the app, then choose the category you would like to browse. If you find a server to join, simply click on it.
Note: If the server is full, you will be prompted. In that case, try again later when there is a vacant spot.
Create Discord Server
You can also create your own server and then ask your friends to join in. Here is how:
-
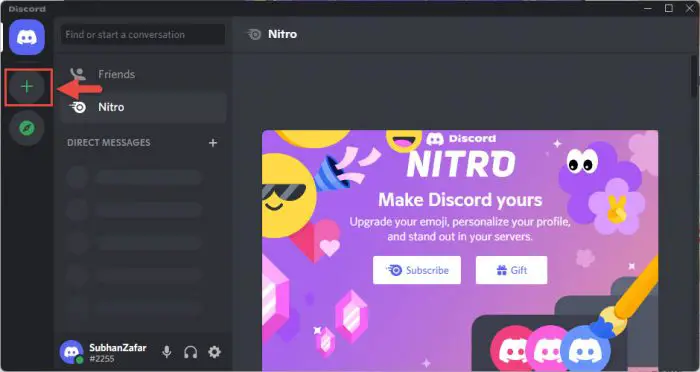
Click on the Add server (+) button on the left.
Add server -
From the popup, click Create My Own.
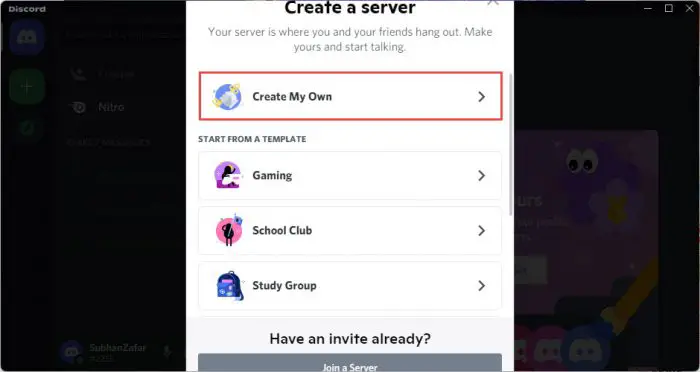
Create own server -
Now select who the server is for.
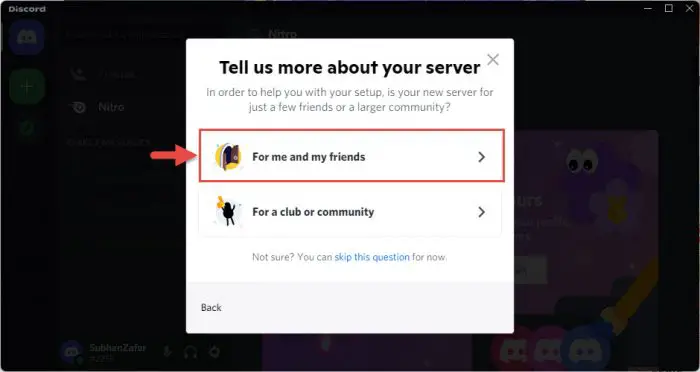
Select who the server is for -
Now enter a custom name for the server and click Create.
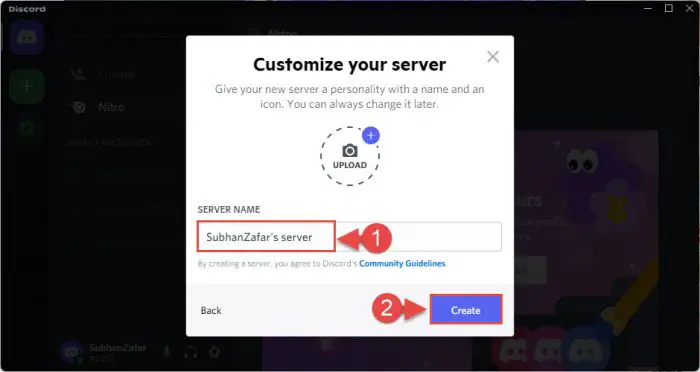
Name the server
The server has now been created. You can see it in the left-most column of the app.
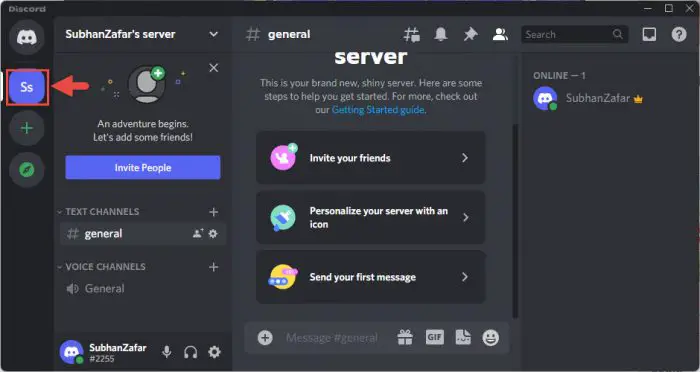
You can now ask your friends to join this server by clicking Invite people, and then share the link with them, which you see in the popup window.
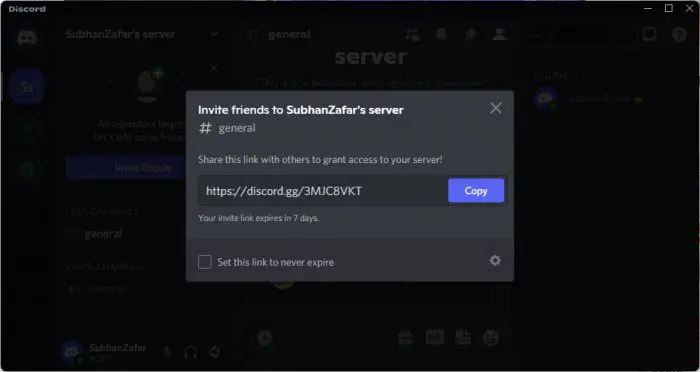
Once all your party is connected, you can use the app to game together or collaborate on tasks.
Frequently Asked Questions (FAQs)
What is Discord used for?
Discord has gained popularity amongst the e-gaming community as an app to conveniently communicate with other teammates. However, it can also be used for more professional tasks, such as collaborating on projects, sharing files and folders, etc.
Can children use Discord?
Discord is designed for gamers of any age, but has only set an age limit of 17+. Although Discord itself is safe for the users, other users on the servers may not be as friendly. Since anyone can sign up and join a Discord server without proper vetting, it is better that children under 17 do not use the app.
Is Discord and Twitch the same?
Essentially, Discord and Twitch are not the same. Twitch is a streaming platform where anyone (but mostly gamers) can stream themselves as well as what’s on their screens, whereas Discord is a platform merely to communicate with other people.
The difference between the 2 platforms can be confusing since Twitch allows streams to collaborate and stream together, and forms a kind of communication medium between them.


