
Microsoft Power Automate is a rebrand of Microsoft Flow, which allows organizations to automate a number of tasks. It is a free tool to automate repetitive tasks.
Microsoft Power Automate is used to create an automated process that executes a task when an event is triggered. It can be connected to a number of different applications so that an event in one app will trigger output in another.
Introduced in 2019, Power Automate has many additional features that make it an even more powerful admin tool. One of the most important of these features is the Robotic Process Automation (RPA), which has been specifically designed for legacy apps that have incomplete APIs, are not user friendly, or their APIs are unavailable from the start.
This kind of powerful and user-friendly automation process that allows a multitude of user interactions like right and left mouse clicks, text inputs and keyboard actions to be recorded and made available to other applications on the cloud, is unique to Power Automate and makes it one of the most important tools of the Microsoft Power suite.
Here is a simple guide for sysadmins and network administrators on how they can use Power Automation to create, scrutinize, and manage automated processes.
Types of workflows
Microsoft Power Automate supports the following types of workflows:
Automated flows
These are simple automated processes that execute a certain task once a specific predefined event occurs.
These are automated processes that execute an action repetitively. They can be triggered via mobile from anywhere, with the proper credentials.
Scheduled flows
These are tasks that are executed on a predefined schedule without user intervention or input.
Business process flows
Basically, these are human processes, and are meant as a guiding tool. They guide a user to a certain end via a number of predefined steps.
UI flows
These are the tasks that are connected to legacy apps with either missing or unavailable APIs.
Creating a basic flow using Microsoft Automate
There are a number of templates that will allow users to create flows. However, here we will guide you on how to create a flow from scratch.
This simple example is a flow that will send a notification to the CEO of the organization whenever their name is mentioned on twitter.
This kind of flow is very easy to create and has three basic steps, creating the event, creating the action, and managing the flow as given below.

Before proceeding, sign in to the email service used by your organization and your Twitter account and connect both of them to Power Automate.
- Event Creation
- Select “My Flows” from the top navigation pane in flow.microsoft.com, and click on “Create from blank”.
- Click on “Search hundreds of connectors and triggers”, in the bottom and click on “Twitter” from “Search all connectors and triggers”, and then click, “Twitter – When a new tweet is posted”, the add the tag of your organization’s CEO, for example “#JackSmithAzure” to the “Search” Text box displayed after “New tweet posted“.
- Action designation
- Click on “New Step”, followed by “Add an Action”. Type “Send Mail” in the “Search all connectors and actions” box. Then select the mailing service of your choice from the drop-down list.
- In the next form, add the email address used by the CEO of the organization and add “New tweet from:” as the subject and press space-bar to access the token. Select Tweeted By, then add the “Tweet Text” token to the body as a placeholder.
- Name your flow and click Create, followed by Done. This will create a flow that sends an email to the CEO directly whenever they are mentioned on twitter
- Near the top of the screen, name your flow, and then select Create flow.
- Flow Management
- Click on My flows in the top navigation pane. The following tasks can be accomplished here:
- Pausing/Resuming flow: Simple toggle switch On/Off
- Editing the flow: Pencil icon next to the flow
- Deleting the flow: Click the Triple Dot Icon and click on Delete, then confirm deletion in the message box that appears.
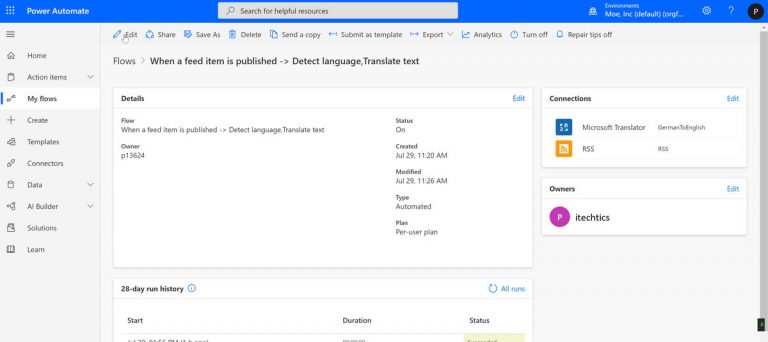
- View flow run history: Select a flow from My Flows, and navigate to the “Run History” section of the new page.
- Click on My flows in the top navigation pane. The following tasks can be accomplished here:
Creating UI flows using Microsoft Automate
One of the most important features of Power Automate is the ability to interact with legacy apps. Flows that are created for such apps are called UI flows.
Here is a short introduction to the process of creating such flows. However, before creating UI flows, you will need to set up UI flows.
To Setup UI flows on your machine, make sure that your machine is running either Windows 10 Pro or Windows Server (2016 or 2019) and you have Google Chrome 80+ or Microsoft Edge 80+ installed on your computer.
UI flows will also require an environment with a Common Data Service database. You can find the UI flows setup file from Setup.Microsoft.PowerAutomate.UIflow.exe. You also need to install the required browser extension for the web browser that you use.
Having met these prerequisites, follow the following steps.
- Click on My flows, select UI flows, and click on New and then select Desktop app and click Next. Name your flow and click Next.
- Click on Record app card and click on Launch Recorder to display the recorder controls, then launch the application you want to automate and click on Record. Make sure that that there are blue outlines visible when you are clicking on a control. If it is not, wait for a second; otherwise, the action will not be recorded.
- Write your name, then save the file. Click Done on the controls and close Word.
- You can view the recorded steps by clicking “Run Script”.
- Click Next twice and skip the optional outputs. Test the UI flow by clicking Test Now. If you are satisfied, click Save and Exit.
Please note that UI flows are a premium feature of Microsoft Automate. You can use this feature if you have a subscription of Microsoft 365.
So there you have it. This easy to use guide gives you a complete walkthrough of using Power Automate with both modern apps as well as legacy apps, in order to automate a number of tasks.
For me, creating flows was very similar to services like IFTTT and Zapier but if you are using the Microsoft ecosystem including Windows and Microsoft 365, Automate is the way to go as it has several pre-made templates for automating sysadmin and power user tasks easily.


