Microsoft has introduced a security feature to protect sensitive folders called Controlled Folder Access. You can control the access of some folders and make them protected. The primary purpose of controlled folder access is security from ransomware and other virus threats.
The chances of malware and ransomware attack reduces for the folders on which you have enabled the Controlled Folder Access feature. This is a useful feature added by Microsoft for the safety of sensitive data that lies in folders across your system from any attacks, malware, ransomware, or attackers.
If you aren’t aware how to enable and use this feature to start protecting your sensitive data by controlling the access of some specific folders of your machine, then let’s walk through some ways that will guide you to make it enable.
Table of contents
Enable Controlled Folder Access Via Windows Defender Security Center
You can enable the newly added features of Controlled Folder Access from the Windows Defender Security Center. To do this, follow the steps below:
- Open the Windows Defender Security Center from the Start Menu’ search bar.
- When the window of WDSC will open, from the left-hand column, open the “Virus and Threat Protection” option.
- Next, you need to open “Virus and Threat Protection settings” from the options.
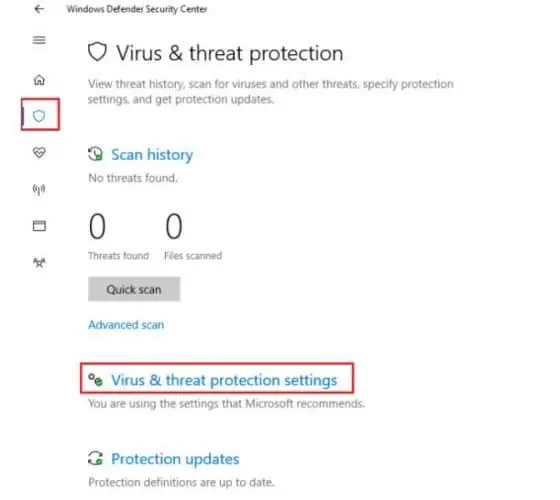
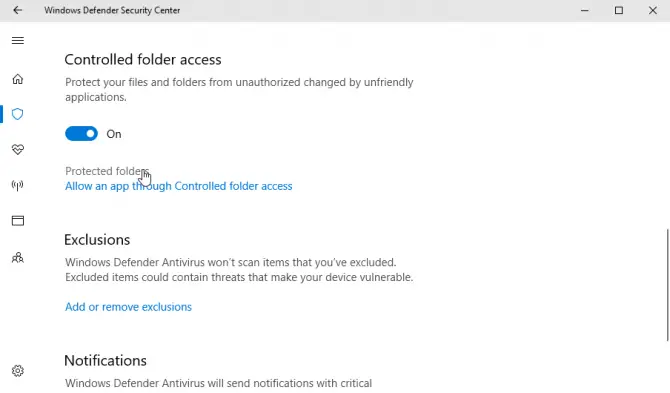
- When the settings open, find the option of “Controlled folder access” from the list by scrolling down.
- Enable this option by switching the toggle button available with this option.
- As you toggle the button to enable the feature, a “Protected Folders” option will be visible to you. You have to click on the option to add folders that you want to protect.

So you are done by enabling the “Controlled folder access” feature on your system, now your folders will be protected from any attacks and malware.
If any software or app needs to get access to any file from that particular protected folder, that software won’t be able to get access to it due to permission issues and gives you a message that the software is incapable of doing this.
Enable Controlled Folder Access Via Group Policy Editor
You can enable the Controlled Folder Access feature via the Group Policy Editor by going to the following steps:
- Open Run dialog by pressing “Windows +R” key, and type “gpedit.msc” to open the Group Policy Editor console.
- Go to the following location:
Computer Configuration –> Administrative Templates –> Windows Components –> Windows Defender Antivirus –> Windows Defender Exploit Guard –> Controlled Folder Access - In the right-hand menu, double click on the option of “Configure Controlled Folder Access” and set its value to “Enable”. You can also enable it from the drop-down menu.

Enable Controlled Folder Access Via PowerShell console
If you do not want to do all these steps described in the above solutions, then here is another short way to enable the “Controlled Folder Access” feature by executing a command in the PowerShell window.
- Open PowerShell window from the Start Menu as an administrator.
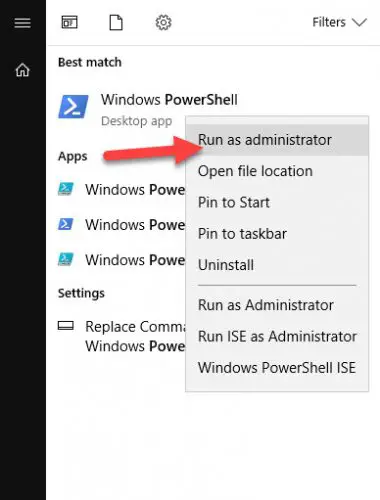
- Copy and paste the following command into the console.
Set–MpPreference –EnableControlledFolderAccess Enabled
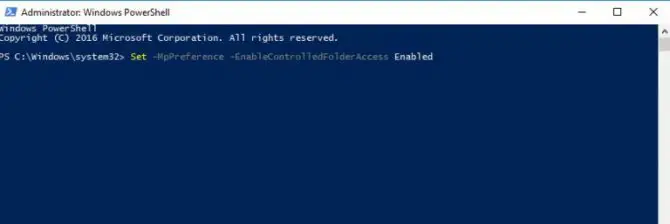
These three are the ways that can enable the feature of “Controlled Folder access” on your system to start protecting the folder which contains sensitive data of yours. It is a very practical feature added by Microsoft as you can easily control access to any folder with it.
How do I add folders to the protected folders list?
- Just go to the Windows Defender Security Center by going to the Windows Settings –> Update & Security –> Windows Defender –> Open Windows Defender Security Center.
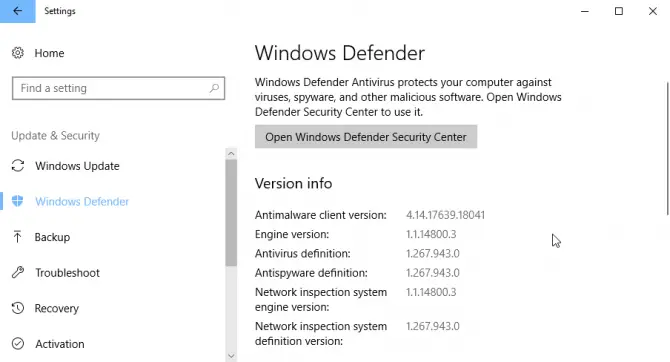
Windows Defender Settings - Now, go to Virus & threat protection –> Virus & threat protection settings.
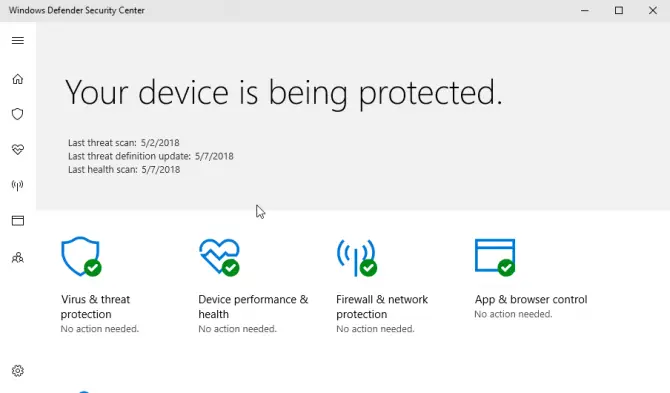
Windows Defender Security Center - Enable Controlled folder access
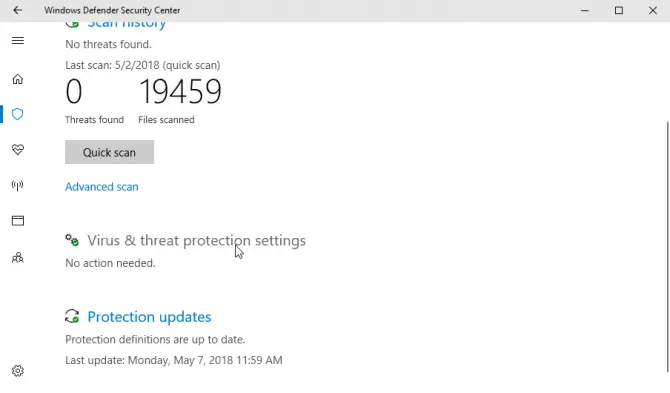
Virus and threat protection settings - Click on the Protected folders link
Protected folders - Add a protected folder
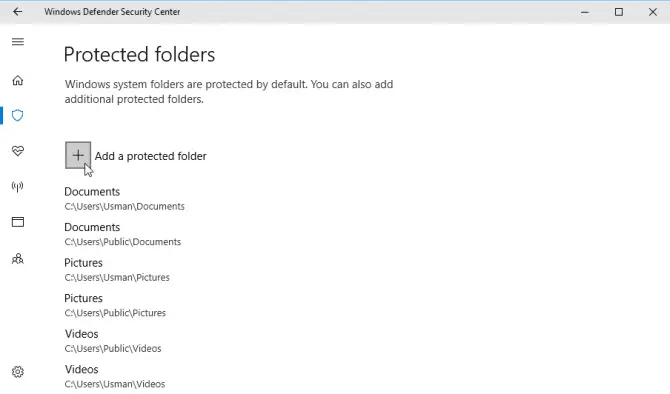
Add a protected folder
Have you start controlling the access of your folders with this feature? If not, then enable it now and stay safe.


3 comments
waleedrana777
There is no space before -mp in Set –MpPreference –EnableControlledFolderAccess Enabled
Usman Khurshid
Thanks a lot. I have corrected this.
windows technical support
I was aware of Enabling Controlled Folder Access Via PowerShell console but other two steps are new for me. I have also written the blog about it on my website but mention only one way.