The Windows operating system has a feature to automatically load and run a few applications as soon as you log into your user account. These are known as the “Startup Apps,” which has a dedicated section in the Settings app as well as the Task Manager to choose whether you want to enable or disable an app/program from starting automatically.
However, some new applications that are initially not available on your computer are added to the list of auto-starting apps automatically when they are installed – without you even knowing about it. This can add extra load on your computer and make the PC startup relatively slower, and most of the time, you wouldn’t even know why.
Thankfully, Microsoft has injected a salient feature in Windows 11 that allows the OS to send you a notification when a new app is added to the list of startup apps. Unfortunately, this setting/option is not available in Windows 10.
This way, you can keep track of the apps added to the startup list and manage them accordingly.
Enable Startup App Notifications in Windows
The option to receive notifications when an app is added to the startup list is disabled by default. However, you can enable it on your Windows PC through the Settings app, or by using the .REG files given below.
From Settings App
Follow these steps to enable startup app notifications from the Settings app:
-
Navigate to the following:
Settings app >> System >> Notifications
-
Here, scroll down to the “Notifications from apps and other senders” section and look for “Startup App Notification.” Toggle the slider in front of it into the On position.
Note: This setting is usually found at the end of the list, but can change its position depending on how the list is arranged.
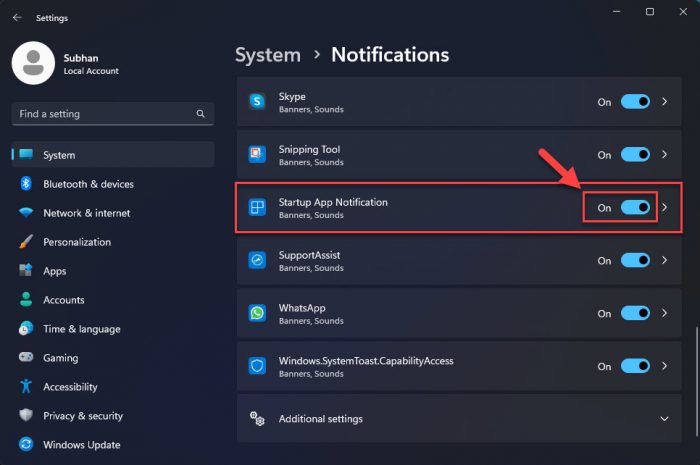
Enable Startup App Notification
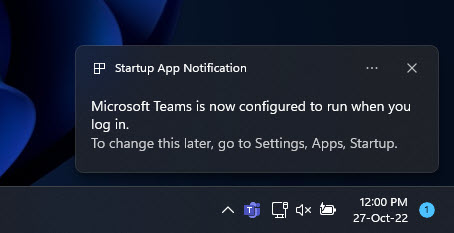
Enabling this setting will now show you a notification in the bottom-right corner of the screen when a new app is installed on your computer and is added to the startup apps list. Here is an example of the notification:
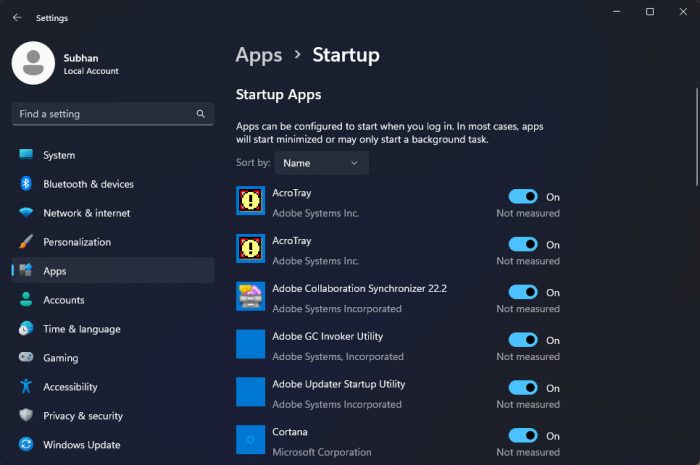
Now, you can control whether the app starts automatically or not through the Startup Apps Settings page located at the following path:
Settings app >> Apps >> Startup
However, if you find that the notifications are annoying or you do not need them, you can disable them again by toggling the slider into the Off position in front of Startup App Notification.
Using .REG File
.REG files are plain text files with a .REG extension that make changes to the Windows Registry. You can enable or disable Startup App Notification settings by running the respective registry file that you can download by clicking on the links below.
These files are error-free and tested by Itechtics, therefore completely safe to use.
 Turn on startup app notifications.reg (364 bytes, 132 hits)
 Turn off startup app notifications.reg (364 bytes, 134 hits)
Simply download the .REG files and execute them to enable or disable Startup App Notifications.
Since these are harmless registry files, a system restore point won’t be necessary. Moreover, you will still be able to change the Startup App Notification setting from the Settings app after using these registry files.
Customize Startup App Notification
There is more to the Startup App Notification setting than just enabling or disabling it.
You can also make changes to the notification setting, like choosing whether to see a notification banner or not or displaying the notification on the lock screen. You can also manage the notification’s priority.
Note that these customizations are available for all the apps in the list and can be configured differently for each one.
The following list of options are available:
- Show or hide notification banner.
- Show or hide notifications in the notification center.
- Show o hide notifications on the lock screen.
- Allow notifications to appear even when “Do not disturb” is on.
- Play a sound when a notification arrives.
- Manage the priority of the notification.
Follow these steps to customize the above-mentioned settings:
-
Navigate to the following:
Settings app >> System >> Notifications
-
Here, scroll down to the “Notifications from apps and other senders” section and click on “Startup App Notification.”
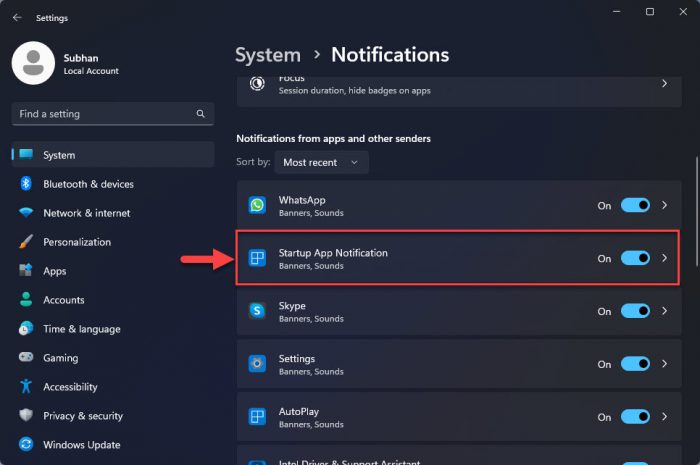
Open Startup App Notification settings -
On this page, you can customize the settings for Startup App Notifications.
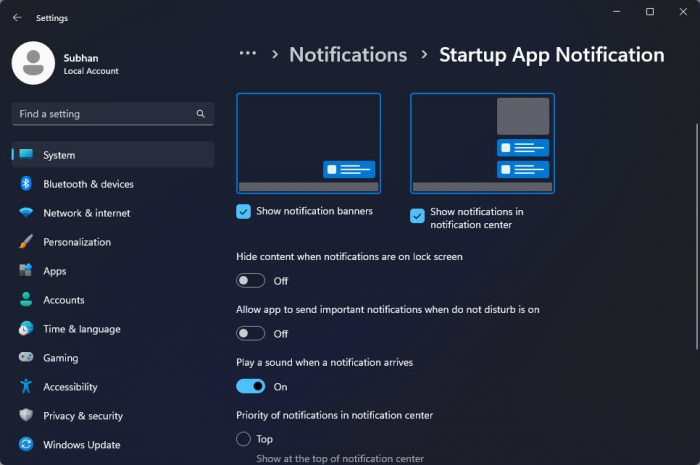
Customize settings for Startup App Notifications When you are done, simply close the Settings app.
Closing Words
The more applications that are added to the startup apps, the longer your PC will take to boot up. This is because all the startup applications try to start simultaneously, consuming significant system resources, all at once. This leaves little resources for critical system functions and services, resulting in a delayed boot of the Windows OS.
Therefore, it is wise to keep track of the applications that have welcomed themselves to automatically start without your approval.


