If you have a Blue Screen of Death (BSoD) with a stop code that mentions “Memory management” as the culprit or you face random system crashes and freezes while using heavy applications, it is most likely that you have a faulty RAM module on your PC.
The best way to confirm this is to run a memory diagnostic test.
The Windows Memory Diagnostic tool is a built-in utility that performs stress-tests on your memory hardware and presents its findings.
Let us see how this tool can be used to our advantage.
Why use the Windows Memory Diagnostic tool
The memory modules on your computer directly affect the overall system performance. Its speed and efficiency are determined by many factors, including the RAM. All applications, programs, and services that do not load on the hard drive execute on the RAM. Therefore, it is a critical component of the overall hardware infrastructure of a PC.
Ensuring that it is working under the right conditions is a must, such as the right temperature, humidity levels, and its clock speed. Excessive use of the RAM or memory modules used for a longer period of time eventually tends to wear out due to the many read and write operations.
This is why we need to use the Windows Memory Diagnostic tool to check up on the RAM. It is better to use this tool as a proactive approach, rather than a reactive one. Meaning, occasional tests should be performed to check the conditions of RAM, instead of only doing so when a critical error occurs.
Keeping an eye out for memory conditions can save you from dreadful BSoD by maintaining working temperatures and clocking speeds under control.
How to use the Windows Memory Diagnostic tool to check RAM health in Windows 10
As we mentioned, the utility is preinstalled in Windows 10. Hence, nothing else needs to be downloaded or installed. However, the process does require your system to be restarted. Therefore, it is advised to save all your data before proceeding.
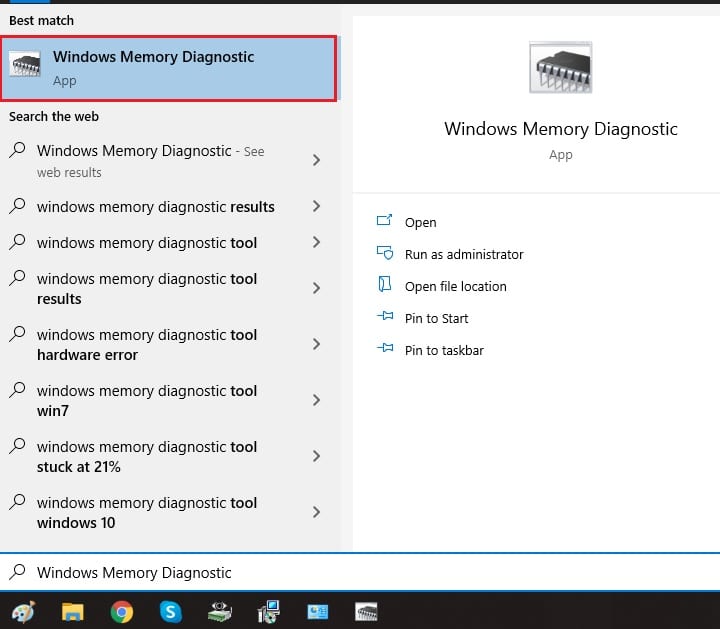
- Open the Start Menu, search for Windows Memory Diagnostic, and press Enter.

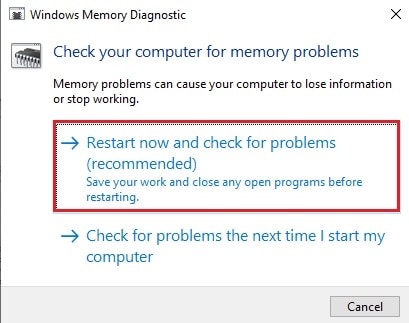
- On the Windows Memory Diagnostic Window, click on Restart now and check for problems.

- The computer will now reboot, and the test will begin automatically. This phase may take some time to complete.

You may also press the F1 function key to change the test from Standard to Extended, Extended being a deeper test for the memory modules. - Once the scan is complete, the machine will boot into Windows. Login to your account and you will be met with the results of the scan, but only if there is a problem with the test. If not, you will be prompted with a notification in the Notification Tray stating that “There were no problems found.”
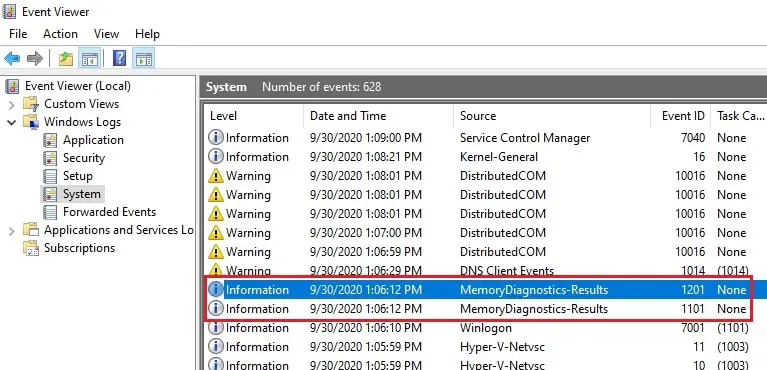
- If you still want to view the results manually, head to the Event Viewer by searching for it in the Start Menu.

- From the left pane, navigate to:
Windows logs -> System - In the middle pane, click on the MemoryDisgnostics-Results under the Source tab.

- In the information section down below, you can find more detailed results of the Memory Diagnostic scan.

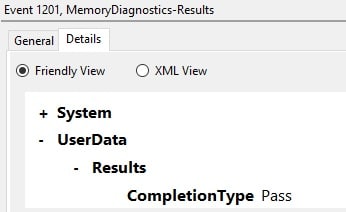
- You can also switch from the General tab to the Details tab to view the insights of the test.

Since our RAM had no bad sectors and was functioning normally, the results did not indicate anything concerning, and passed the test.
Closing words
Sometimes simply cleaning the RAM modules is not sufficient to troubleshoot your PC. Often, misconfigured or overclocked memory modules affect your hardware direly. To keep them in check, it is important to get a complete picture of the current condition of the modules.
Although there are a lot of free and paid applications on the internet to provide real-time statistics of the system hardware, there is nothing better than the built-in utility provided by Microsoft for those who do not trust the third-party utilities.


