Windows 11 can treat a network as a metered connection. Essentially, this means the network a Windows PC is connected to is considered a pay-as-you-go network for which you need to pay depending on how much you use, limiting the background internet usage.
When you set up a metered connection on a Windows 11 computer, the operating system will restrict all unnecessary uploads and downloads, and only use the internet where it is needed, such as browsing the internet, downloading or uploading something which you instructed, etc.
However, a metered connection restricts certain tasks to the following:
- Only priority Windows updates will be downloaded.
- Windows Store applications will be paused from updating/downloading.
- OneDrive synchronization will pause.
- Certain applications may not function properly until the metered connection is disabled.
Now that you understand what a metered connection is used for and what its purpose is, let us show you how to set it up for the wired and wireless networks on a Windows 11 computer.
How to Enable Metered Connection Over Wi-Fi
You can configure a network profile as a metered connection as long as your device is connected to it, or has connected to it in the past.
Connected Wi-Fi Network
Here is how to configure the wi-fi network your device is currently connected to as a metered connection:
-
Navigate to the following:
Settings app >> Network & internet >> Wi-Fi
-
Here, click on the network properties you are connected to.
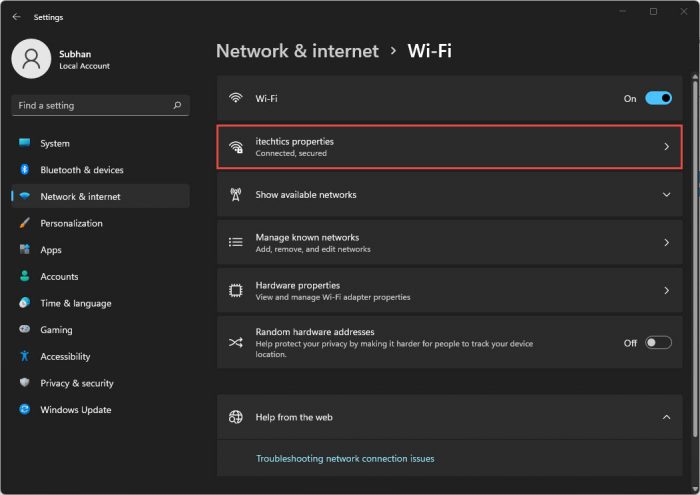
Open network properties -
Here, toggle the slider in front of “Metered Connection” into the On position to enable set this network as a metered connection.
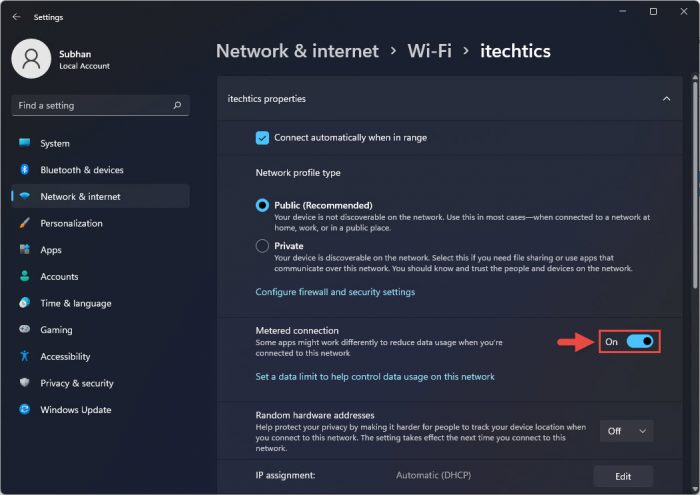
Toggle on metered connection
The connected network will now be treated as a metered connection.
Known Network
To configure a previously-connected (known) network as a metered connection, follow these steps:
-
Navigate to the following:
Settings app >> Network and internet >> Wi-Fi >> Manage known networks
-
Here, click on the network you want to set up as a metered connection.
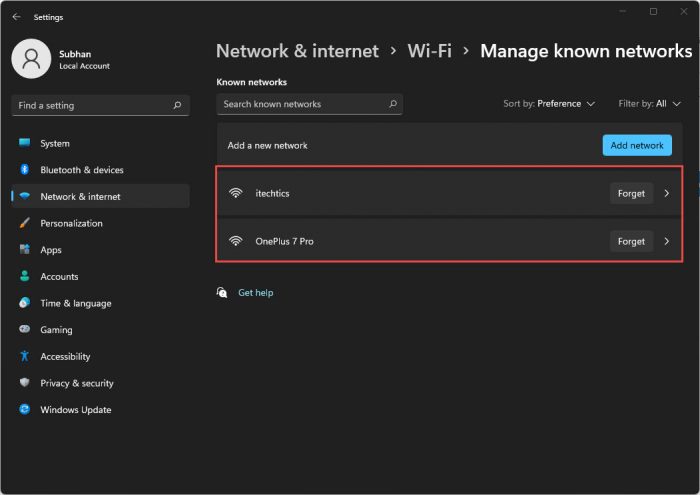
Select wi-fi network -
Now toggle the slider in front of “Metered Connection” into the On position to enable set this network as a metered connection.
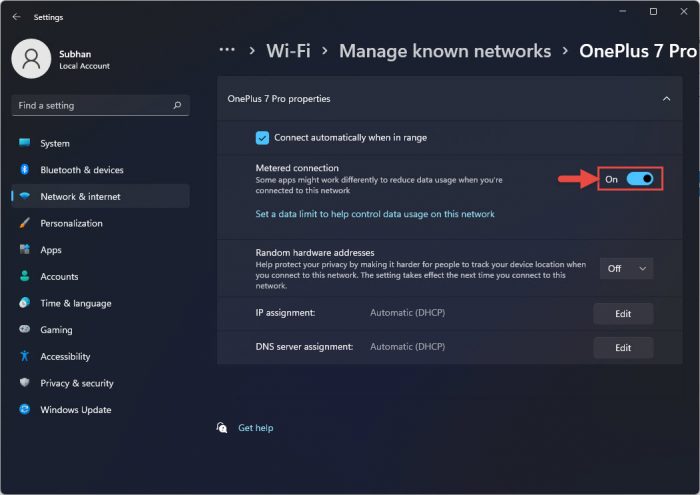
Toggle on metered connection
How to Enable Metered Connection Over Ethernet
Unlike wi-fi, you can only configure a metered connection on the ethernet network you are connected to. The steps given below show you how to enable it:
-
Navigate to the following:
Settings app >> Network and internet >> Ethernet
-
Here, toggle the slider in front of “Metered Connection” into the On position to enable set this network as a metered connection.
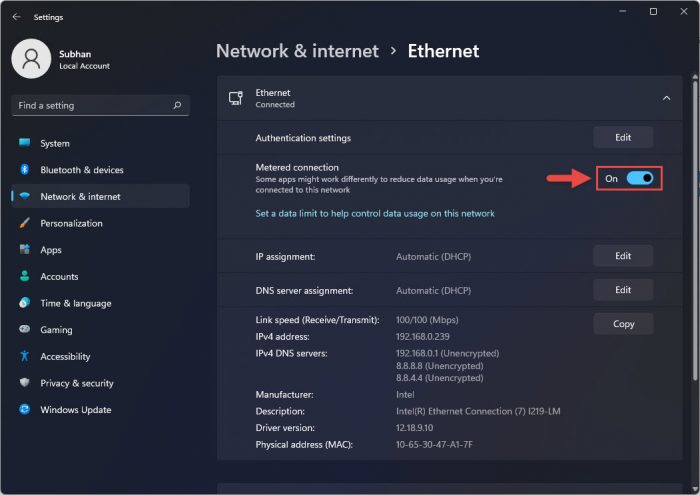
Toggle on metered connection
The connected ethernet network will now be treated as a metered connection. However, when another cable is connected from a different network, it will not be automatically set up as a metered connection.
If you wish to disable this feature in the future, all you need to do is toggle the slider again into the Off position.
Set Up Internet Data Limit
If you are configuring a network as a metered connection, the data plan on that network is likely costing you. If that is the case, then configuring a data limit on the network would be the wise thing to do.
Note: A metered connection doesn’t need to be enabled to set up a limit. Also, you can only set up a data limit on the network you are currently connected to.
You can configure a monthly or a one-time data limit on a network, simply leave it to unlimited data usage and only monitor its usage. Furthermore, you can also choose when the data cycle resets.
Let us show you how to set up and monitor your Wi-Fi network’s data limit:
-
Navigate to the following:
Settings app >> Network & internet >> Advanced network settings >> Data usage
-
Here, select the network interface you want to set a limit for (Wi-fi or ethernet) from the top-right of the Settings app.
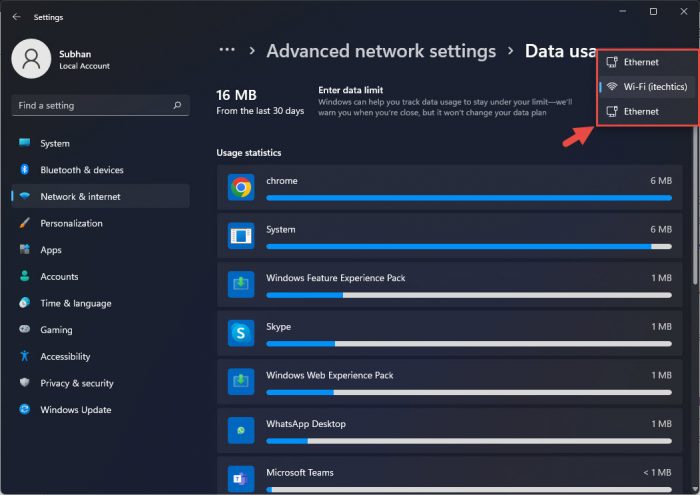
Select network interface -
When selected, click Enter limit.
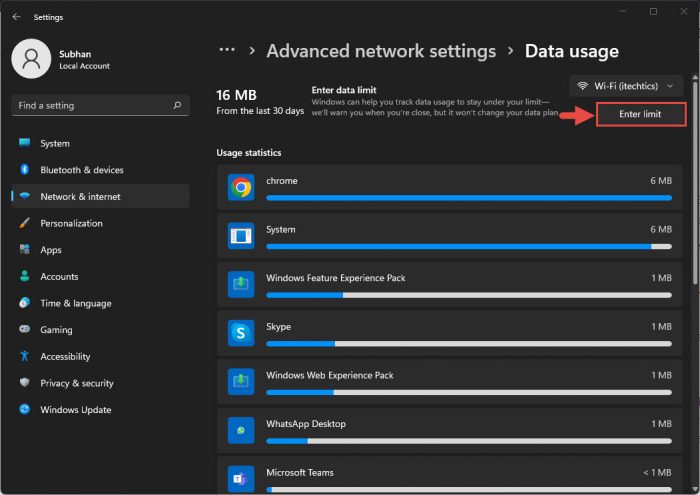
Enter data usage limit -
From the popup window, select the type of limit you want to configure, then enter “Monthly reset date” in case of the “Monthly” limit type, or “Days until data expires” in case of the “One time” limit type.
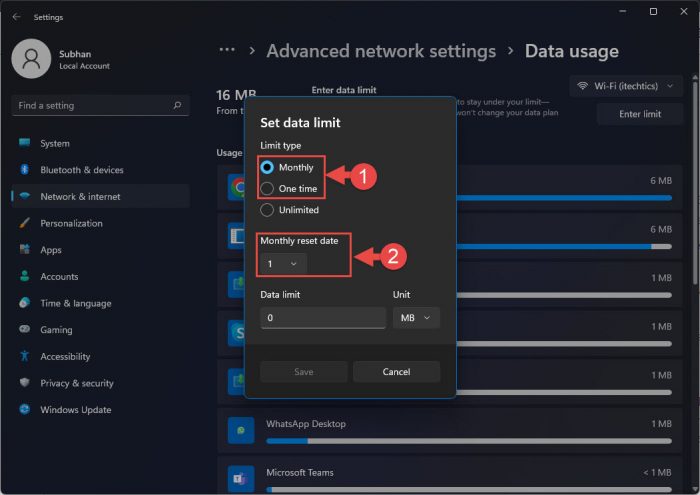
Choose limit type and reset duration -
Now enter the data limit and select the appropriate unit. Once done, click Save.
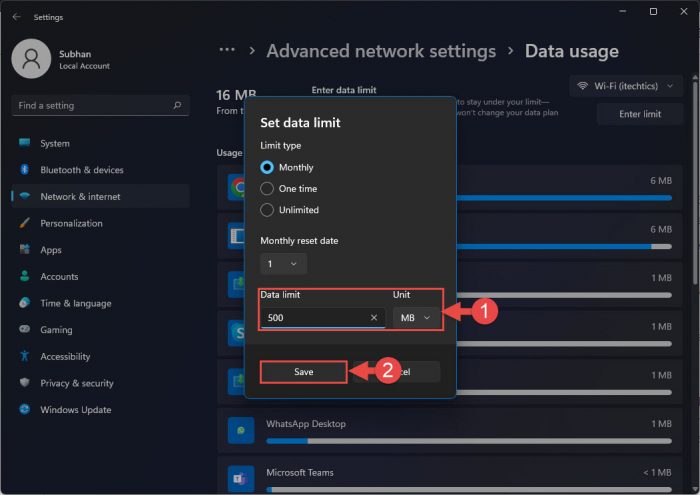
Enter data limit and save
That’s it! You have now configured a data limit on the selected network. You can see the limit status on the Data usage Settings page, as in the image below.
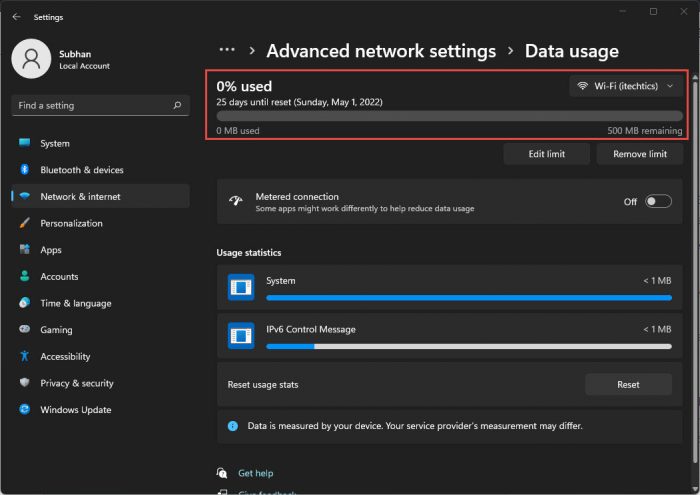
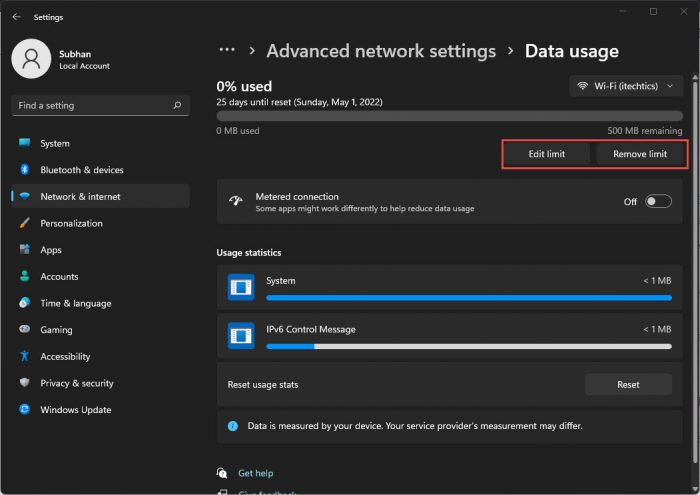
When the limit is achieved, the computer will no longer use this network. This can affect your work since there won’t be an internet connection anymore. In that case, you can either edit the configured limit by clicking Edit limit, or remove the limit entirely by clicking Remove limit.
Closing Words
Setting up a metered connection can be very useful. In fact, it is one of the methods used today to conserve your data plan, or speed up your internet browsing by restricting background internet usage.
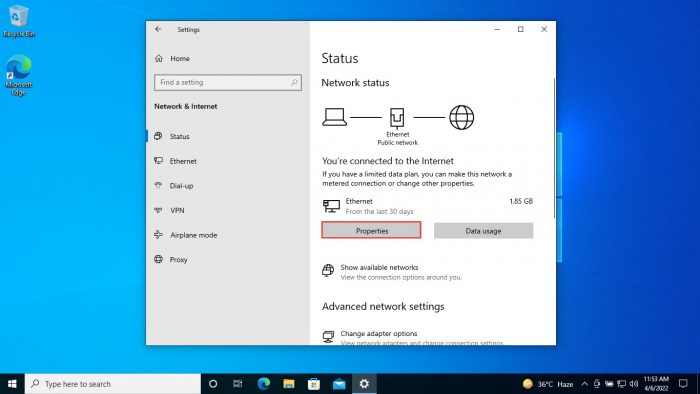
If you are using Windows 10, then the methods to enable/disable metered connection are almost the same. The only difference is that you need to click Properties under the network in the Network & Internet Settings page to toggle metered connection.
