If you have a program, script, executable (.exe) file, or a UWP application, you can run it as a different user directly from the current user account you are logged in from. This way, you do not have to sign out and then log back into another account to be able to run the desired file with elevated privileges, or use the settings specific to the other user account.
This article lists both native and non-native methods you can adapt to run an app or a file as another user on a Windows computer. These methods can also be used to run an app or program as an administrator, or for when you want to use the settings/configurations for an app set for another account.
You can run scripts and programs as a user account that has elevated privileges from an underprivileged user account. Of course, it would require the necessary user account credentials.
Before we discuss the many methods to run an app, program, or file as another user, there are a few things you must consider.
Prerequisites to Run App as Different User in Windows
Whether you want to run a file as a local user or a domain user; all can be done using this guide.
However, before you do, you must enable the Secondary Logon service, also referred to as “RunAs.” This Windows service is responsible for allowing different apps and files to be run as different user.
If this service is not running or is problematic, then you won’t be able to run anything as a different user.
To check the status of the Secondary Logon service, run the following cmdlet in PowerShell:
Get-Service seclogon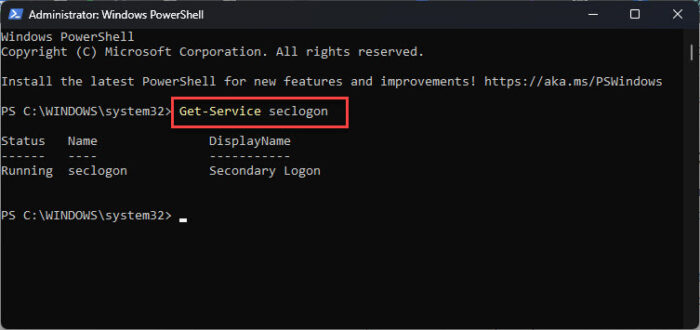
If you find that the service is not running, then run the following command to enable it:
net start seclogonThe Secondary Logon service is set to start manually when called upon. To allow it to run automatically, use these steps:
-
Open the Services Console by typing in “services.msc” in the Run Command box.

Open the Services Console -
Right-click the service “Secondary Logon” and click Properties.

Open Secondary Logon properties -
Change the Startup Type to “Automatic (Delayed Start)” then click Apply and Ok.
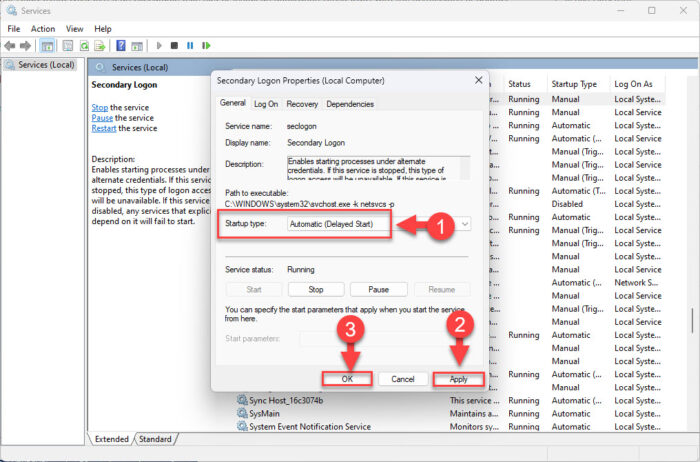
Automatically start Secondary Logon
Now, the Secondary Logon service will start automatically in the background every time you are logged into your account.
Apart from the Secondary Logon service, you must also ensure that the account you want to use to run a file as a different user must have a password. You cannot run an app/program as a different user that has no password configured.
After having ensured that both of these conditions are met, it is now time to move on to running a file/app as a different user.
How to Run App/Program as Different User In Windows
This method can be applied to any file, may it be a .exe, .bat, .ps1, or any other, to run it as a different user. However, it can not be implemented on Universal Windows Platform (UWP) applications. For that, you must use the PowerShell method shared below.
The easiest method to run a file as a different user is through the context menu by holding the Shift key while right-clicking the file.
-
Hold down the Shift key from the keyboard and then right-click the file.
-
Click “Run as different user” from the context menu.
Note: If the “Run as different user” option is missing from the context menu, it might be disabled. To enable it, refer to the last section of this post.
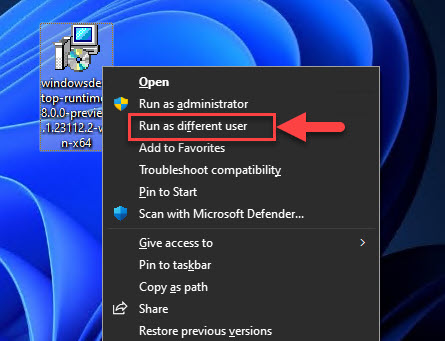
Run as different user from the context menu -
Enter the credentials for the user account to RunAs.
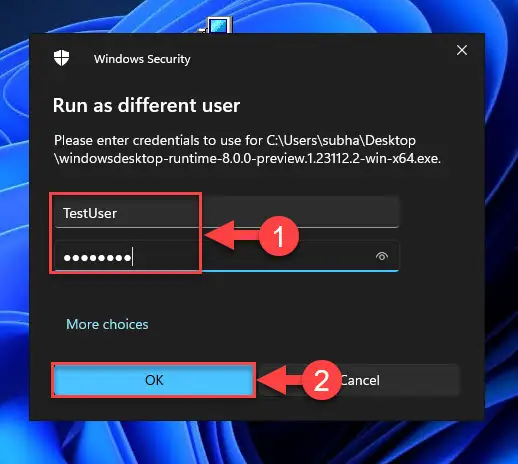
Enter user credentials To run the file from an Active Directory user account, use the syntax “DomainName\Username” in the username field.
To run the file as a local user from a machine connected to a domain, use the syntax “.\Username”.
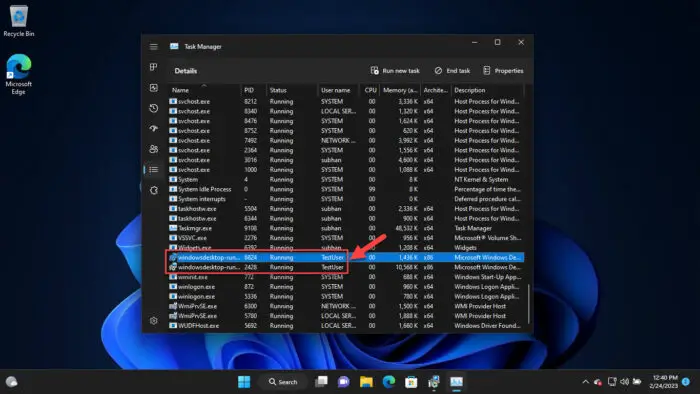
The file will now run from the other user account. You can confirm this through the Details tab in the Task Manager.
Run as Different User from Command Prompt/Run Command
You can also use the command line to run a file as a different user. This method can be used in both the Command Prompt and the Run Command box.
To learn how to run a file as a different user using PowerShell, refer to the next section below.
You can run a file as a different user using the “RunAs” command line tool. Here is how:
-
Use the following command in an elevated Command Prompt or the Run Command box.
Replace [PathToFile] with the complete path to the file and [Username] with the account name you want to run it as.
To run the file from an Active Directory user account, use the syntax “DomainName\Username” in place of [UserName].
Runas /user:"[Username]" "[PathToFile]"
Run as different user from Command Prompt -
Now enter the password for the user account and hit Enter.
Note: You will see no text in the command line while entering the password.
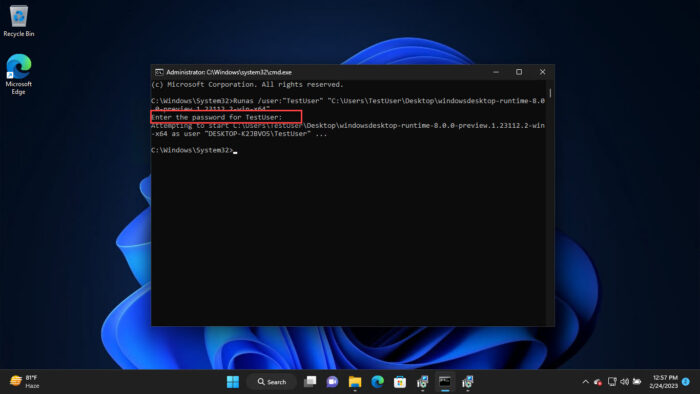
Enter the password for the user account to run as
You will now see that the file will run from the other user account.
Run as Different User from PowerShell
To run a file as a different user using PowerShell, the syntax of the command is a little different. However, it can be done using a single cmdlet.
You can also use this method to run the UWP application as another user. But first, let us see how to run any file using PowerShell:
-
Use the following command in an elevated PowerShell instance:
Replace [PathToFile] with the complete path to the file to run.
Start-Process "[PathToFile]" -Credential $(Get-Credential)
Run as different user from PowerShell -
Now enter the credentials for the user account.
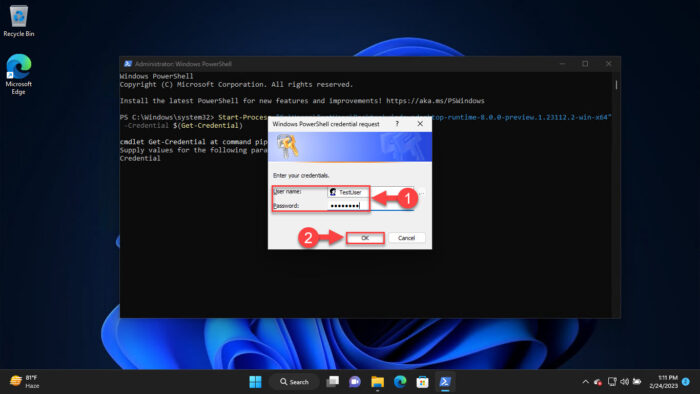
Enter user credentials
The file will now be executed from the other user account.
To run a UWP application as a different user, you must first have the name of the app. Use these steps to run a Windows UWP app as a different user:
-
Use this cmdlet in PowerShell to get the names of all the installed apps:
Get-AppxPackage|select Name
Get all application names using PowerShell -
Once you have the name of the app you want to run as a different user, use it in the following command:
Runas /user:"[Username]" "explorer.exe [AppName]"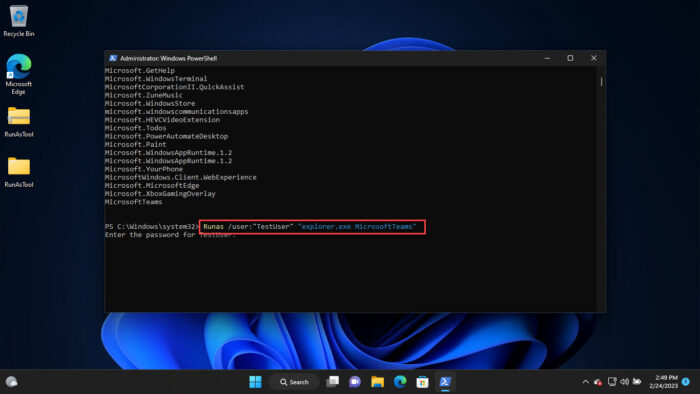
Run UWP app as different user from PowerShell -
Now enter the password for the other user account.
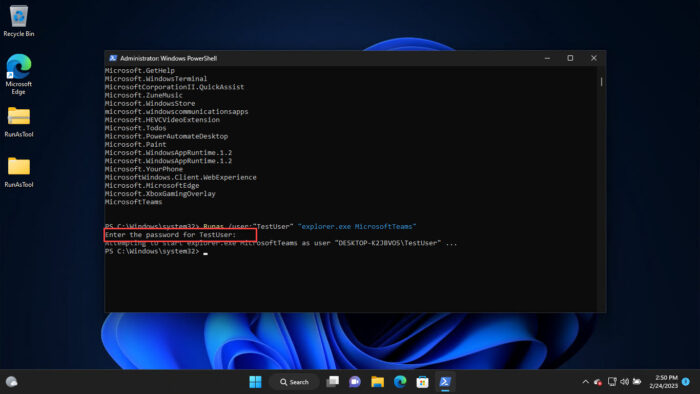
Enter password for user account
The UWP app will now run as a different specified user.
Run as Different User using Shortcut
If you occasionally have to run a specific file from a specific user account, it would be convenient to create a custom shortcut. Simply running the shortcut will run the file from a specified user account every time.
Use these steps to create a shortcut and run a file from a different user:
-
Right-click on an empty space on the desktop, expand New and click Shortcut.

Create a new shortcut The Create Shortcut wizard will now open.
-
Enter the complete location of the file prefixed with “runas /user:[Username]”.
The syntax of the location will be something like this:
Runas /User:[Username] "[PathToFile]"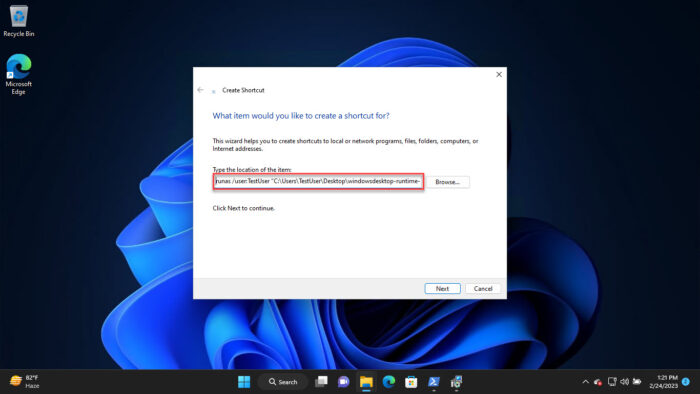
Enter file path with RunAs -
Click Next.
-
Set a name for the shortcut and click Finish.
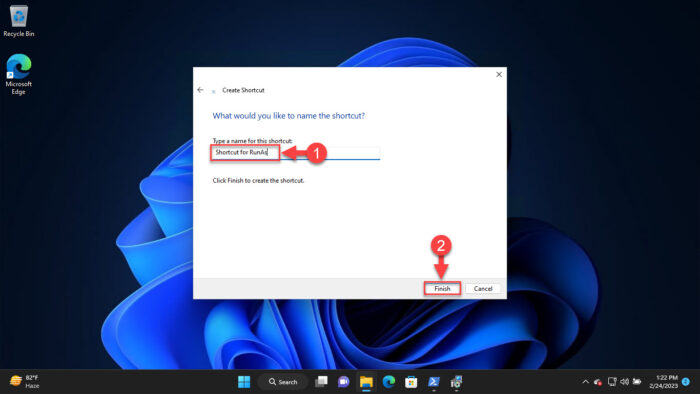
Name the shortcut
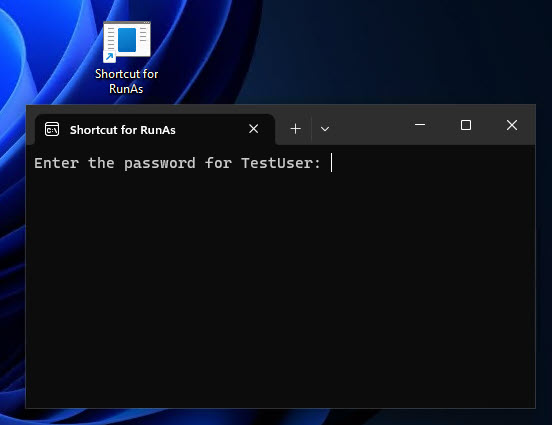
The shortcut will now be created. All you must do now is double-click the shortcut to run the specified file with the specified user. However, you will still need to provide the password for the configured user account every time you run the shortcut.
Run as Different User using RunAsTool
The RunAsTool is a portable app in which you can save user credentials and then the app can automatically run programs and files listed in the app as the specific user all the time, just like the shortcut method we discussed above.
This tool is especially useful for system administrators who want to give administrative rights to standard users only for specific programs and applications.
Use these steps to use the RunAsTool to run apps, programs, and files as different users:
-
Extract its contents.
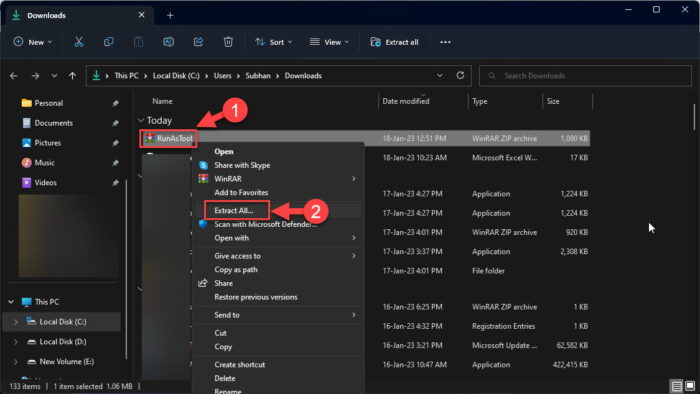
Extract RunAsTool -
Run “RunAsTool.exe” or “RunAsToolx64.exe” (depending on your system architecture).
-
Enter the administrator account’s credentials and click Apply.

Enter administrative credentials for RunAsTool -
Now drag and drop the applications you want to run as administrator into the tool.
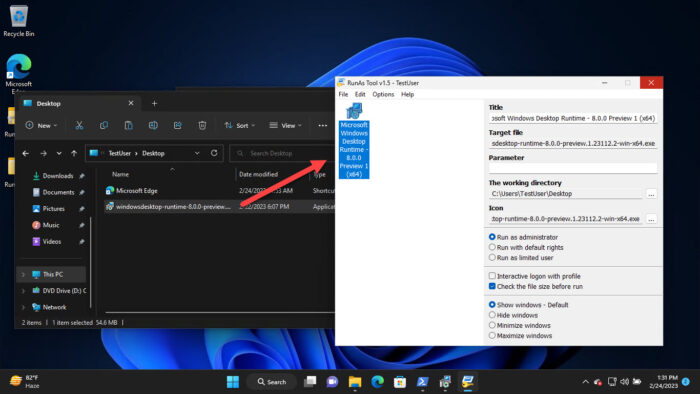
Drag and drop items into RunAsTool
Now you can double-click any application within RunAsTool to run directly from the specified user account. Note that the “administrative” account for the RunAsTool is now the account for which you initially entered the credentials in Step 4 above.
The methods to run an app/program as a different user we have discussed so far have no effect on the items visible inside the Start menu. If you want to have the “Run as different user” option in the context menu of the Start menu, then you must follow these steps:
-
Open the Group Policy editor by typing in “gpedit.msc” in the Run Command box.
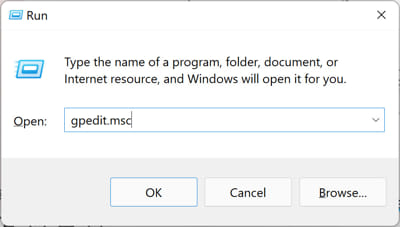
Open the Group Policy Editor -
Navigate to the following from the left pane:
Local Computer Policy >> User Configuration >> Administrative Templates >> Start Menu and Taskbar
-
Here, double-click the policy “Show “Run as different user” command on Start.”
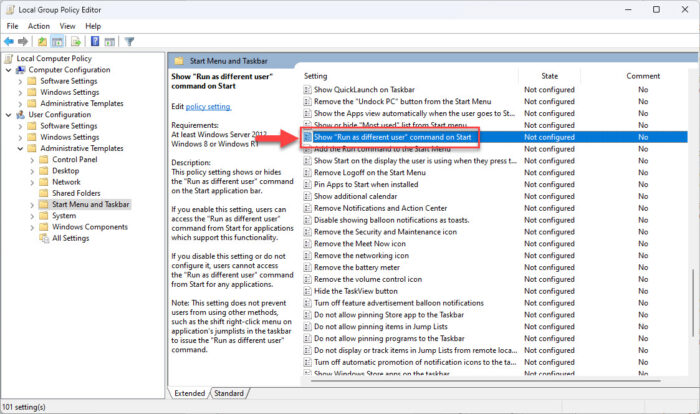
Open policy settings for “Run as different user” in Start menu -
From the policy settings window, select “Enabled,” and then click Apply and Ok.

Enable the “Run as different user” option in Start menu -
Now run the following cmdlet in an elevated Command Prompt to implement the policy changes.
GPUpdate /Force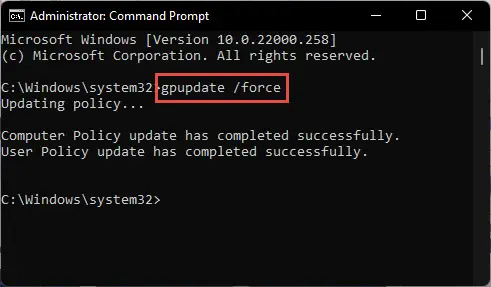
Force update group policies
You can now check that the “Run as different user” option is now available in the Start menu.
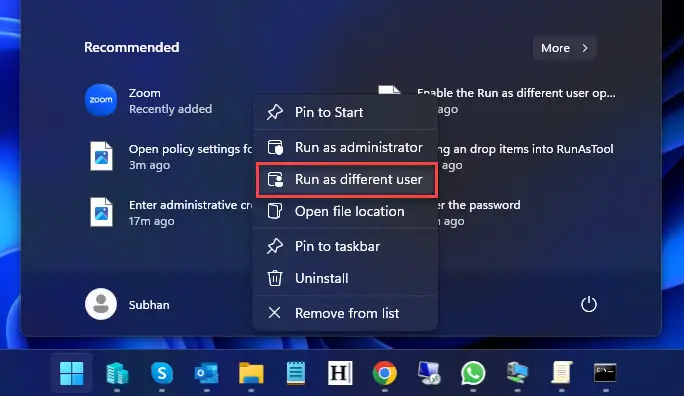
You may now select this option and provide the credentials for the user account you want to run the selected app as.
That said, note that the UWP apps still won’t have the option to “Run as different user” in their context menu, even inside the Start menu. For that, you must use the PowerShell method shared above.
Till now we have discussed different methods to run an app, program, or file as a different user. Some of these methods involved selecting the “Run as different user” from the context menu. However, it may be possible that the option has been disabled deliberately.
You can thus enable the “Run as different user” using the following steps.
Note: The process involves manual manipulation of the Windows Registry. Misconfiguration of critical values in the system’s registry could be fatal for your operating system. Therefore, we insist that you create a system restore point before proceeding forward with the process.
You can also use our top selection of disk imaging and backup software so you never lose your data or operating system again.
-
Open the Windows Registry editor by typing in “regedit” in the Run Command box.

Open the Registry Editor -
Paste the following path in the navigation bar for quick navigation:
Computer\HKEY_LOCAL_MACHINE\SOFTWARE\Microsoft\Windows\CurrentVersion\Policies\Explorer

Quick navigation to Explorer registry key -
Double-click the DWORD “HideRunAsVerb.”
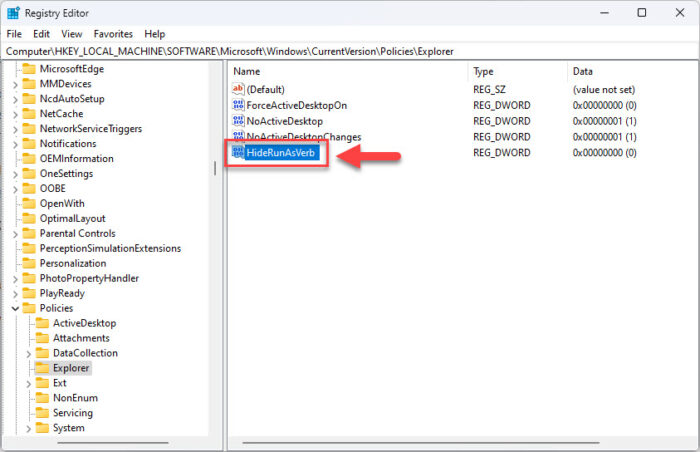
Open HideRunAsVerb -
Change the Value Data for “HideRunAsVerb” to “0.”
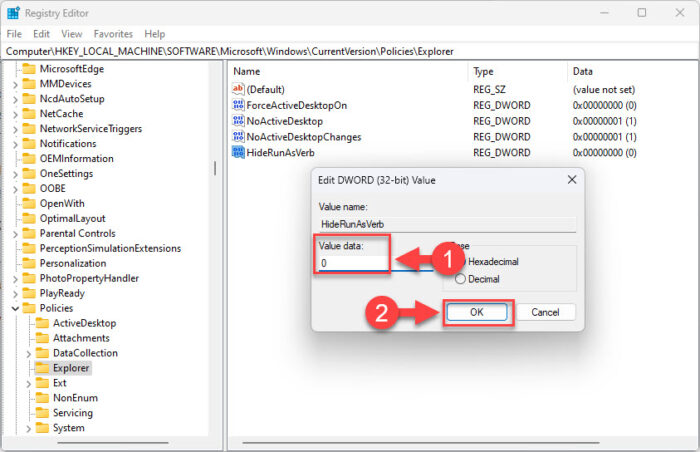
Change Value Data for HideRunAsVerb -
Now enter the following path for quick navigation:
Computer\HKEY_LOCAL_MACHINE\SOFTWARE\Microsoft\Windows\CurrentVersion\Policies\CredUI
-
Now change the Value Data for “EnableSecureCredentialPrompting” to “0.”

Change Value Data for EnableSecureCredentialPrompting -
Now restart the computer for the changes to take effect.
Once it reboots, you should have the “Run as different user” option in the context menu for both File Explorer as well as the Start menu (if the option has been enabled as given above).
Closing Thoughts
Having the ability to run a program, script, file, or UWP app as a different user can be time-saving and allows you to run something with either elevated or restricted privileges.
In this article, you will find all the possible methods to run an app as a different user while remaining inside your current user account. This approach can be taken when you want to run something with elevated privileges, or when you want to run something with even lower rights, such as an app that might be malicious.
Additionally, you can also run something as a different user when you want to use the settings specific to the other user account. For example, you can run Microsoft Teams as another user so that you are automatically logged into another account (which was previously logged into the other user account).

