Internet Information Services (IIS) is a web server that satisfies requested HTML files or pages. It is offered as an optional feature in Windows that allows you to host and manage websites locally on your computer.
If you are a developer and wish to test out a website before publishing it, or want to run an internal Content Management System (CMS) for an organization, then you need to enable IIS on the server to host it.
This post shows you how to enable or disable the feature if needed, how to check its version, and for whom it is useful.
What is Internet Information Services (IIS)
As we mentioned, IIS is used to host HTML websites or static pages that can be accessed from the internet or the intranet. An IIS web server accepts requests from remote computers and then returns the appropriate response using ASP.NET.
IIS works through different protocols and languages. HTML is used to create the elements, which include text, placement holders, actionable buttons, hyperlinks, etc.
The ASP.NET Core framework is the latest generation of Active Server Pages (ASP), which is a server-side script engine that produces interactive webpages. When a request comes to the IIS server from the internet, it forwards it to the ASP.NET Core application, which in turn processes the request and sends its response back to the IIS server and the client who initially originated the request.
IIS has been released with different versions for the different operating systems. So, to check which version is on your PC, you must first install it. However, the table below lists which IIS version is shipped with which operating system.
| IIS Version | Operating System |
| IIS 1.0 | Windows NT 3.51 |
| IIS 2.0 | Windows NT 4.0 |
| IIS 3.0 | Windows NT 4.0 SP 2 |
| IIS 4.0 | Windows NT 4.0 (option pack) |
| IIS 5.0 | Windows 2000 |
| IIS 5.1 | Windows XP Professional |
| IIS 6.0 | Windows XP Professional Windows Server 2003 |
| IIS 7.0 | Windows Vista Windows Server 2008 |
| IIS 7.5 | Windows 7 Windows Server 2008 R2 |
| IIS 8.0 | Windows 8 Windows Server 2012 |
| IIS 8.5 | Windows 8.1 Windows Server 2012 R2 |
| IIS 10.0 Version 1607 | Windows 10 Version 1607 Windows Server 2016 |
| IIS 10.0 Version 1709 | Windows 10 Version 1709 Windows Server Version 1709 |
| IIS 10.0 Version 1809 | Windows 10 1809 Windows Server 2019 |
How to Enable IIS on Windows
Perform the following steps to enable IIS on a Windows PC:
-
Open Windows Features by typing in optionalfeatures in the Run Command box.

Open Windows optional features -
From the Windows Features window, scroll down and expand Internet Information Services. Then check the boxes below it to enable the selective IIS features.
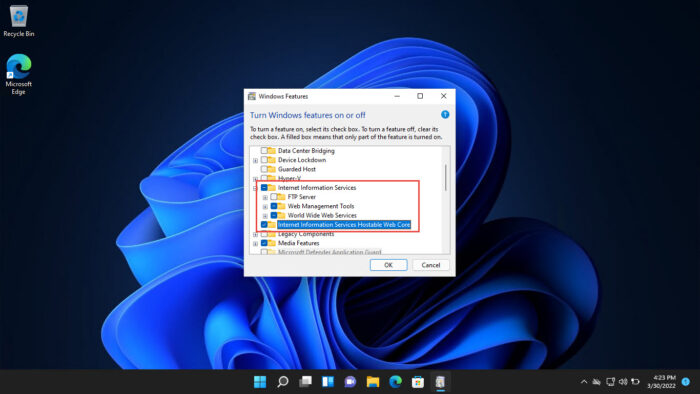
Enable IIS -
Once done, click Ok. The wizard will now attempt to apply the changes.
-
Once completed, click Close.
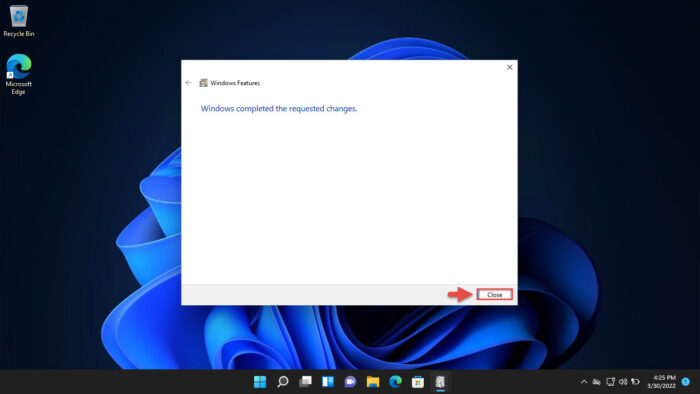
Close window
IIS will now be installed on your PC.
If you no longer require it in the future, disabling it is just as easy. Simply open the Windows Features again and uncheck the IIS options.
How to Check if IIS is Installed
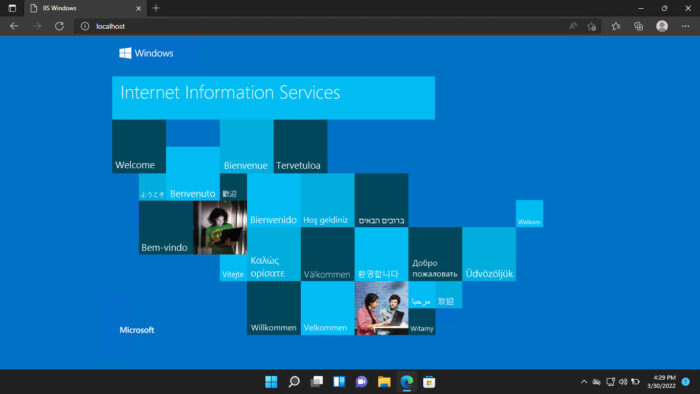
To confirm that IIS is installed on your computer, open any web browser, paste the following in the address bar, and then hit Enter.
http://localhost/
You should now see a screen somewhat like the one below.
Note: The display can be different depending upon which version of IIS is running on your PC.
How to Check IIS Version
From Internet Information Services (IIS) Manager
To check which IIS version has been installed on your PC, perform the following:
-
Search for “IIS Manager” from the Search box in the taskbar and open it.
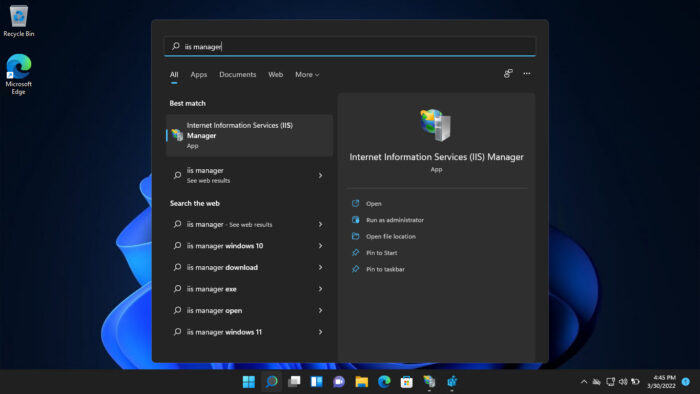
Open IIS Manager -
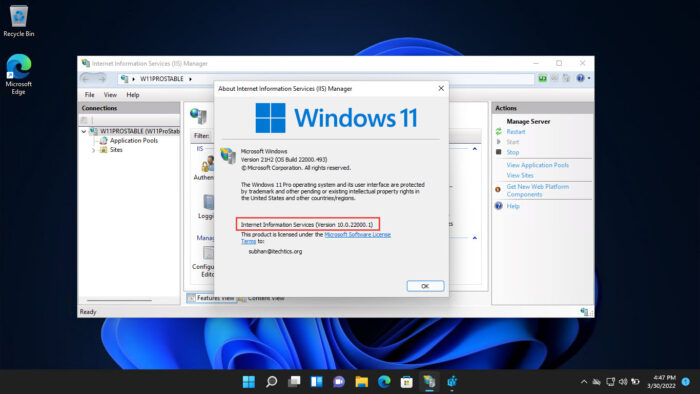
From the manager, click Help from the top ribbon menu, then click About Internet Information Services.

about IIS -
You will now find the complete IIS version in the pop-up window.
IIS version From Registry Editor
You can also determine the IIS version from Windows Registry. Here is how:
Note: Misconfiguration of critical values in the system’s registry could be fatal for your operating system. Therefore, we insist that you create a system restore point before proceeding forward with the process.
-
Open the Registry Editor by typing in regedit in the Run Command box.

Regedit -
Now paste the following into the address bar at the top for quick navigation:
Computer\HKEY_LOCAL_MACHINE\SOFTWARE\Microsoft\InetStp

Quick navigation to InetStp -
You can now see the IIS version in front of the VersionString value in the right pane of the Editor.
-
From PowerShell
To obtain the IIS version using Windows PowerShell, run the following cmdlet in an elevated PowerShell instance:
Get-ItemProperty -Path registry::HKEY_LOCAL_MACHINE\SOFTWARE\Microsoft\InetStp\ | Select-Object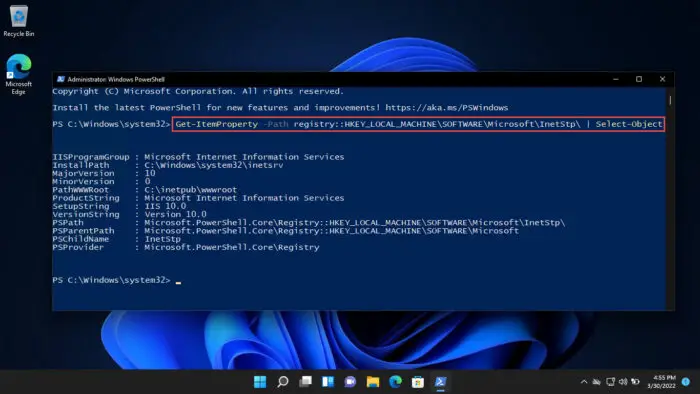
You should then be able to see the IIS version in the data listed below the command.
Closing Words
Not everyone needs to enable IIS on their computers. We recommend you disable it if you do not need it.
IIS is only required if you plan to host a website or static HTML page on your computer. That said, enabling or disabling it is a piece of cake thanks to the Windows interface.


